I knew you could 'handle' it. 
")


^^ Freaking awesome. I'll be behind you, soon, with some updates to my projects.

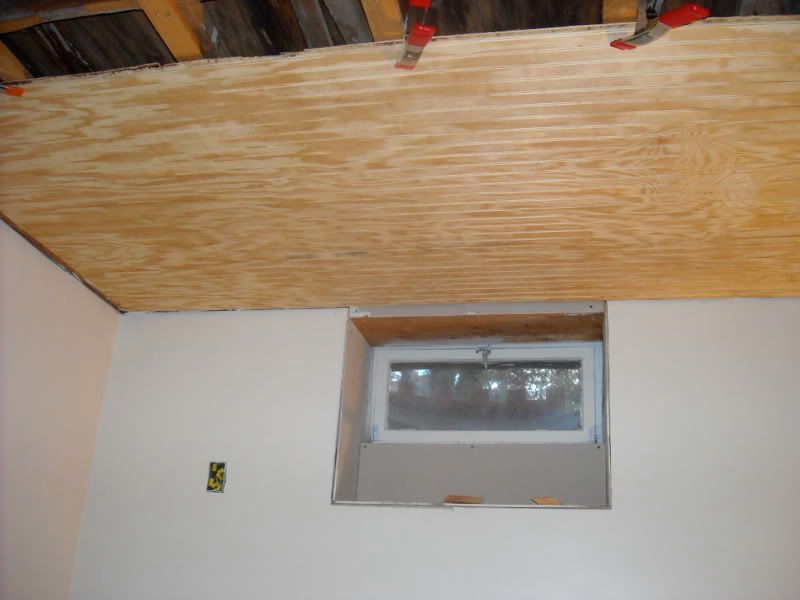
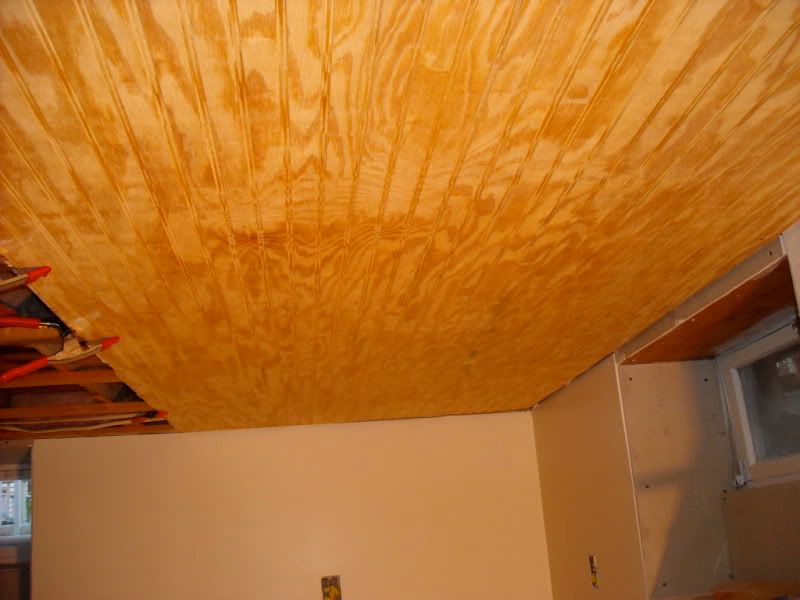
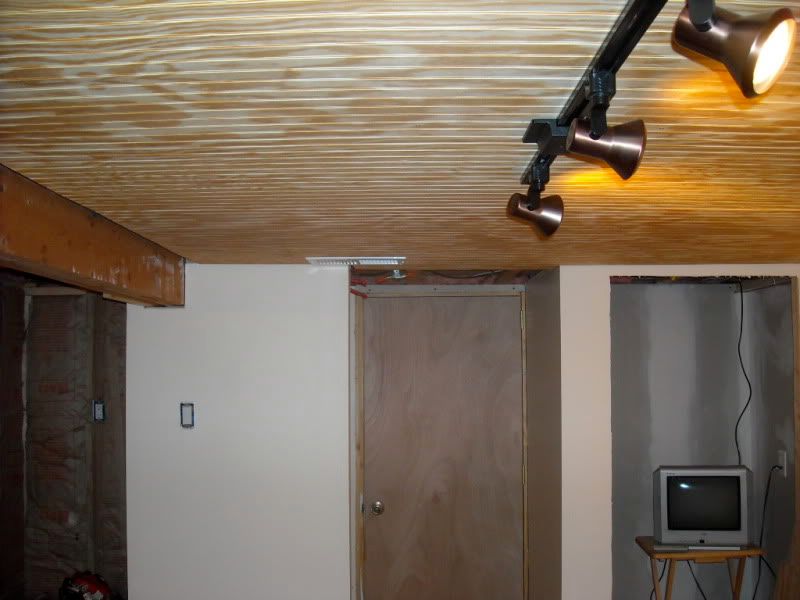
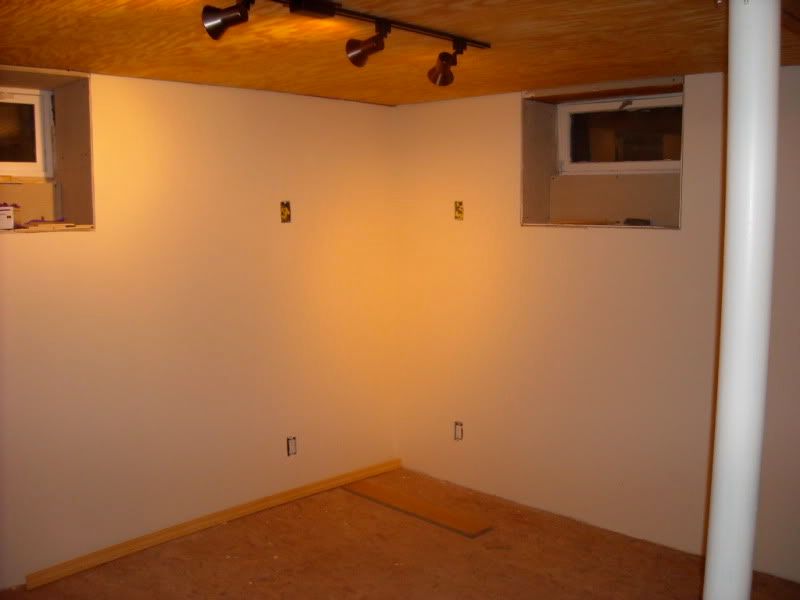
The ceiling panel was extremely difficult. We used clamps but they only helped somewhat. Near where the edges meet drywall I used flat head nails that will get covered, but a friend of mine suggest finishing all the rest with small phillips head screws in case we need to ever take a panel down. He also said to draw out where all the wiring and piping is before finishing it. Don't try this at home, kids - this is backbreakingLooks great. Everything is coming together.

 I think the former owner would have a heart attack if he saw what we we're doing to his bleak old dungeon/workshop
 ")

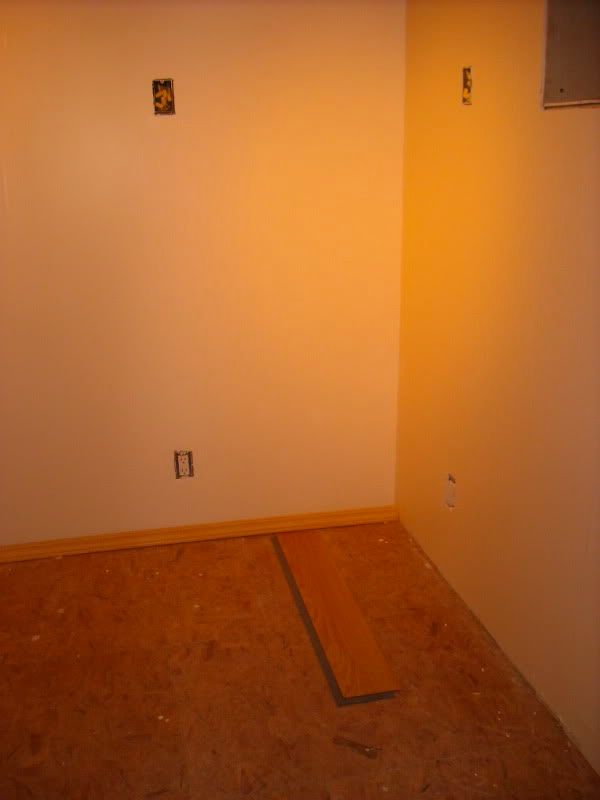
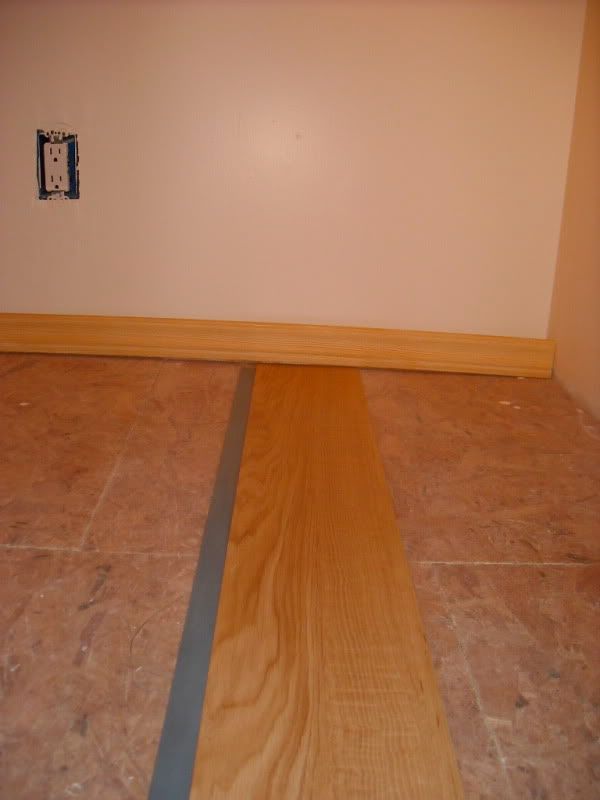
^ This floor tile is amazing. We were going to carpet down here, but reconsidered the mold issue, and the cutting, and the whole carpeting process and then just junked the idea. When we found this hard laminate we never looked back. It's going to go in so much faster and easier. Ultimately a much better idea
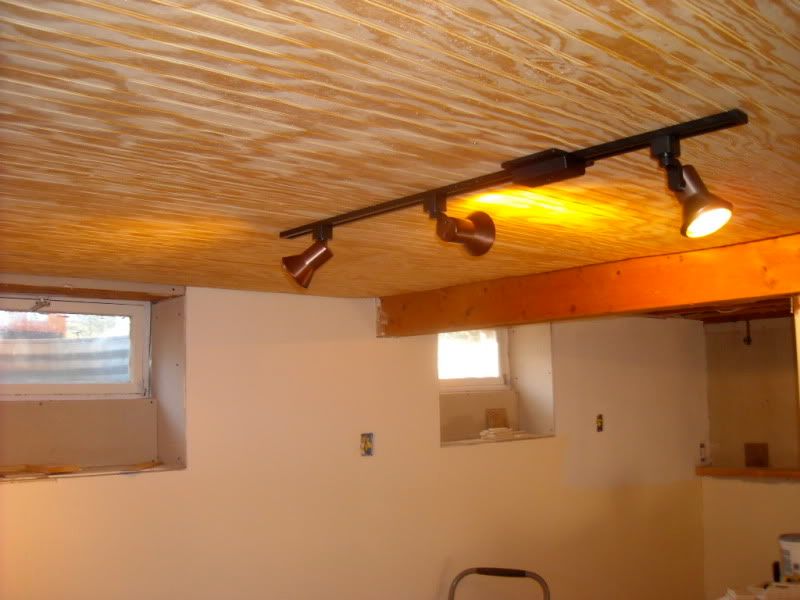
At work I'm under a drop ceiling all day -- to me they are just the worst. This is far less work for only $20/sheet - and the ceiling will probably total 7 sheets. We won't be covering any piping with this ceiling at all either. My wife's step-dad has a gorgeous sun room off their kitchen with lots of unfinished wainscoting and when I saw it, I knew I wanted a similar ceiling for our basement.Yes, the laminate is great. I used the tile look for the laundry room I made.
I really like your wood ceiling. I bought the house with drop ceiling and while it's good for getting to pipes and such it doesn't look as classy.
When we bought it, the inspection revealed only a very minor mold/moisture issue. Remediated for mold myself which was a hellish experienceLooking good. Did you have much moisture/water in your basement? I have no water at all but it gets damp down there at times when its humid. I looked into a basement system but they wanted like 10 grand for it.
Did you do anything special to treat/prep it? Or just seal it?
 . To prevent moisture in our basement, we really attacked these 50 year old cinder block walls back in mid '08, exposing any inside cracks with cement and then using a moisture block paint. Then when all the new studs went up, we stapled on a nice vapor barrier that went right down to the floor. The dri-core (subfloor) has a plastic undercarriage with feet so its off the basement floor which allows for ventillation to channel beneath it. Until I can dig up the front wall outside, I still "expect" to see some water come in. In the spring I will attack any cracks from the outside with the proper cement. We just had a HUGE snow melt along that wall and I'm happy to report no water got through so I'm pretty happy. But shit happens -- water is a funny, relentless thing. I have a new de-humidifier that will also run down there in the summer once the whole room is sealed, as well.
When we bought it, the inspection revealed only a very minor mold/moisture issue. Remediated for mold myself which was a hellish experienceLooking good. Did you have much moisture/water in your basement? I have no water at all but it gets damp down there at times when its humid. I looked into a basement system but they wanted like 10 grand for it.
Did you do anything special to treat/prep it? Or just seal it?
We use essential cookies to make this site work, and optional cookies to enhance your experience.