-
Welcome! The TrekBBS is the number one place to chat about Star Trek with like-minded fans.
If you are not already a member then please register an account and join in the discussion!
You are using an out of date browser. It may not display this or other websites correctly.
You should upgrade or use an alternative browser.
You should upgrade or use an alternative browser.
Are You Handy? 2
- Thread starter SPOCKED
- Start date
Sure. Here's a link to the dri-core to start, if you are interested in a subfloor. I'll try to compile the rest later after I'm home from work. The dri-core took me a few scary starts until I hit the learning curve. Then I flew through it
Yea definitely!! Thanks man!
After chiseling and caulking any cracks in the walls, we applied several coats of drylok (which is pricey but recommended). For larger repairs we troweled on some quickcrete. Our largest hurdle in all of this was a very irregular knee wall (as seen, for instance, here ) which had many cracks. The basement floor, which has a sleight downward slope, saw no repair, paint, or sealant at all.Sure. Here's a link to the dri-core to start, if you are interested in a subfloor. I'll try to compile the rest later after I'm home from work. The dri-core took me a few scary starts until I hit the learning curve. Then I flew through it
Yea definitely!! Thanks man!
As I said before call a pro .
As I said before call a pro .
...and pay $$$$$ for his manhours
Can't tell you how many times a little research on what seemed like an impossible task told us we could do it ourselves. We never did any of this before in our lives. And the money saved from hiring someone translates to equity, and equity drives us
")
OK, I need some input/advice here. I have not used my fireplace for years because they're a waste of energy (only 7% of heat is actually extracted) and they're a pain. Mine was never built properly with a heatilator, aka a fan to push the heat out. Anyway, the firebricks in the bed all came loose and the more I whittled away at it, the more I'm thinking of trying to remove the housing and install a pellet insert. I already have an electrician slated to rewire my house and install 200A service. Anyway, any suggestions how I should go about this?
The dimensions of the opening are 35-3/8" wide by 29-7/8" high. From the face to the back of the metal housing is 21-1/4", but 15" up it starts to angle toward the face, to form the flue.

This shows the face of the fireplace and how it mates with the brick facade.


These last two pictures show how the bed came apart as well as the large openings in the side, where the air should be pushed through to further heat the room.

Here's what it looks like with the bed reassembled. The bricks are place there -- I did not lay a new bed of cement.
The dimensions of the opening are 35-3/8" wide by 29-7/8" high. From the face to the back of the metal housing is 21-1/4", but 15" up it starts to angle toward the face, to form the flue.
This shows the face of the fireplace and how it mates with the brick facade.
These last two pictures show how the bed came apart as well as the large openings in the side, where the air should be pushed through to further heat the room.
Here's what it looks like with the bed reassembled. The bricks are place there -- I did not lay a new bed of cement.
If you use a pellet insert you'll have to have use (according to most building codes) a flexible 3" pipe running to the top of the chimney. This is good in your case as you wont have to worry about fixing any of the firebox.
The only drawback I've heard about inserts is you have to move them out of the fireplace a bit to work on the back. I've been running a freestanding one for 9 years and love it.
Here's a pellet group if you wish to ask them some questions. http://groups.yahoo.com/group/pelletstove/
The only drawback I've heard about inserts is you have to move them out of the fireplace a bit to work on the back. I've been running a freestanding one for 9 years and love it.
Here's a pellet group if you wish to ask them some questions. http://groups.yahoo.com/group/pelletstove/
^^You know, I've been hemming and hawing on a free standing stove. My living room is 19'x22' with a 15' vaulted ceiling. I keep toying with bricking the fireplace shut, making the face a system of shelves, and then installing a free standing stove in the opposite side of the room where there are no windows.
That would hurt to brick it shut. But it may make sense. You could also use it as a place to put a couple bags of pellets. Might not be real attractive but you wont have to go lugging one in when you need it.
Do you have plenty of ventilation to other rooms? Otherwise it'll get pretty hot in there.
Do you have plenty of ventilation to other rooms? Otherwise it'll get pretty hot in there.
If it were me, I'd do some cleaning & restoration to the fireplace and fit it for the pellet stove only since it seems to make more sense to use the existing flue. I think they look great together and it could (possibly) mean less overall work.^^You know, I've been hemming and hawing on a free standing stove. My living room is 19'x22' with a 15' vaulted ceiling. I keep toying with bricking the fireplace shut, making the face a system of shelves, and then installing a free standing stove in the opposite side of the room where there are no windows.
This flooring is amazing - we love it. We bought enough to finish the room today (as well as the floor molding) and got to work.
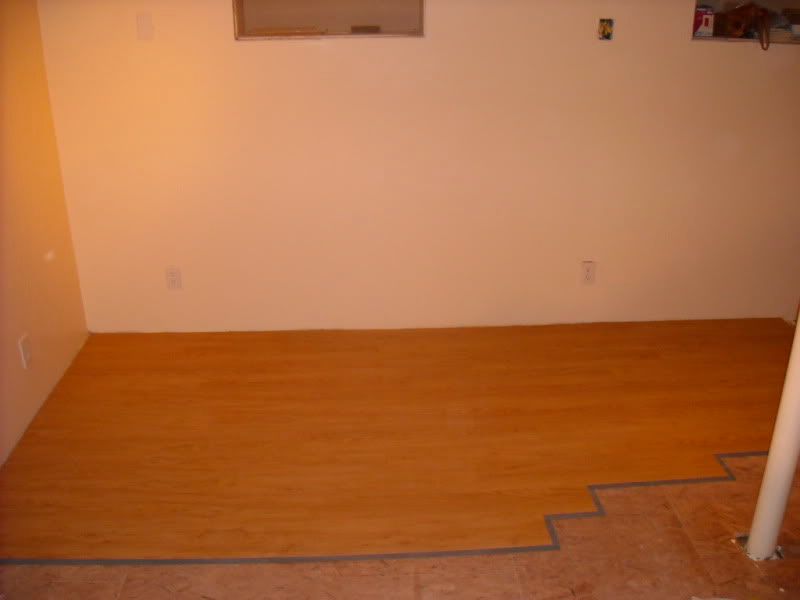
^ started getting outlet covers on too
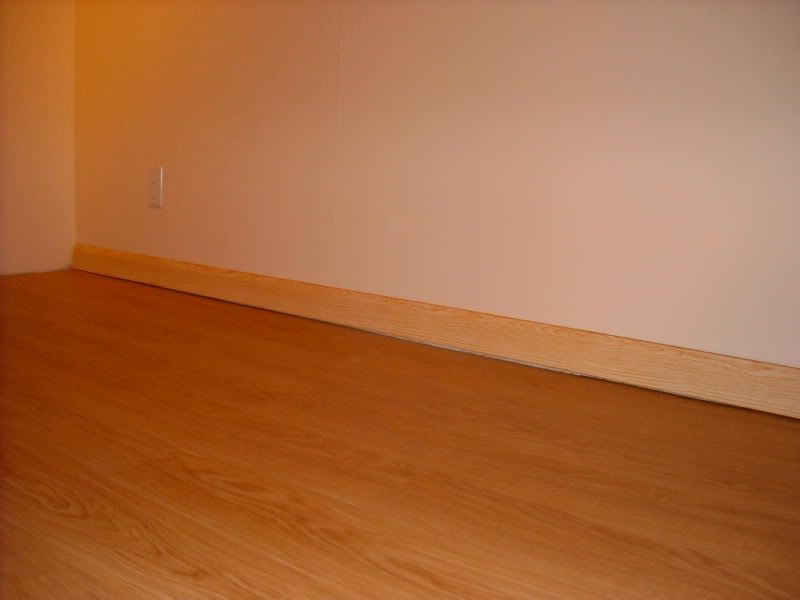
It was getting late so we'll hit it again tomorrow and hopefully wrap up the floor. Another little added touch...
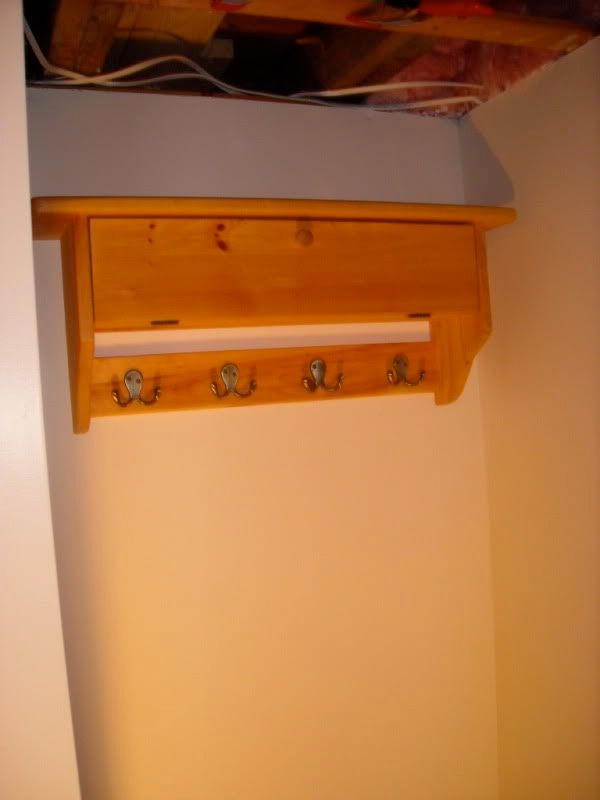
was finally hanging our coat rack now that we're done painting. We removed the loose wooden pegs and put in some nicer metalic hooks
^ started getting outlet covers on too
It was getting late so we'll hit it again tomorrow and hopefully wrap up the floor. Another little added touch...
was finally hanging our coat rack now that we're done painting. We removed the loose wooden pegs and put in some nicer metalic hooks
The refit is looking better and better, Scotty. 
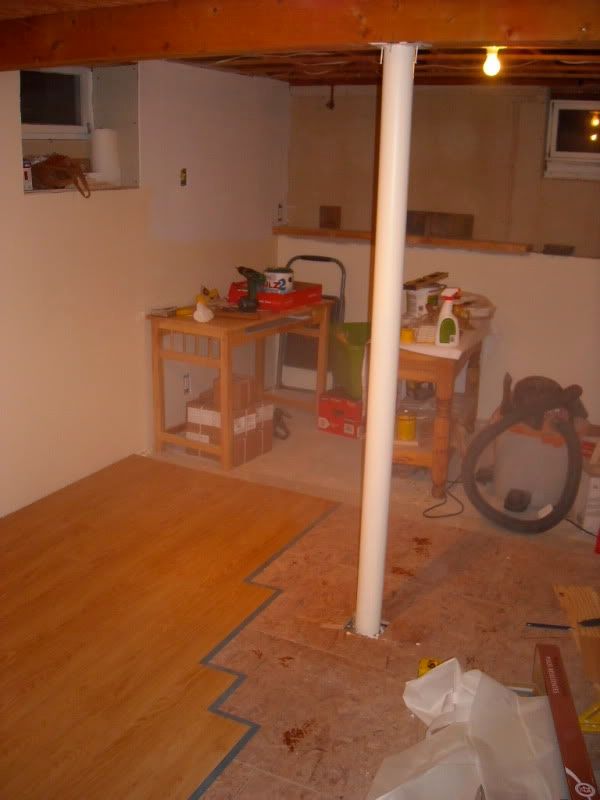
This weekend storm has put some brakes on getting down there, but I very nearly finished laying the floor yesterday. I'm tempted to bring down my miter saw from the shed and start cutting floor molding (my nail gun and compressor are already in the basement) but I'd have to do some serious shoveling to get thereThe refit is looking better and better, Scotty.

I recently purchased the following from Amazon.com:
Taunton's Tiling Complete
Drywall: Professional Techniques for Great Result
Trim Complete (Taunton's Complete) [BARGAIN PRICE] (Paperback)
I am still waiting for the tile book to arrive. I thumbed through it at Lowe's and really liked it. The Trim book is much, much better than the Black and Decker book that I bought, but they both are great to own.
Wait until you see what I have planned for them.
Wait until you see what I have planned for them.
Balancing the wobbly leg on the kitchen table?
Wait until you see what I have planned for them.
Balancing the wobbly leg on the kitchen table?

L
lady_trekkie_10
Guest
i wish i was handy! fortunatly for me, my roommate is a carpenter and my boyfriend does everything from fixing the pilot light in my stove to unclogging my drains!
I recently purchased the following from Amazon.com:
Taunton's Tiling Complete
Drywall: Professional Techniques for Great Result
Trim Complete (Taunton's Complete) [BARGAIN PRICE] (Paperback)
I am still waiting for the tile book to arrive. I thumbed through it at Lowe's and really liked it. The Trim book is much, much better than the Black and Decker book that I bought, but they both are great to own.
Wait until you see what I have planned for them.
Knowledge is power
JP, how long do we have to wait? We need to know now!Well, I finished the floor today. I only had to cut two pieces in the lengthwise direction so I really lucked out.
Here, at the entrance...
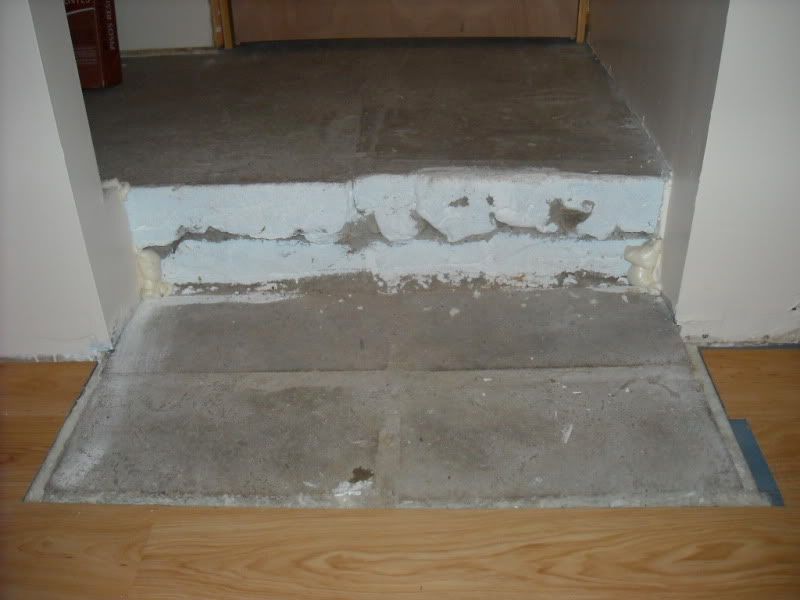
I'm going to have to get a little creative ahead of tiling. I have to do some framing on that facing dimension, like I did for the window wells, and then use backerboard. Its so uneven -- and the step is probably too unlevel to tile directly onto it as well. Up on top there is no level issue at all so that will go easily. I want to get some nice, colorful tile so that the entrance will pop right out at you - maybe something in an antique or barndoor red
")
Last edited:
Well after admiring all of the work in this thread I finally get to post some of my own work!
Last fall my brother-in-law and I completely gutted my kitchen to prepare it for the contractor we hired to redo our kitchen. The kitchen turned out great but unfortunately we did not have the tiles for the backsplash so the contractor couldn't completely finish the job.
When we finally did get the tiles in the contractor seemed to lose all interest in coming back to finish the job so I decided to tackle it myself.
This is the first time I have ever done any tiling and the tiles are glass. At first I was just going to rent a wet saw from home depot for $50/day but one of the guys in the tile section pointed out a wet saw on sale for $55 so I ended up buying one. I figured even if it only lasted me this one job it'd still be cheaper than renting, and boy was I ever right. I underestimated how long it would take me to make the cuts and what I thought would be a weekend job stretched out into the weekdays. Granted I only worked on it a few hours a night after work so it probably would have gone faster if I had had a solid day on it.
Anyway, here are the results.
Before:


During:


Done!


I'm just wating for one more wall plate to come in for the electrical outlets and then it'll be complete!
Last fall my brother-in-law and I completely gutted my kitchen to prepare it for the contractor we hired to redo our kitchen. The kitchen turned out great but unfortunately we did not have the tiles for the backsplash so the contractor couldn't completely finish the job.
When we finally did get the tiles in the contractor seemed to lose all interest in coming back to finish the job so I decided to tackle it myself.
This is the first time I have ever done any tiling and the tiles are glass. At first I was just going to rent a wet saw from home depot for $50/day but one of the guys in the tile section pointed out a wet saw on sale for $55 so I ended up buying one. I figured even if it only lasted me this one job it'd still be cheaper than renting, and boy was I ever right. I underestimated how long it would take me to make the cuts and what I thought would be a weekend job stretched out into the weekdays. Granted I only worked on it a few hours a night after work so it probably would have gone faster if I had had a solid day on it.
Anyway, here are the results.
Before:
During:
Done!
I'm just wating for one more wall plate to come in for the electrical outlets and then it'll be complete!
Similar threads
- Replies
- 0
- Views
- 4K
- Replies
- 192
- Views
- 29K
- Replies
- 0
- Views
- 277
- Replies
- 5
- Views
- 12K
- Replies
- 13
- Views
- 2K
If you are not already a member then please register an account and join in the discussion!