Terminus Timeline - Ships and Interiors


As the work got cut off in the panel when I dropped it into the comic, here's a better look at the hand prop I modeled up as a TOS version of something the crewman were carrying around in Wrath of Khan. Our two unlucky ensigns are going to be using them to sterilize the machinery in the Waste Reclamation Facilities on the Aries.

Rendered in DAZ Studio with iRay
Uniforms are V4 courageous and M4 Valiant
Uniform textures by JamesJAB
Figures are Genesis 3
Hand Prop built in Blender For Artists 2
All other sets and Props built in Truespace


Finally got the script working as an add-on in Blender For Artists so I could import my old Truespace scenes and objects and I started with my TMP bridge. This also gives you an idea of my workspace I was building these in Truespace with. Parts were created on the far left. Then I'd center them on the TMP bridge in the middle and as I went through part revisions I'd drop them below the existing set so I still had them if I needed them but they weren't cluttering up my creation area on the left. To the far right is the Challenger bridge. Same idea.

With Blender for Artists, after I clean up the meshes, I can have both bridges existing in the same place through the use of layers and just hide the one I'm not working on versus having it off to the side and having to match it up later.

I am thrilled these imported as well as they did and are all separate objects as oppose to importing it as an OBJ and having to clean that mess up. I can also cut quite a few poly's if I do it right because half of the outer shells were because I had to work with solid objects in Truespace to do what I was doing and Blender just doesn't care.


Clean-up on Deck 1.

I'm massively cleaning up both bridge meshes to be editable in Blender which includes grouping the parts to their respective bridge collections as well as relabeling the parts, materials, shading and edge clean-up, deleting as many extra polys as I'm comfortable with and saying good bye to the trash parts I'd saved in Truespace but probably won't use again here. I've also taken the liberty of snatching the larger consoles I built for the Refit bridge and moving them over to the Challenger bridge, but making them only slightly larger than the mid-size consoles I'd made for Challenger. This was MUCH easier to do in Blender than it would have been in Truespace.

I'm guessing a few more days of clean-up and I can start modeling bits and pieces for both bridges again, although I'll be concentrating on the Refit bridge first as I have far less work to do on Challenger and even less after I get the console buttons and screens modeled.


Blarg. Well the clean-up on the Refit bridge continues. But, I'm re-thinking my original decision to build all of the displays and consoles as actual mesh.

It's A LOT to clean-up. Especially when I can fix-up JUST the buttons and indicator lights and the displays can be edited in Photoshop in a third of the time.

I was thinking about dropping the labels on the controls, but I'm remembering they were actually there on the consoles in the films, so they stay.

One thing I am doing though is bringing those buttons down as flat as I can get away with on the consoles.
 
LOL - maybe only do up a hero console for those close-ups and leave everything else textures? :whistle:

And what if you need a close up of the environmental mixture on deck ?

Eh, we'll see. I've gone back to the main bridge structure for now as the consoles were becoming too tedious.
 
If I may give a bit of encouragement, from someone who's modeled their own Refit bridge...

Doing the detail work on the control panels is totally worth it! Here's an example to get you psyched...I've done every single button and slider; even the guts of the microscopy and life-forms panels on the science station retractable wings. Every single light on the library computer memory assign boards. It was a ton o' work to get it all done, but once it's all in place all that extra detail really pops. I'd recommend using the texture maps as placeholders, and drop in a 'real' panel every so often as you complete 'em.
stage px lib 2 by Bill Thompson, on Flickr


Back from a work imposed hiatus. That and Mass Effect Legendary Edition. :P

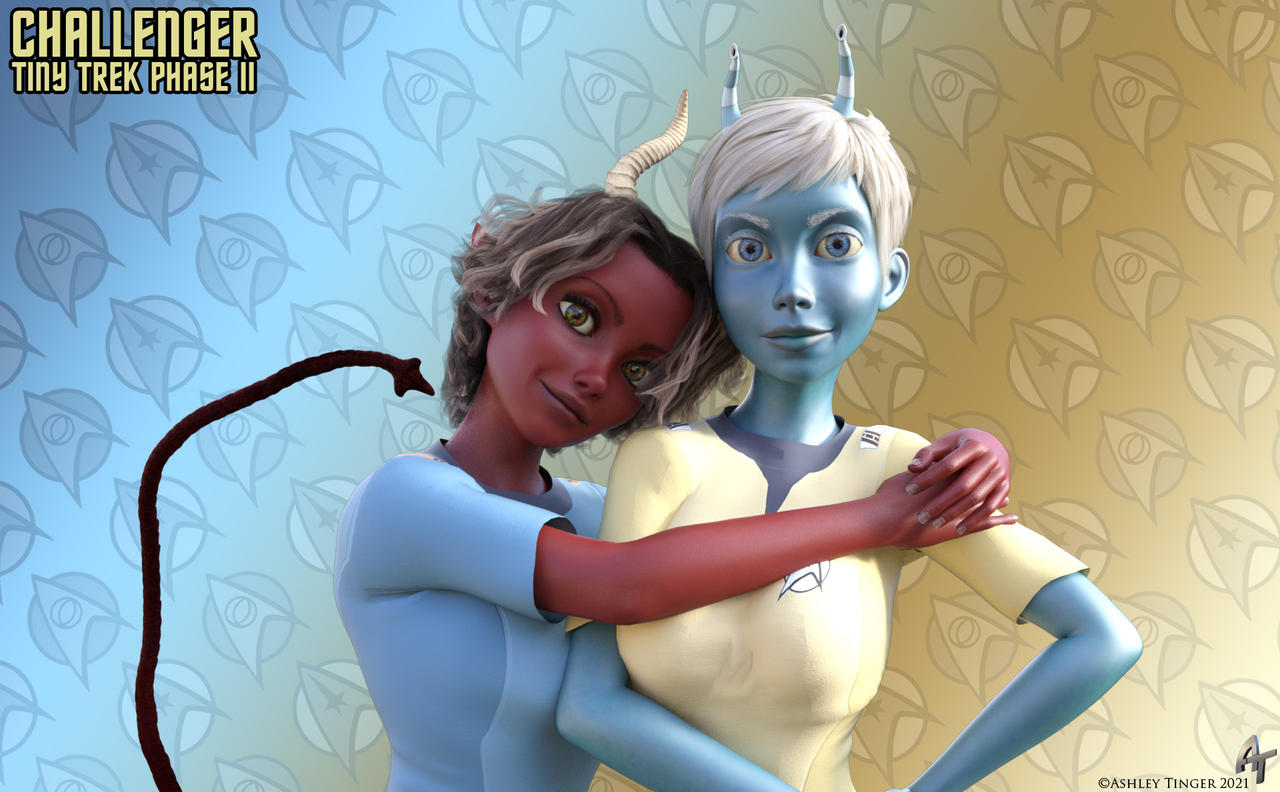
This did start off as an idea for the monthly challenge here at TrekBBS. Blue and Gold. I was going to mimic the Kirk and Spock promo photo from above but I liked them like this instead. Along with that I decided to change up my crew roster a bit after binging the hell out of the 90s era DC Trek comics. While the Andorian might be familiar, say hello to Commander M'yrna, a Teuful, same race as M'yra from the DC run of Trek comics in the 90s. They never named her race so I did a little play on the origin of Tiefling. Also didn't go ram horns on this one although I'm sure I'll visit that with more people from the race as they pop up.

Uniform design inspired by JBogguess fantastic designs for a Phase II era.
Rendered in DAZ 3D using iRay
Uniforms are V4 Courageous
Figures are Genesis 8 using Toon Princess morphs
 
Last edited:
Oh, it's lovely! The colours, and light, and their expressions are all beautiful. I hope you do enter this, or something similar, for this month's art challenge?
 
Pretty awesome though I do think the tail would benefit from having some of the character's color palette be reflected in it's detailing to help it tie into the character as a whole. Maybe a bit the red skin tones on the barb, for example, or highlights that are call backs to the hair color.
 
Back
Top