• Welcome! The TrekBBS is the number one place to chat about Star Trek with like-minded fans.
    If you are not already a member then please register an account and join in the discussion!

Donny's Refit Enterprise Interiors (Version 2.0)

Star Citizen has the bigger ships clocking at over 7 million polygons. I think that's for everything, including interiors. So polycount is really dependent on project, engine, performance and level of detail needed. For VFX work, 500K is actually pretty low these days. I was pretty liberal with polygons on my ship, and I only managed to get it to 5.2 million. Needs more :biggrin:
 
Getting there:

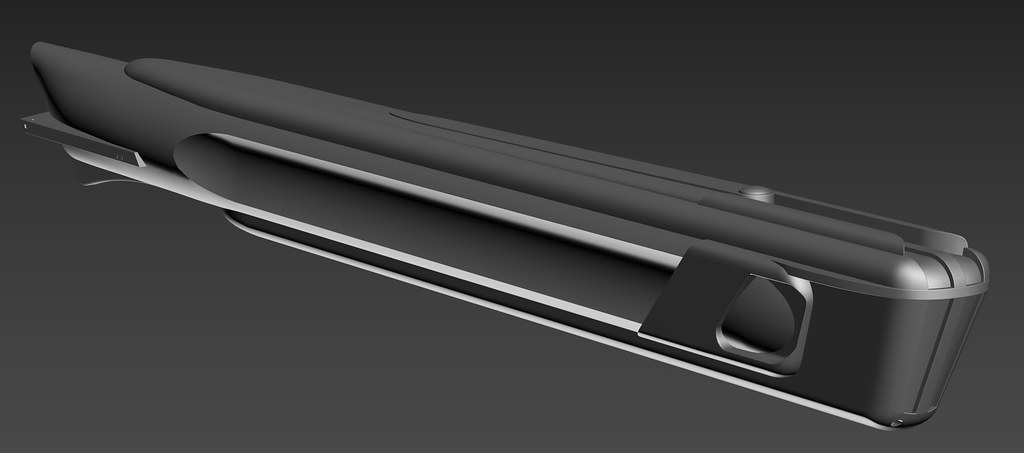
I took a much needed night off last night, and continued tonight at a more leisurely pace. Still more detailing to do. One more night and the nacelle should be done!
Donny, when you're done will you animate the propulsion units to light up before 1701-A goes into warp ala the end of The Voyage Home?
 
Excellent work! I think I missed those little squares on mine. I'll add when I UV them. BTW, I didn't see the pylons on the thread?
 
Excellent work! I think I missed those little squares on mine. I'll add when I UV them. BTW, I didn't see the pylons on the thread?
The pylons are modeled but I haven't posted a shot of them. I'm working on merging all the work so far into one master Substance Painter file. As soon as I get everything merged and re-baked, I'll post some screens.
 
Maybe? I'll have to watch that scene and see exactly what you're referring to.

STEPhon IT is referring to the inner grilles lighting up blue whenever the warp engines engage. The FX guys were mostly consistent with this during the movies.

Nacelles are looking sweet. :)
 
Maybe? I'll have to watch that scene and see exactly what you're referring to.

On the TMP ship, the inner grill only glows while the ship is at warp. The only time we catch it in the act of switching on (aside from a glitched transition in the last shot of TMP) is TVH, but you only see it in the uninterrupted version of the closing shot at the end of the credits; in the actual movie, the moment is edited out. I don't think I've ever seen the full shot on-line, so let me fix that...

To view this content we will need your consent to set third party cookies.
For more detailed information, see our cookies page.
 
The pylons are modeled but I haven't posted a shot of them. I'm working on merging all the work so far into one master Substance Painter file. As soon as I get everything merged and re-baked, I'll post some screens.

Yeah, I figured you wouldn't have forgotten something so big, heh. Looking forward to seeing her all put together!

BTW, are you going to texture everything inside Painter? How would you go about doing all the different panels?
 
Merged all the pieces into one large Substance Painter file and re-baked all high-poly information onto the textures. Ready to start painting in the morning. Here's a quick preview of the U.S.S. Pewterprise:


BTW, are you going to texture everything inside Painter? How would you go about doing all the different panels?
I've got a couple different methods I'm going to try, mainly using Substance Painter, Photoshop, and ID maps baked out from 3ds Max. I will do some tests tomorrow.
 
Last edited:
Cool, will be interesting to compare the methods. I'll be doing a few masks in Photoshop and make some wizardry in Substance Designer to output the textures I need for rendering.
 
The "Pewterprise" is stunning! I like her just the way she is :)

P.S. Your nacelle image is great. I think it looks really retro - the metal finish and lighting gives it a kind of 50s/60s look.
 
Well, I spent the day doing painting tests and getting the top half of the saucer painted.
Keep in mind these are WIP shots, so some things may be incomplete or absent (for instance, the red trim around the phaser pads and thrusters is missing, the beacons are not textures, and I still have some work breaking up the Aztec pattern on the saucer top)
Here's a shot in Substance Painter:


And a few in-game shots:


Last edited:
That looks excellent. I think for the scale of the ship, the bump might be a bit much. On the other hand, very close to the look of the studio model.

I'm curious, did you make the aztec pattern in Photoshop and applied that inside painter? Or were you able to do everything in Painter?
 
That looks excellent. I think for the scale of the ship, the bump might be a bit much. On the other hand, very close to the look of the studio model.

I'm curious, did you make the aztec pattern in Photoshop and applied that inside painter? Or were you able to do everything in Painter?
I actually am modeling a simple polygonal Aztec pattern in 3ds max over the model of the ship, setting different polygon groups to different material IDs, and then baking that out as a color mask in Painter. I then use that color map as masks for the Aztec variations in color, roughness, and metallic values on my textures. Some of the paneling I’m painting by hand within Painter.
 
Last edited:
I actually am modeling a simple polygonal Aztec pattern in 3ds max over the model of the ship, setting different polygon groups to different material IDs, and then baking that out as a color mask in Painter. I then use that color map as masks for the Aztec variations in color, roughness, and metallic values on my textures. Some of the paneling I’m painting by hand within Painter.

That's a very interesting approach. The panels you model must have the same UV information as the saucer though, right? Or am I missing something?
 
So I'm just curious, Donny, is there a way to make the floodlights on the Enterprise actually illuminate spots on the ship the way they do in TMP, or are you going to have to build an invisible rig of lights (and dental mirrors) to follow your model around?
 
That's a very interesting approach. The panels you model must have the same UV information as the saucer though, right? Or am I missing something?
The Aztec pattern is separate geometry from the rest of the model, with high-contrast colors (blue, red, green, and yellow) set to it via simple blinn shaders. It is baked as a series of color ID maps onto the same UV space as the model. The Aztec pattern geometry is exported as a separate model, and doesn't have/need UVs since it only features single-color shaders. It is simply used for baking/generating the color ID map, which is used as a mask within Painter, and is not output into the final textures. The geometry isn't used for anything other than baking this color map and is not part of the final model. Does that make sense?

This is a common way of generating color ID maps used for masks within Painter and Designer, except that usually the colors are applied to the same model used for baking high poly information. I'm simply exporting the Aztec geo out as it's own model, and when I bake this color ID map in Painter, I just change which model the baker is referencing from the high-poly model to the Aztec geometry model.

You can see an example of this workflow in this video here:
To view this content we will need your consent to set third party cookies.
For more detailed information, see our cookies page.

So I'm just curious, Donny, is there a way to make the floodlights on the Enterprise actually illuminate spots on the ship the way they do in TMP, or are you going to have to build an invisible rig of lights (and dental mirrors) to follow your model around?
I'm glad you asked. I haven't gotten very detailed with lighting the model yet (the lighting you see in the screenshots above was done very rough), and I'll be honest: I haven't done much research into how the studio model was actually lit. Does anyone have any information on this? Was the studio model's "self-illumination" system actually completely self-contained and generated from the lights on the model, or did they cheat and use external lights for this self-illumination? Some of those ways the model is lit seems impossible given the angles of those lights on the model.

[EDIT] Ok, after studying screencaps a bit, it does appear that the model's self-illumination system was in fact legit. I think I can pull this off in Unreal.

[DOUBLE EDIT] Okay, after some reading, it sounds like they actually cheated with mirrors to achieve the self-illumination effect, but they took pains to make it appear it was self-illuminated.
 
Last edited:
If you are not already a member then please register an account and join in the discussion!

Sign up / Register


Back
Top