• Welcome! The TrekBBS is the number one place to chat about Star Trek with like-minded fans.
    If you are not already a member then please register an account and join in the discussion!

NCC-1701 USS Enterprise Deck by Deck - WIP

Status
Not open for further replies.
^ if it helps, here's a couple more photo documentaries of the E and tos D7
http://www.modelermagic.com/?p=8672
http://www.modelermagic.com/?p=8656

:D

Ok, lest anyone feel I'm slacking ;)

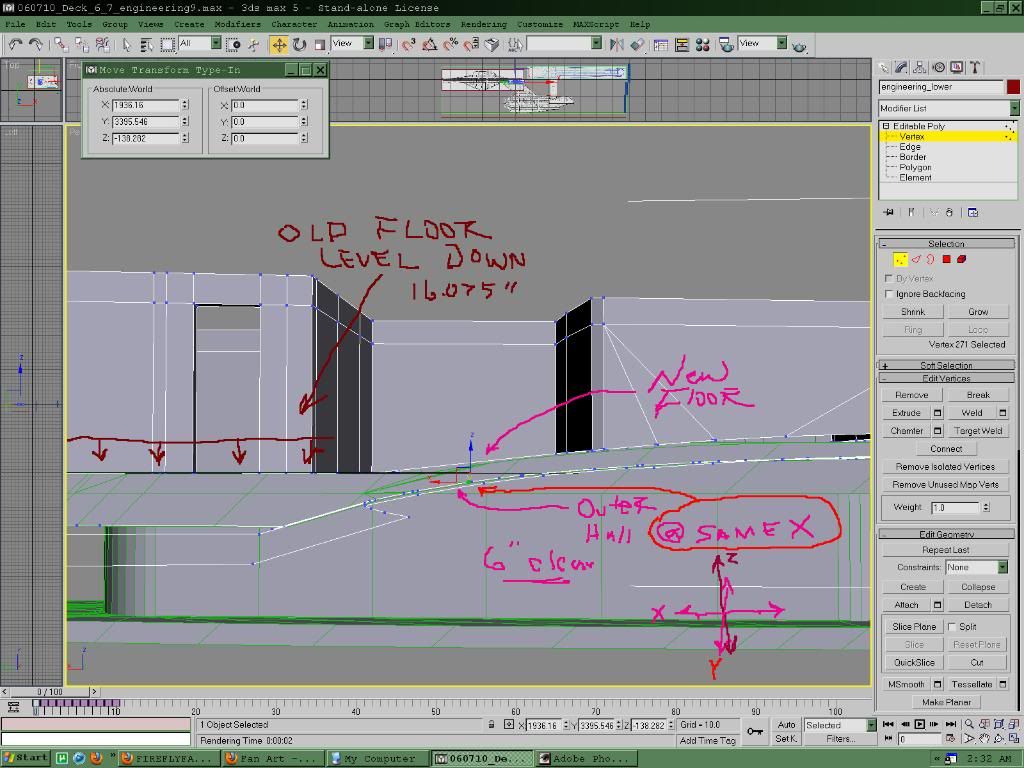
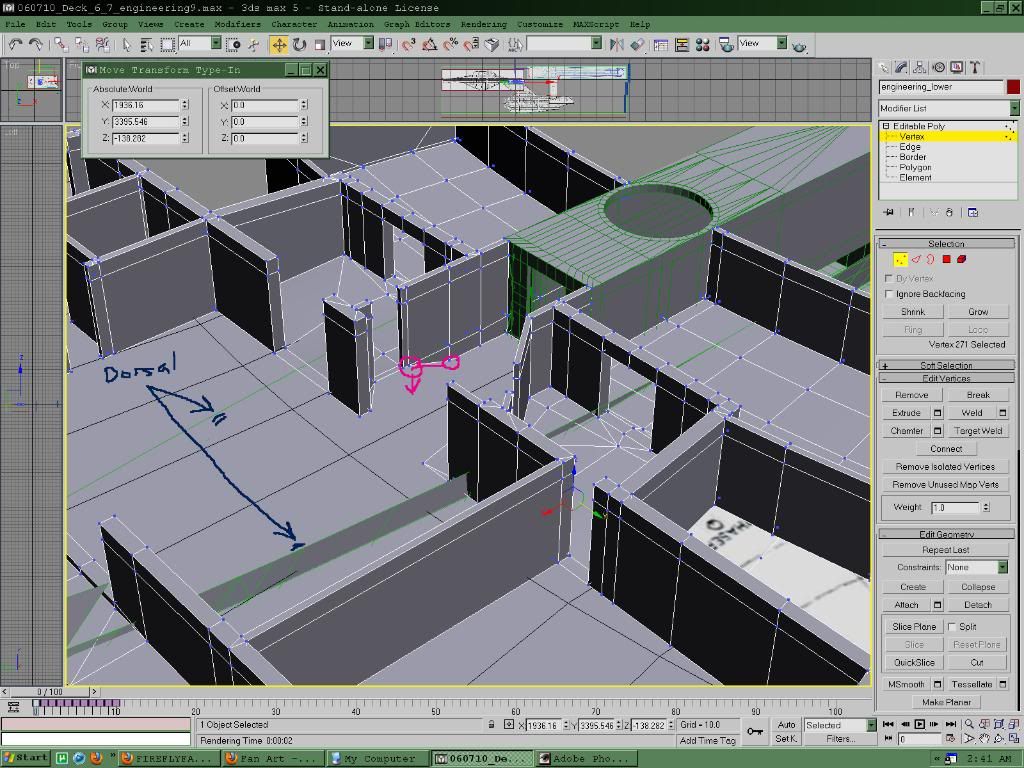
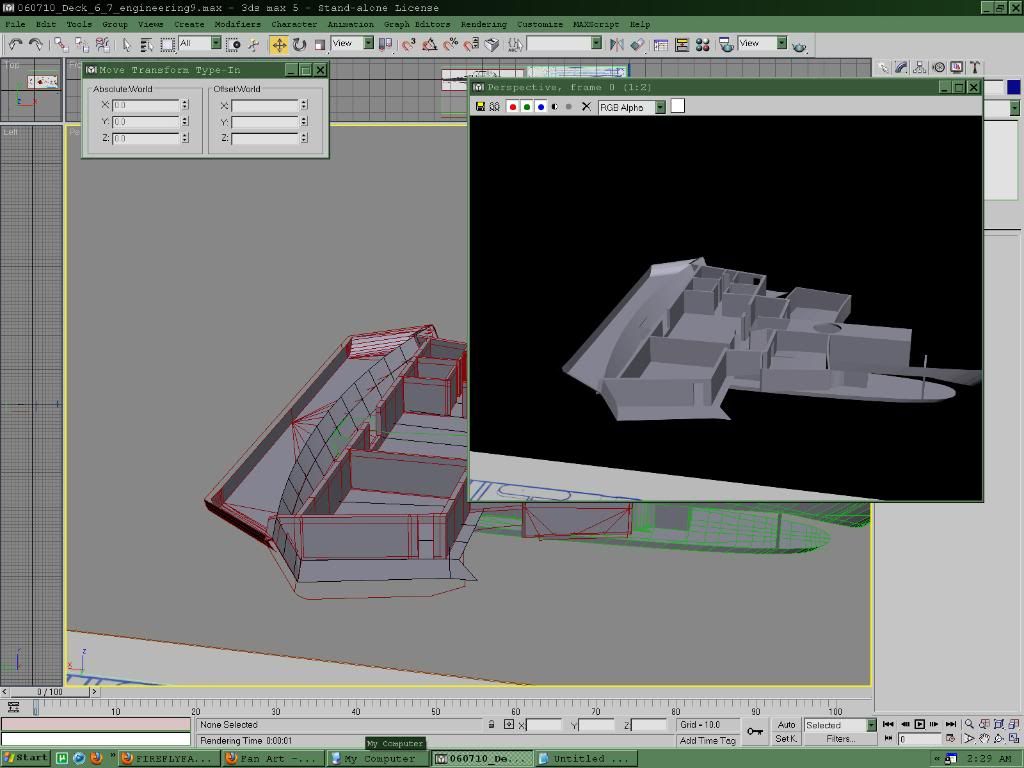
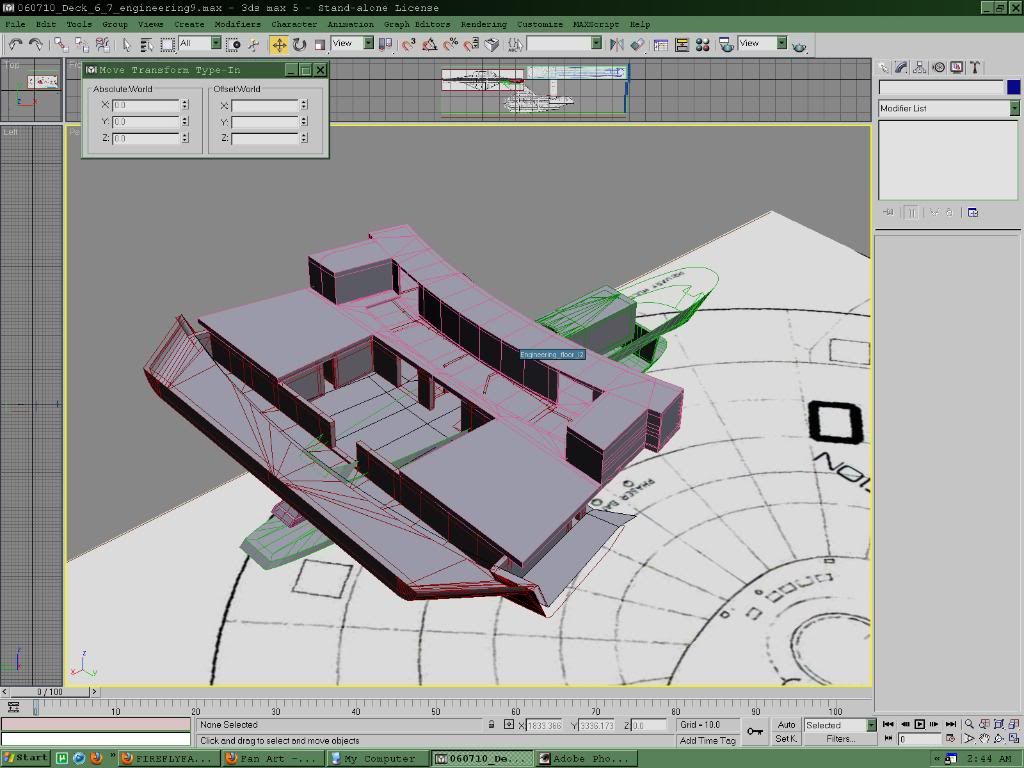
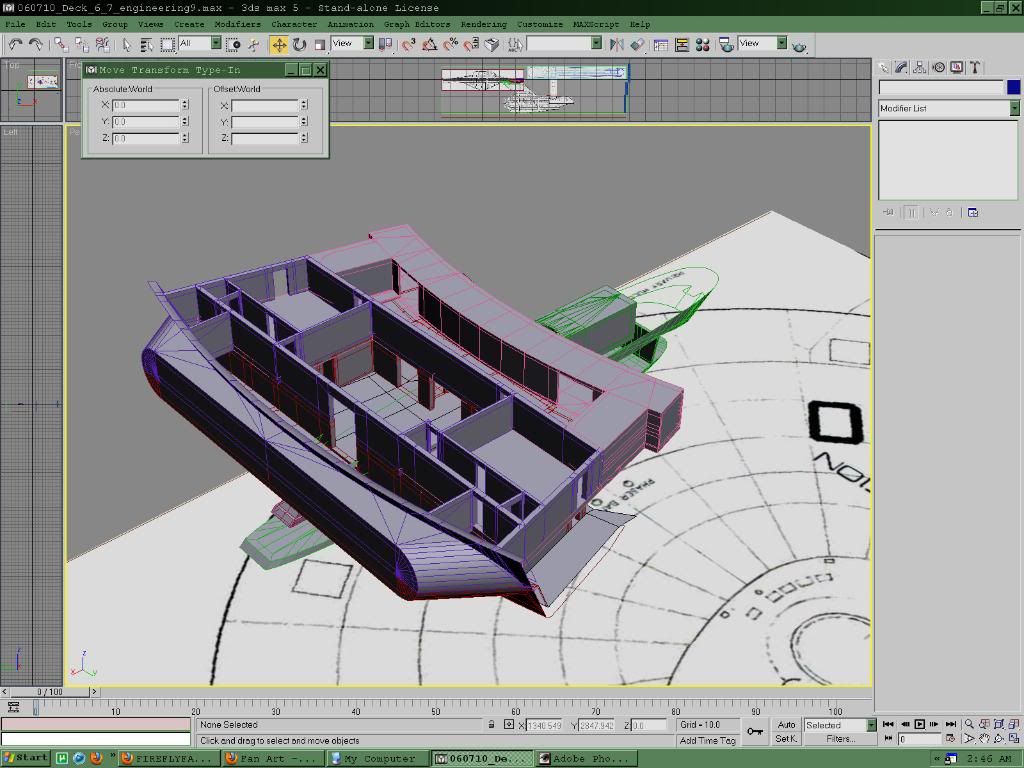
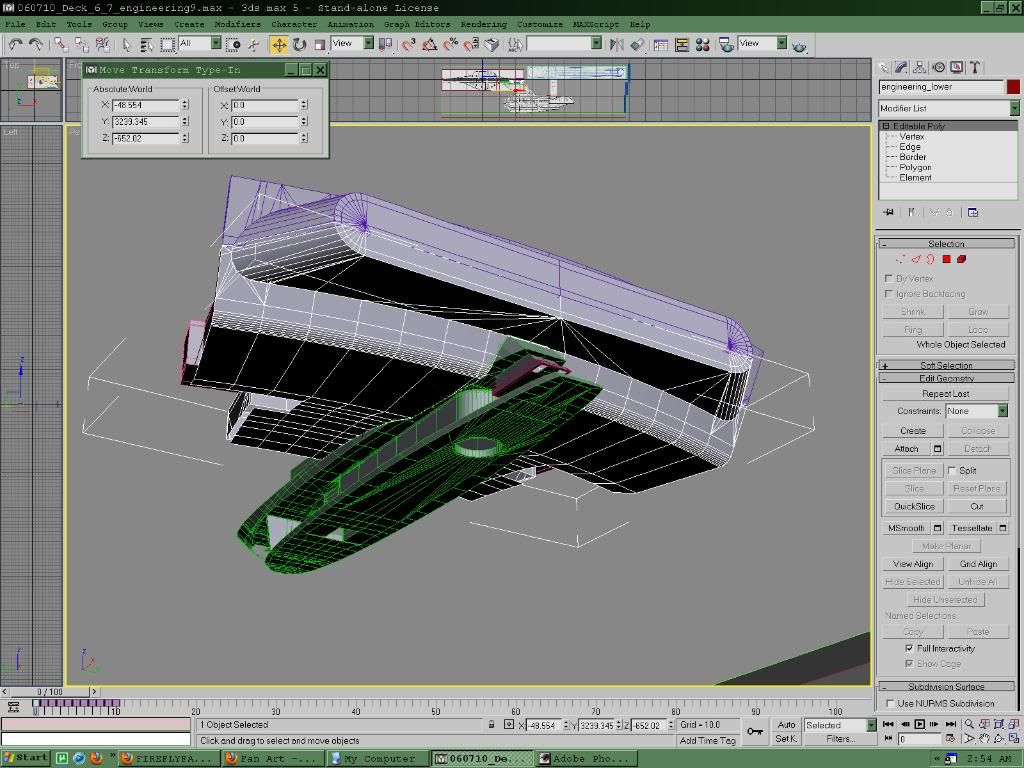
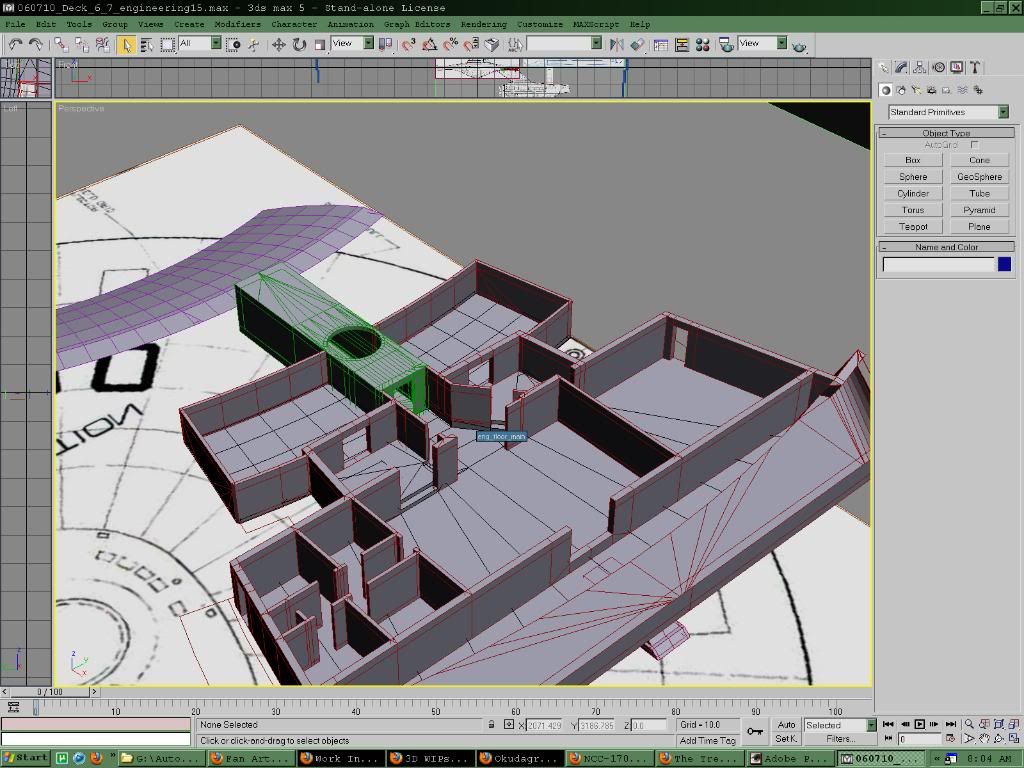
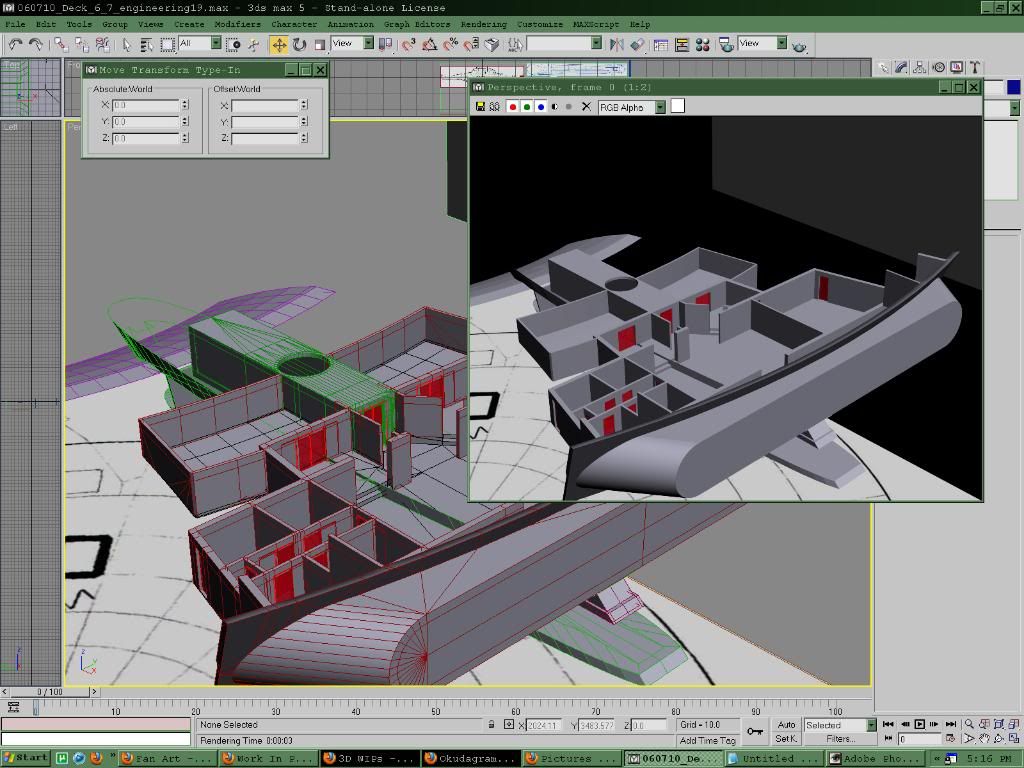
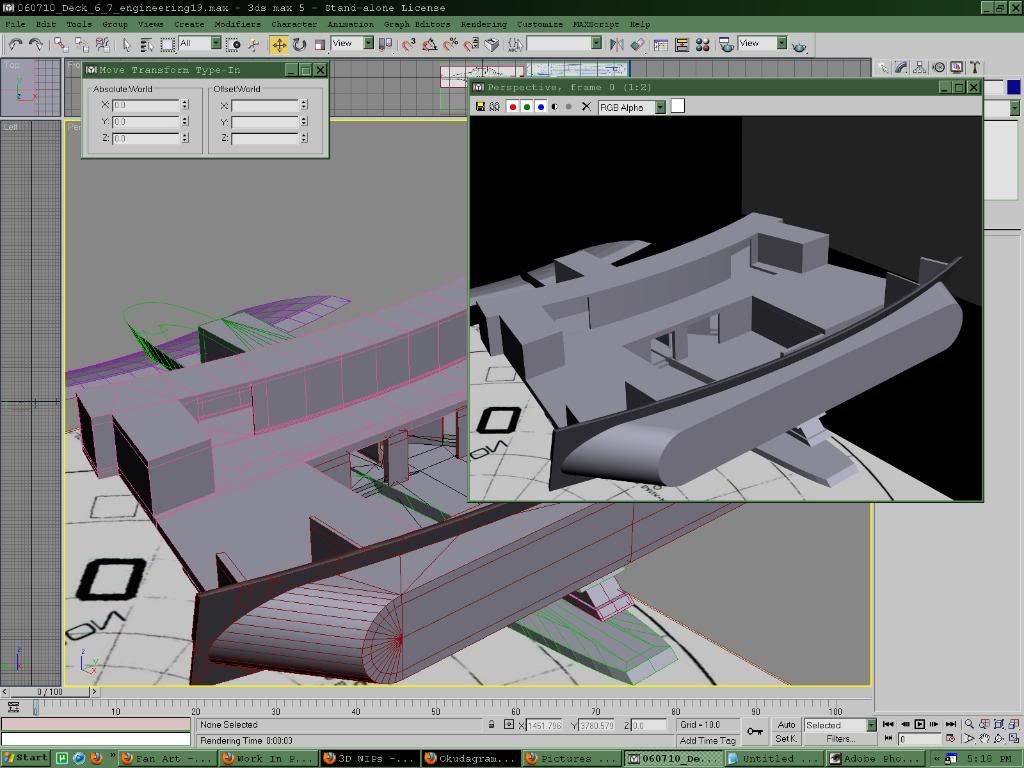
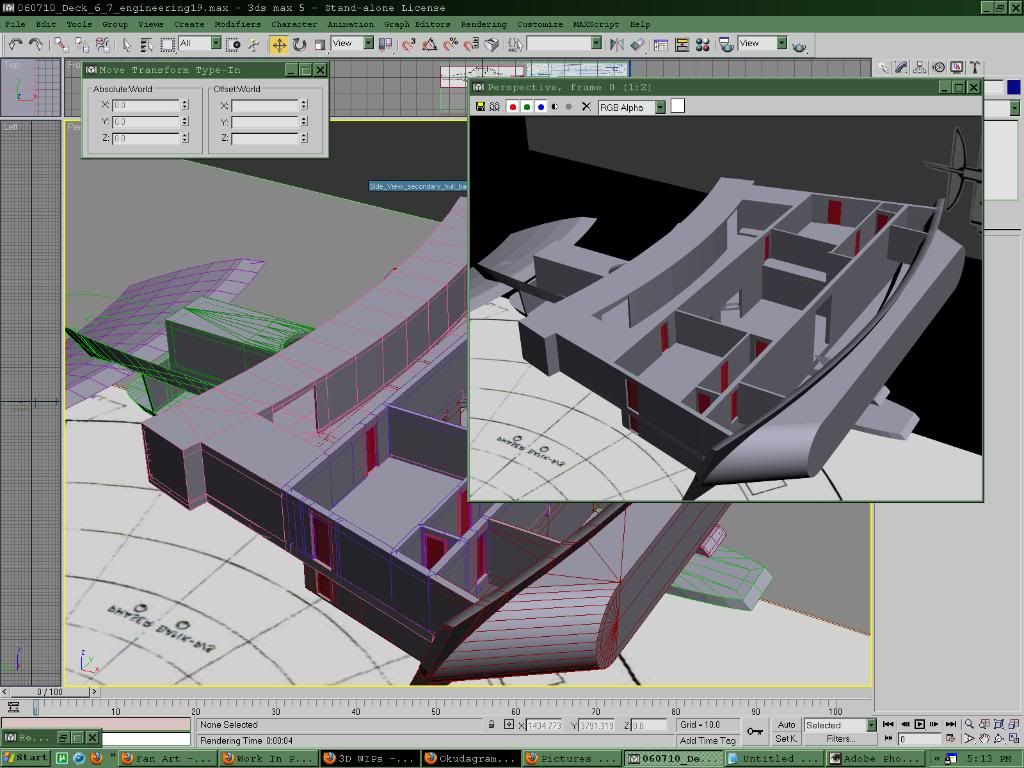
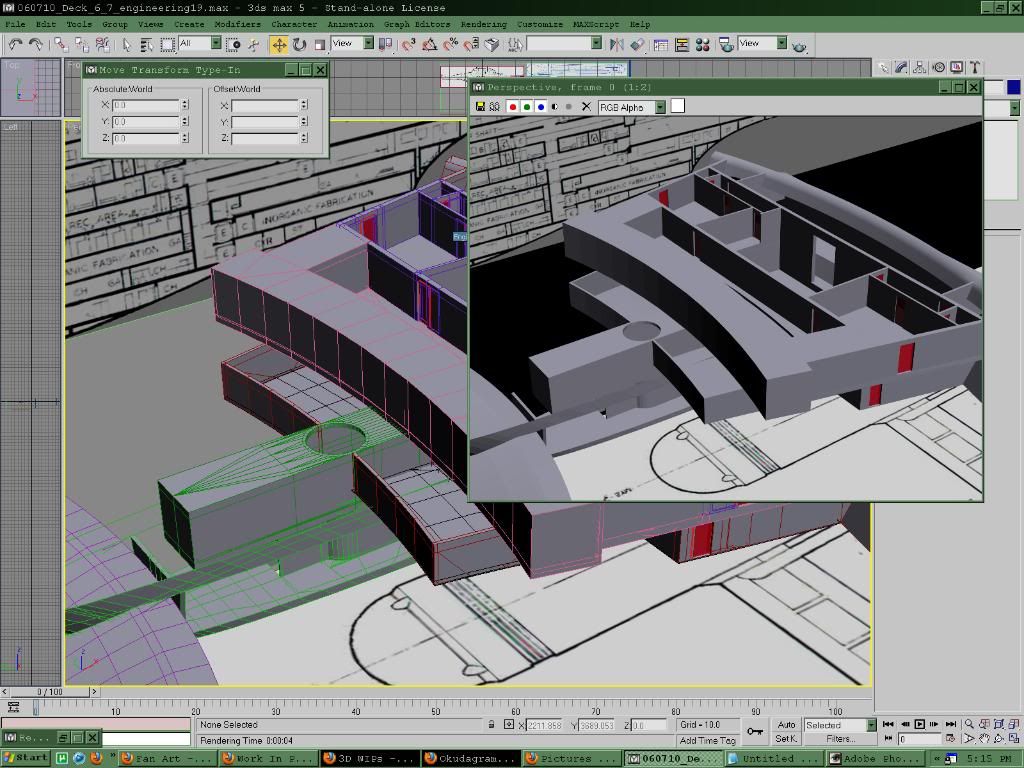
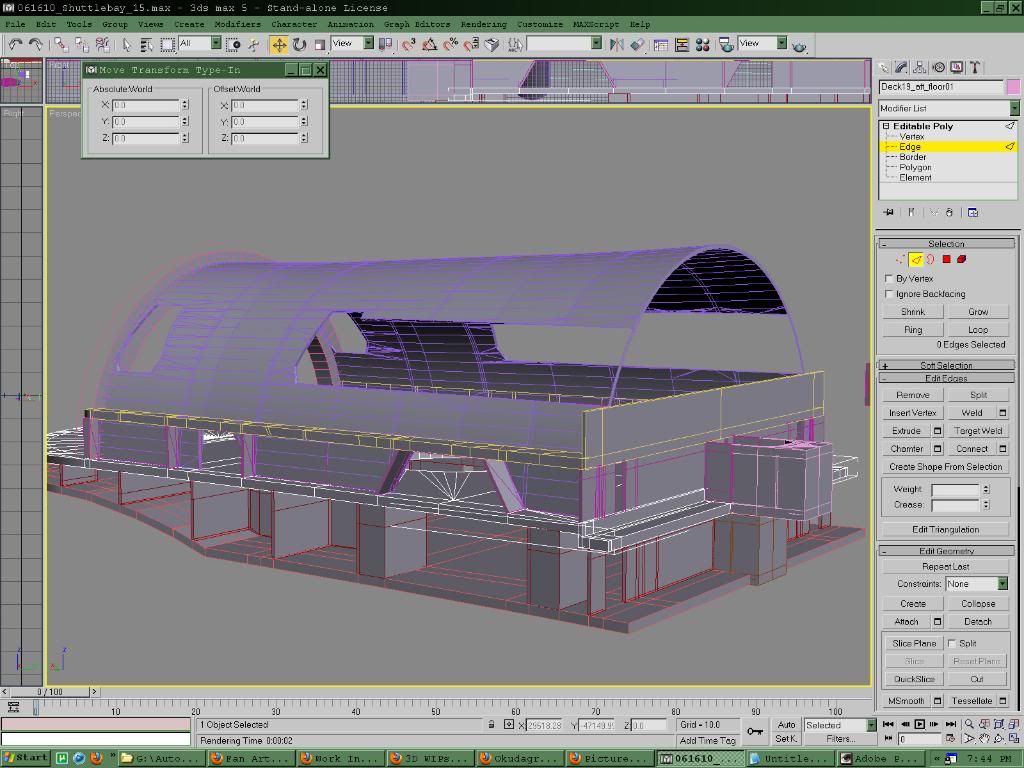
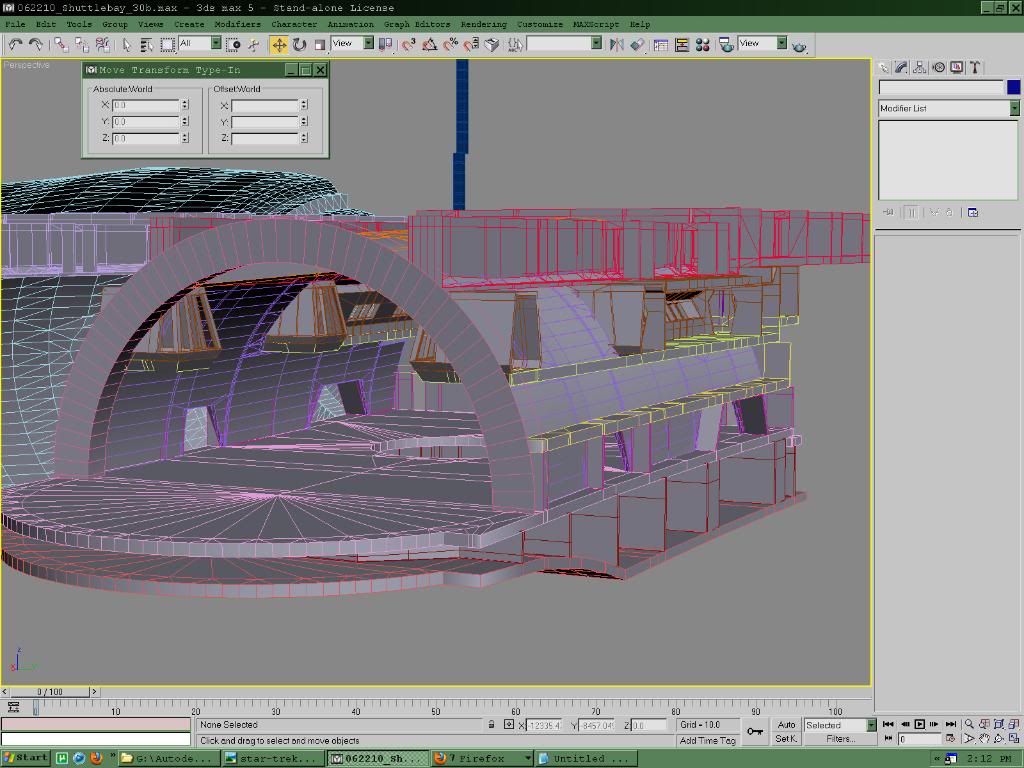
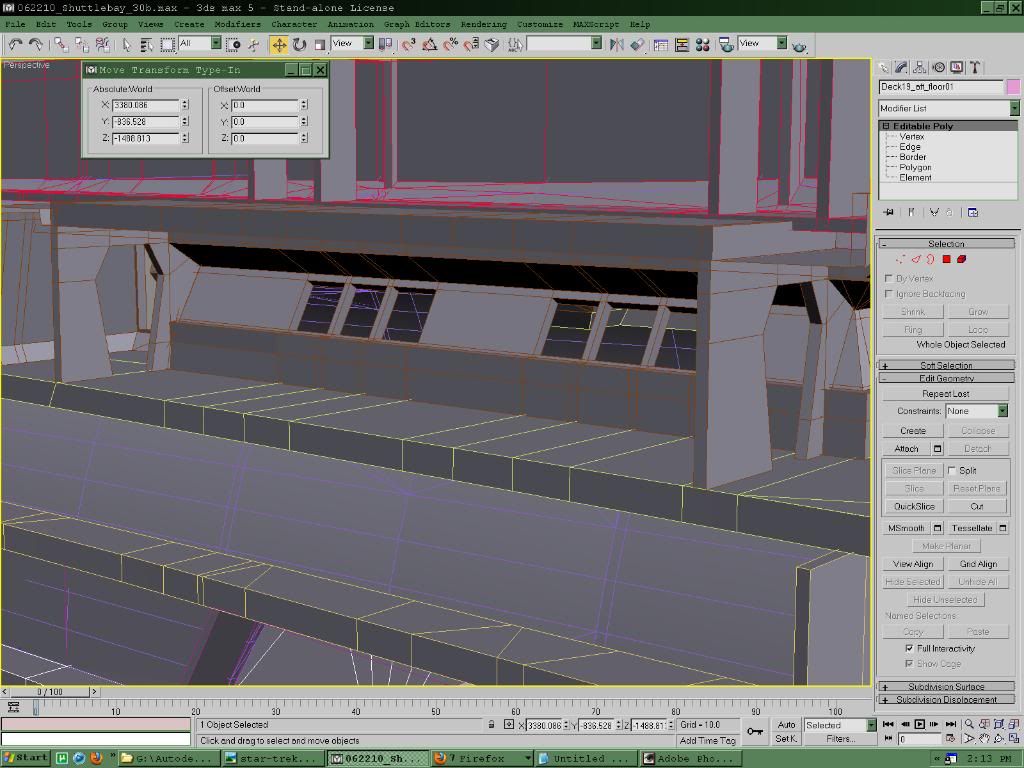
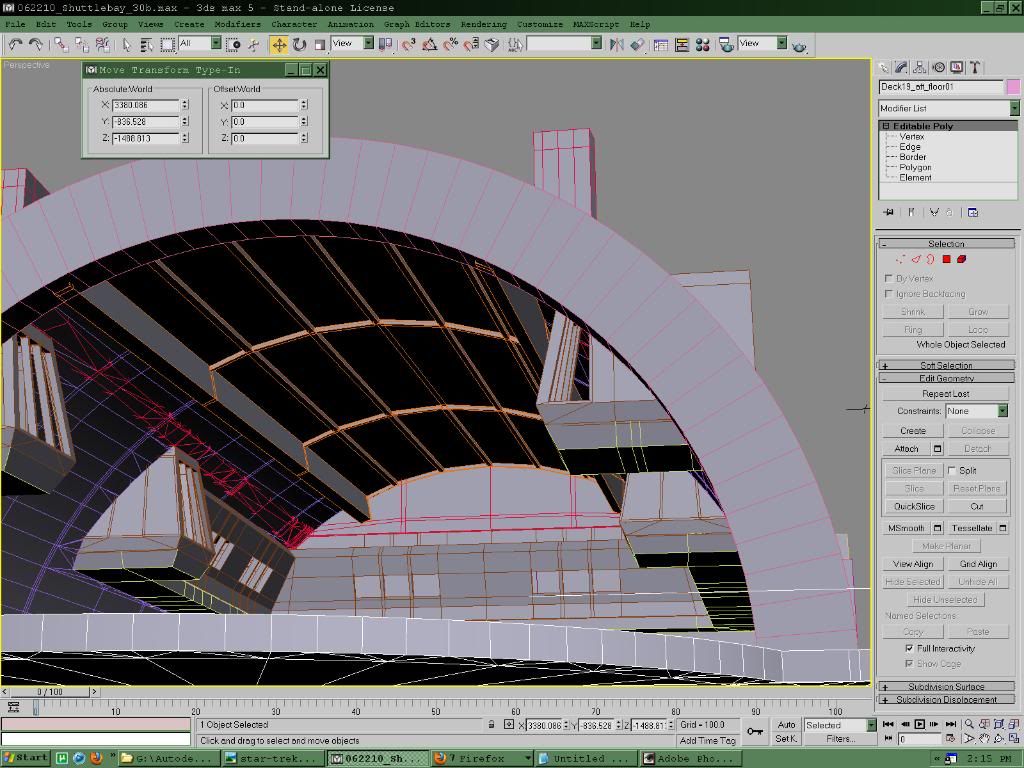
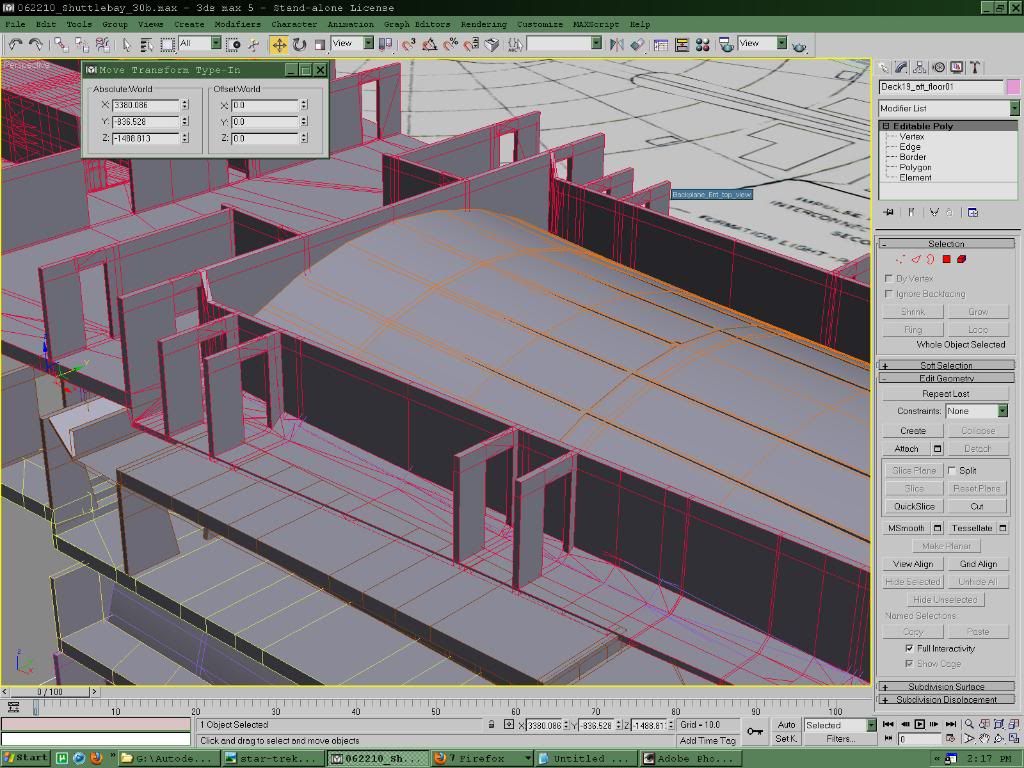
The cleanup is tedious; but, ongoing. I divided cleanup into three phases: High poly, low poly and final. The final phase is where I will break engineering and the shuttlebay away. There is no real reason to do this on the high poly model; so, it will only be addressed on the low poly model. That said, the nacelles are now being trimmed for export and that will finish the high poly cleanup phase. After that, all the decks will be exported and then they will be trimmed again for the low poly. For now, the high poly model will retain the built in floors. The low poly will not. They will be blown out where geographically possible. Deck 7 has
rises in the outer rings that must be part of the structure on export as it would present a real problem to duplicate in bsp. It will make for a fat mesh; but, I don't see a way around it.

Now, I should also throw out there the fact that I've trimmed a few small decks in between doing decks 6, 7 and 8. I took on doing 8 because, though already exportable, it was nearly as poly fat as deck 6 and shouldn't have been. I cut it in half in two days. Deck 6 took two days as well. Deck 7 required a week to trim down. If I could find more to trim I'd still be on it. But as of now, any more trimming there would start affecting geometry in ways I don't want to.

The nacelles are likely to take a while as well. The poly count there is 59, 775 - 6k less than deck 7 was when I started it and, unfortunately, it will likely prove far more difficult to trim down; so, I may have to break up the internals into exportable modules (yech). We'll see. I started work on that today.

I can't say this is going to go quickly. Though, I can say it should go much more quickly after tha nacelles are finished as all the decks from here on out will be much smaller. Back to work..
 
This project makes me want to have done it myself. Well done! Can't wait to see how you progress!
 
This project makes me want to have done it myself. Well done! Can't wait to see how you progress!

Thank you. Pulling my hair out right now. The cleanup has been really slow. Probably doesn't help that I've taken breaks because of how tedious it really is; but, getting there. Should be into detailing soon ;)
 
Alright campers.. a quick update:

A lot has happened in the past few months to slow me down. Had very much more pressing concerns that had to take
precident; so, work on the project had to be stopped for a bit. Right now I"m trying to motivate myself back into the work.
I go on vacation again in about three weeks; so, I may wait until then to get going again.

Until then, I'm sorting reference images in preparation to begin building props... beds, intercoms, dressers, etc.. About time
for the fun stuff to begin.
 
Ok, geared back up and hip deap in grime from crawling around the engineering basement... lol.

Change of intended direction. I decided instead of doing detail to go ahead right back into cleanup. But finally there are things to show. I started back in with cutting Engineering free from decks 6 and 7. Lotsa polys. Lots of headaches. But, it's moving along at a good clip.

progress_060710_1.jpg


This shows where I was yesterday. The relevant sections have been cut out, trimmed down nearly to where I wanted them, and the level 2 floor was blown out and replaced with a simpler, lower poly floor.

progress_060810_2.jpg


This shows a little of what I'm up against and might make it a little clearer why I built up with the outer hull skins attached on each deck. The skins stay put and show me exactly what my clearance level is for working between deck and hull. The
highlited sections show where the old floor level was, where it is now and how tight a squeeze it is to keep it level against the outer hull. The new floor will be complex as a result; but, not as poly laiden as the original.. hopefully. The one real
bit of license I got was from the Dorsal section:

progress_060810_3.jpg


You can see here that the dorsal section (green) intrudes with a wide enough footprint to allow for a level floor in the primary access areas of engineering. I had originally moved the main floor area up by 16 inches to avoid clearance issues.
But when I added the lower outer ring of the hull into the mix, it became clear that I had a lot more room, even with superstructure added, than I thought. So the floor is going back where it should be.

That said, here are some layering shots:

progress_060810_1.jpg


..the basement

progress_060810_4.jpg


Level 2 floor added along with lift maintenance area (trimmed).

progress_060810_5.jpg


Level 2 walls (trimmed)

progress_060810_6.jpg


And a shot from aft and under showing the trim work on the outer hull, alignment of deck 8 dorsal area, etc. There's a whole lot going on here - far more than readily apparent. This is where the docking collars are going to go. It's where the primary energy transfer systems link up to the saucer section, .... Lots of critical systems are going through here and I have to keep all of them in mind as I model this. The detail level of the bridge deck this far should be an example of how much I'm considering detail. And it doesn't yet have near the detail that it will have.

Look fun? lol. The build continues!
 
I feel for ya, this is one of those areas where I think FJ thought he could fudge a bit on the plans and nobody would notice? It's only when one tries to translate into 3D like you're doing here on computer (or I've done in my head for years) that the headaches start. Great work though, looking forward to more of the same!
 
I like how you're focusing on the 'business-end' of things with this starship =).

Re-undercut: Maybe you could under-exaggerate it, and get back some usable space?
I sketched this up one night, tracing some of Shaw's work, and basing it off of what he called the 'conjectural hanging edge structure' - perhaps the undercut we saw on the show/the model was supposed to be a hanging edge, not a huge cutting into?

(This sketch would be for a ship greater than 947ft...)
(The red were parts I was proposing water/liquid/gas tankerage and life support sub-systems)

rect2931-7.png
 
Last edited:
I sketched this up one night, tracing some of Shaw's work, and basing it off of what he called the 'conjectural hanging edge structure' - perhaps the undercut we saw on the show/the model was supposed to be a hanging edge, not a huge cutting into?

I've thought about this very idea over the years. It would make sense, not cutting all of that "undercut" space out.

Interesting work. I look forward to keeping an eye on this. :techman:
 
Yeah, that would make a lot more sense (and those thicker decks have room for horizontal turboshafts, which should be taller than the corridors) :bolian:

Edit: Of course, Havoc92's avoiding shortcuts, modeling from the established plans... and the results are already jaw-droppin' awesome!
 
Last edited:
I like how you're focusing on the 'business-end' of things with this starship =).

Re-undercut: Maybe you could under-exaggerate it, and get back some usable space?
I sketched this up one night, tracing some of Shaw's work, and basing it off of what he called the 'conjectural hanging edge structure' - perhaps the undercut we saw on the show/the model was supposed to be a hanging edge, not a huge cutting into?

(This sketch would be for a ship greater than 947ft...)
(The red were parts I was proposing water/liquid/gas tankerage and life support sub-systems)

rect2931-7.png

It's a good idea; but, I'm left torn between "by the book" and interpretation. That for me goes too far into interpretation. I hate the humps. And they present a particularly onerous problem specifically in the engineering section.

I've had to work and rework the area to come up with a solution that I can stomache and I think my final solution has turned out to be pleasing at least to myself. Ya'll haven't really seen it.. yet. I'll be posting it later. I'd originally built steps to the approaches to engineering and raised the whole floor. That doesn't work for me. It made me mad having to do it. So I changed it. Now the alcoves next to the lift entrance are on risers with steps leading up.

progress_060910_00.jpg

progress_060910_01.jpg


IMHO, it works pretty well and I'm pleased with it. Just hope something can be done with the other spaces where I'm anticipating a lot of loud verbalizations in the near future..
 
Hull skins removed. Trimming complete. Doors added. And some pics..

progress_061310_03.jpg


Main floor with walls and doors in place.

progress_061310_04.jpg


Level 2 floor and maint.

progress_061310_01.jpg


Everything. Everything. Everything...

progress_061310_02.jpg


And another view..

Engineering section trimout completed and ready for detailing. On to the Shuttlebay!
 
Been a couple of days. And a lot of work is done. The cleanup work continues as I pear down the decks of the secondary hull and build the shuttlebay into it's own level. The decks have been seperated again into three primary parts - floor, walls and lift tubes. The poly count has been drastically reduced in the process.

progress_061610_02.jpg


This shows decks 18, 19 and 20 in place. There are a few decks left to trim out yet; but, at the rate of one per day, it's moving slowly.

progress_061610_01.jpg


Deck 18 aft is essentially done at this point; but the foredeck still needs work. And that's what's taking so long. I'm not simply cutting out the shuttlebay, I'm doing the low poly cleanup now in conjunction with seperating out these major sections.

More to come. ;)
 
Ooooookay!

Well, vacation starts tomorrow, officially; but, I unofficially started two days ago. So..

Wireframe shots this time round..

progress_062210_01.jpg


Ok, here's a 3/4 aft view of the interior as it is now. The observation platform kindof stands out. And it should after all the work I put into
detailing at this point. Fewer polys and more detail.. still befuddles me.

progress_062210_02.jpg


Here's a side shot showing more of the work to the observation platform. The door sections here are temps until I decide if they're actually going to work with all the geometry. And, so far, this is as close to what aired on TV as I can actually get to with the FJ plans.. So far.
I'm still tweaking and trying to do more; but to
say the show sets won't fit the deck plans is an
understatement.

progress_062210_03.jpg


Here you can see the lighting systems in progress along with the support booms. Been dying to get to these; but, hadn't had a real chance till now..

progress_062210_04.jpg


.. and this, in part, is why. Or rather..


progress_062210_5.jpg


..this. The deckplans show the structural bulkheads; but, I don't think FJ knew what he was drawing about. The spine is essential and should be structurally reinforced; so, he went that far; but, how they actually fit the model is quite another thing. They don't really seem to.

The pretty lines represent structural beam work, jeffries accessway and the routing of the tie ins for the warp core and the ship's primary power grid. Methinks a trip down the road of building the structural support core is probably warranted at this point. That starts tonight.
 
Early start this morning. Here's the result of last night's venturing into building some of the ship's structural spars. Lots of work for this small amount; but, worth it.

progress_062310_00.jpg


Back to work.. ;)
 
This whole thread is really starting to annoy me. I'm starting to hate on it.

But for a good reason. It looks so... REAL. Like... like... it can EXIST -- and I could walk through it.

WAHHHH!!!!!!

I wanna walk through it! :(


Keep up the good work. :)
 
I've been a fan of sci-fi movies and television for most of my 34 years, and of all the ships that I've watched, the TOS Enterprise is the one that I've most imagined exploring. Franz Joseph's blueprints helped me to do that to an extent not possible on the TV show, and your 3D rendition of those blueprints have literally added another dimension to those drawings. Great job. Keep up the great work!
 
This is a fascinating thread. But now that structural supports have started to be introduced I have to ask the question - could it actually work? I mean, assuming a strong enough material, would the "hoops" approach actually have enough rigidly to keep the ship together? Sorry, my mind works in unfriendly ways! :)
 
This is a fascinating thread. But now that structural supports have started to be introduced I have to ask the question - could it actually work? I mean, assuming a strong enough material, would the "hoops" approach actually have enough rigidly to keep the ship together? Sorry, my mind works in unfriendly ways! :)

Unfriendly, not at all ;) And not an unwelcome question. The discussion of this at scifi meshes started with me tweaking a little over the fact that the bulkheads bolstering the nacelle support pylons essentially cut off access to the jeffries tube.

The hoops are essentially the first step in building a framework; There are no crossmembers in place.. no floor joists, etc.
I don't know if they work. They're a long way from done; but, I needed them even if incomplete to troubleshoot other problems.
And that's ultimately what I'm up against now.. fully. FJ drew pretty pictures; but, I keep finding myself having to edit his plans in order to make them work. aggrivation.. lol
 
Status
Not open for further replies.
If you are not already a member then please register an account and join in the discussion!

Sign up / Register


Back
Top