wait a minute, what is that other game?
Is that...............is that 3D Checkers?!?! OMG‼‼

I've never noticed that before!
What's next? 3D tic-tac-toe??
Yes, the 3D Tic-Tac-Toe will be next--but first, the 3D Checkers.
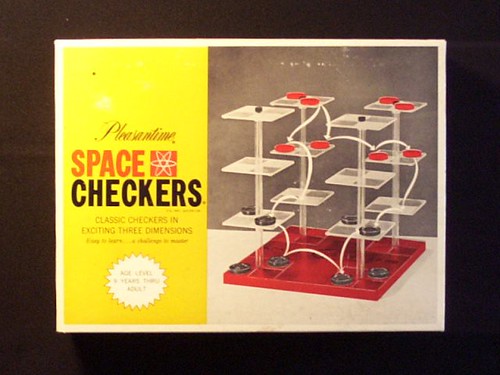
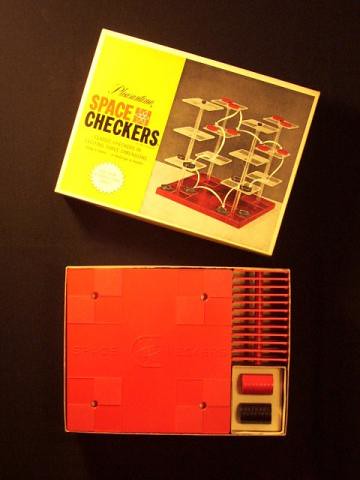
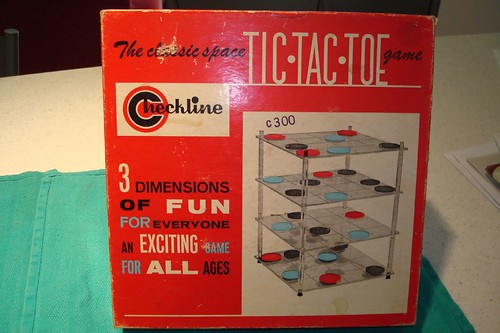
In 1965, the Pacific Game Company (also called Pleasantime Games) of North Hollywood, California began to produce and market a game that they called
Space Checkers.
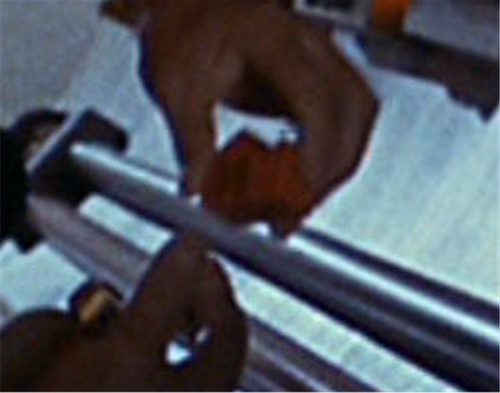
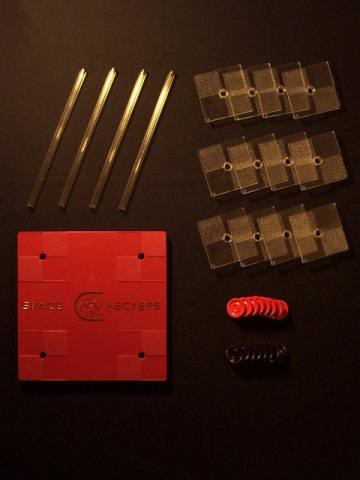
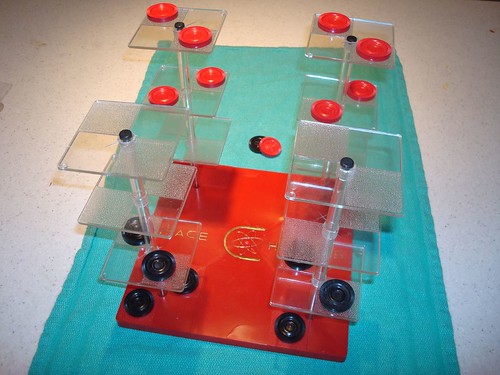
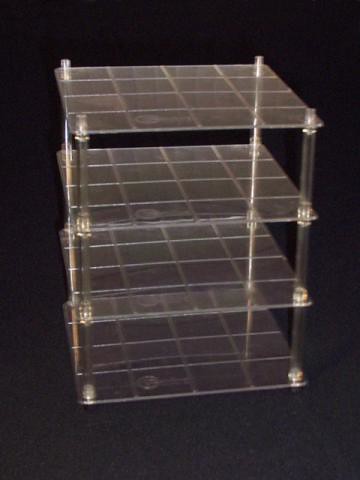
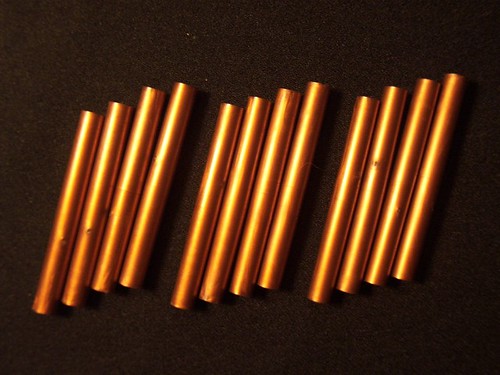
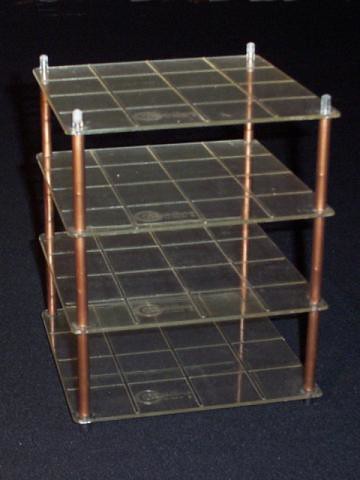
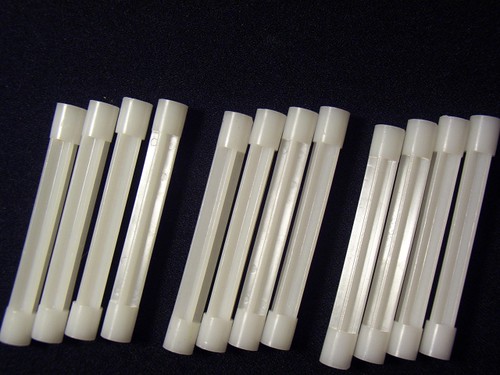
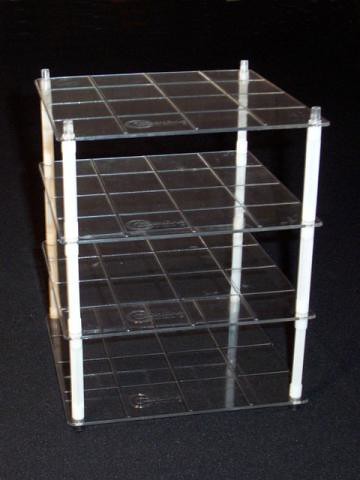
The Space Checkers game came with a large base, twelve small boards, four long spacing tubes, four small black end caps and sixteen checkers (eight red and eight black).
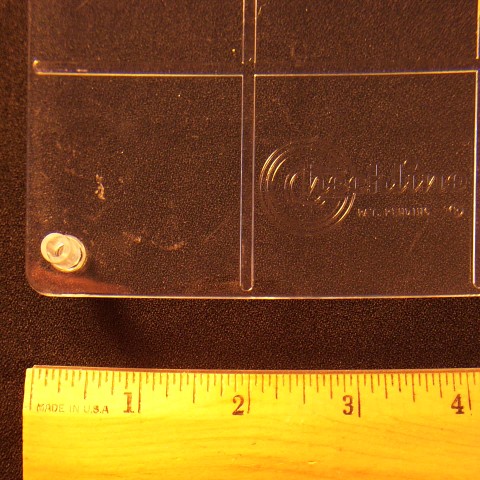
The large base is 8.95 inches by 8.95 inches and 0.52 inch high, molded in opaque red styrene plastic with a raised, gold-painted logo.
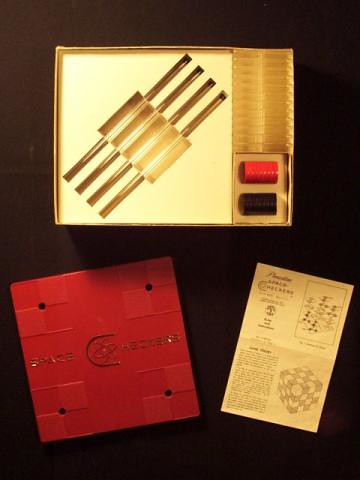
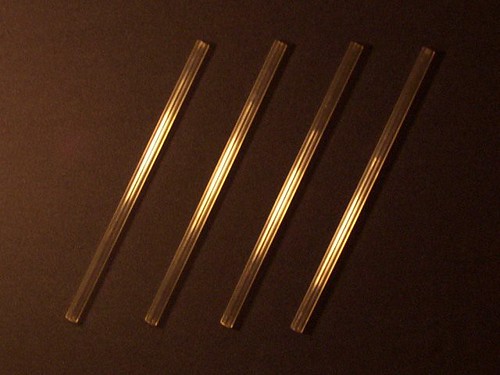
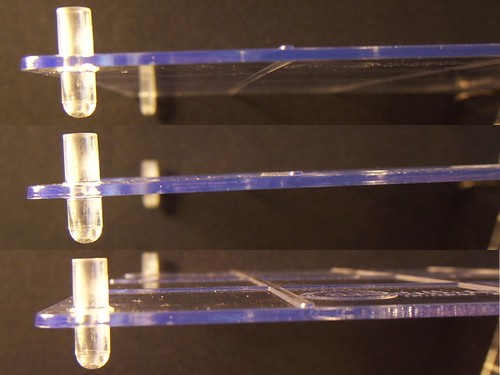
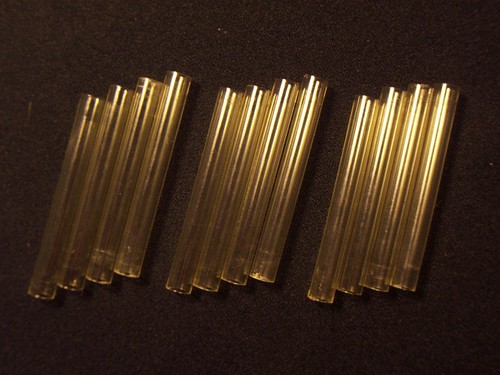
The spacing tubes are 8.94 inches long, with an outer diameter of 0.375 inch and an inner diameter of 0.220 inch.
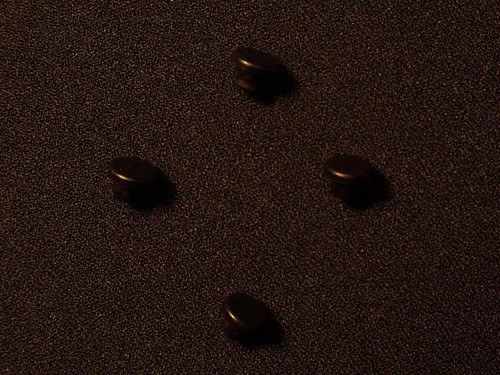
The four black end caps are designed to fit onto the top ends of the vertical spacing tubes.
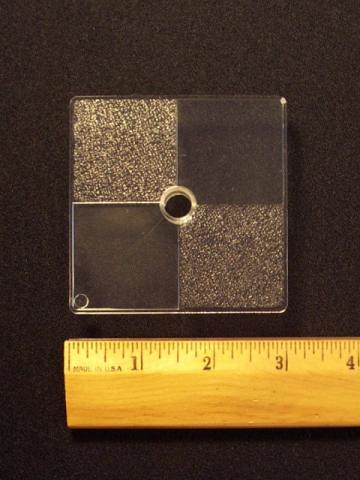
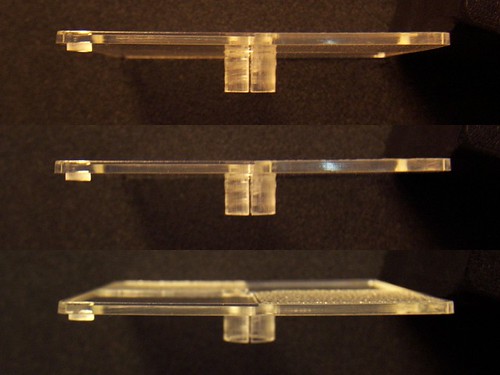
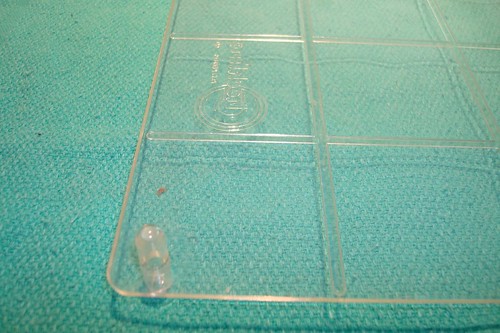
Each small board is 3.00 inches by 3.00 inches. Discounting the width of the narrow rims around the outer edges of the small boards, a chess or checkers player would probably consider the small boards as having one-and-a-half-inch squares.
Each small board has an overall thickness of 0.100 inch, including the rim around the entire perimeter of the board. The rim is 0.050 inch wide. The "white" squares are full-thickness, with a fine rounded-pebbling texture on the top. The "clear" squares are 0.070 inch thick; the top surface is slightly recessed below the rim. The hole in the center of each board is 0.375 inch in diameter.
The bottom of each small board is smooth, with two exceptions. One is the obvious "split collar" at the center. This collar is designed to grasp a spacing tube with a "friction fit." The two halves of the collar are molded at a slight angle, narrowing the opening at the bottom of the split collar to 0.370 inch but allowing the two halves of the collar to flex apart to the full 0.375 inch when slid into a spacing tube.
The second feature on the bottom of each small board is a small 0.185 inch diameter circular “nub” that hangs 0.050 inch down under the outer corner of one clear square, 0.050 inch from one edge and 0.070 inch from the other. There is no apparent purpose for this circle, and yet it seems to be a deliberate feature of the design, present on every board.
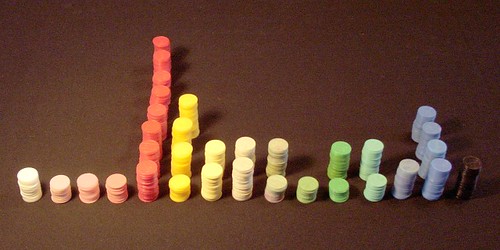
The checkers are 1.18 inches in diameter and 0.215 inch thick, with serrated 0.125 inch wide rims that nest when the pieces are stacked. Each piece is molded with concentric circles decorating one face and a crown on the other.
When fully assembled for a Space Checkers game, the squares alternate textured/clear in all three directions, left/right, forward/back and up/down. The game instructions indicate that the pieces play entirely on the textured squares, starting at opposing edges.
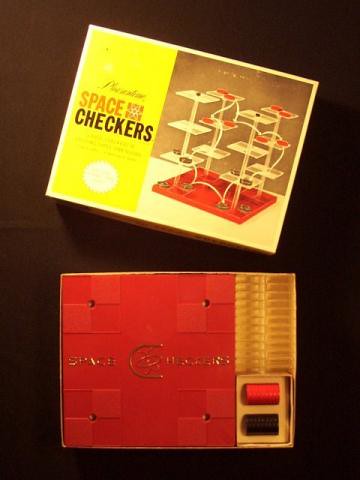
In the rare, early releases of the game, the twelve small boards were molded in clear styrene plastic. It is these clear, small boards that appear in the photo on the original box cover. In later releases, the Pacific Game Company switched to molding the small boards in the same opaque red plastic used for the base, even though the box cover photo continued to erroneously show the original clear small boards. (
Caveat emptor.)
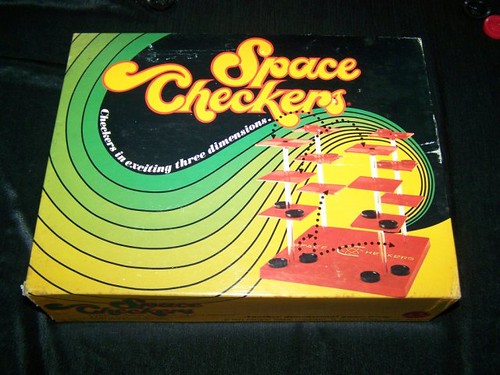
At some point after that, the Pacific Game company simplified their manufacturing even further by no longer using gold paint on the raised lettering of the large red base.
In 1971, the box cover was completely changed to feature new "mod" artwork and the photo on the box cover was changed to reflect the all-red boards.
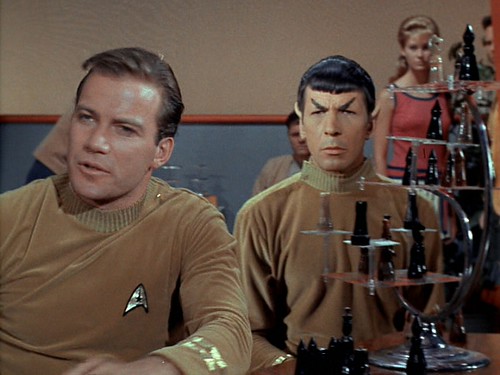
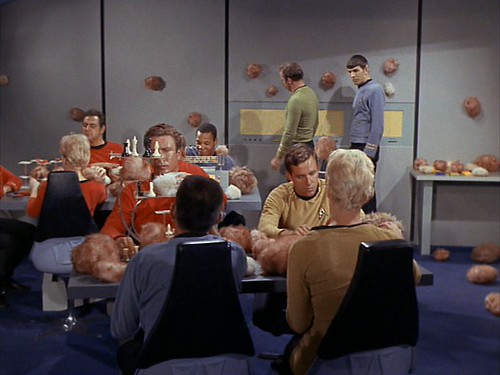
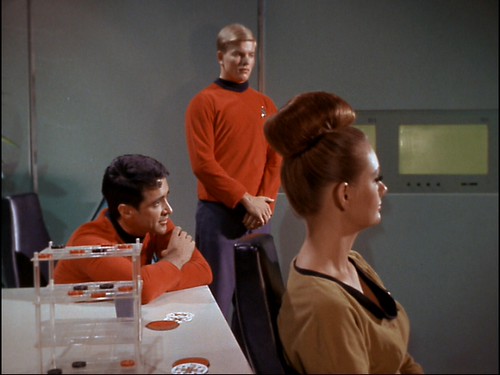
Space Checkers makes its first appearance on-camera in "Where No Man Has Gone Before" (Episode 02). It is being played by the two extras behind
Mister Spock in the Briefing Lounge.
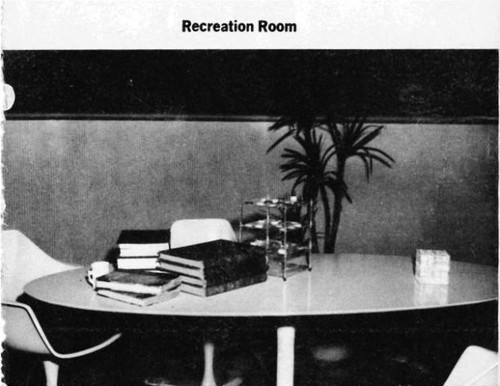
Space Checkers can be seen on-camera in all three seasons. During the first two seasons, there are occasionally two sets of Space Checkers in the same Recreation Room scene.
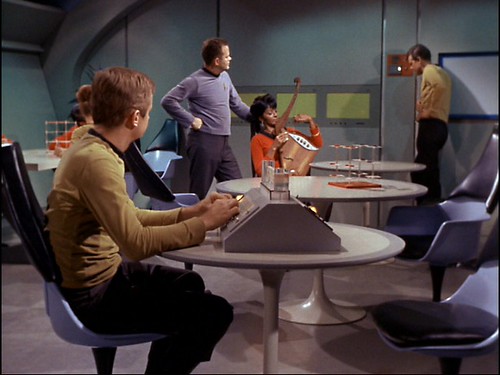
It can be seen in "The Naked Time" (Episode 06) in the Recreation Room:
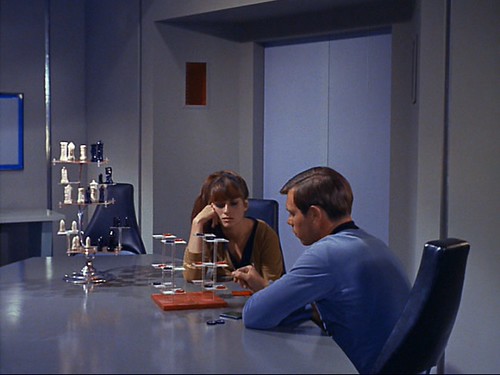
It can be seen in "Charlie X" (Episode 07) in both the Recreation Room and in the extreme foreground in the Briefing Room:
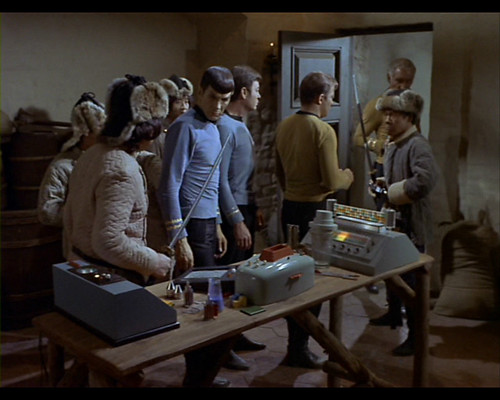
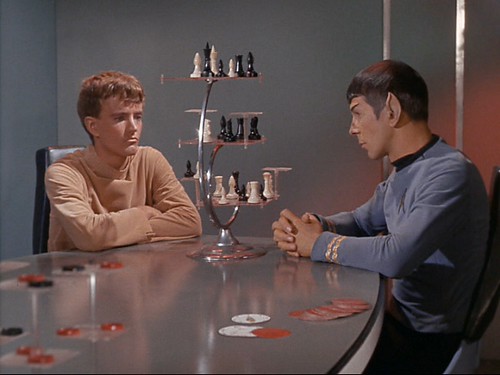
It can be seen in the Recreation Room in "The Conscience of the King" (Episode 12)--where you can also make out the 3D Tic-Tac-Toe set at screen left:
It can be seen in "The Alternative Factor" (Episode 19):
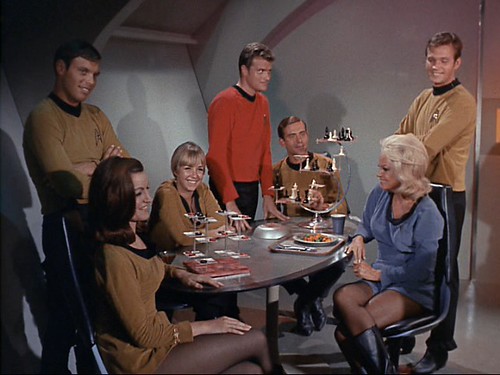
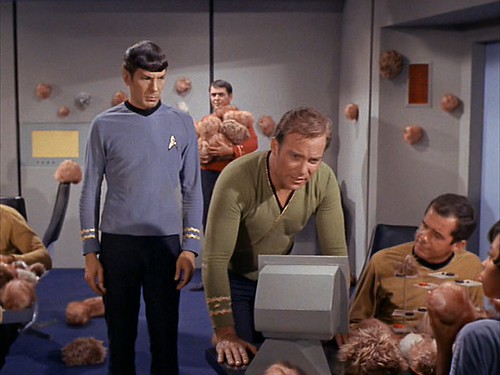
It can be seen in two places in the Recreation Room in "The Trouble with Tribbles" (Episode 42)—at screen left in the first shot and at screen right in the second shot:
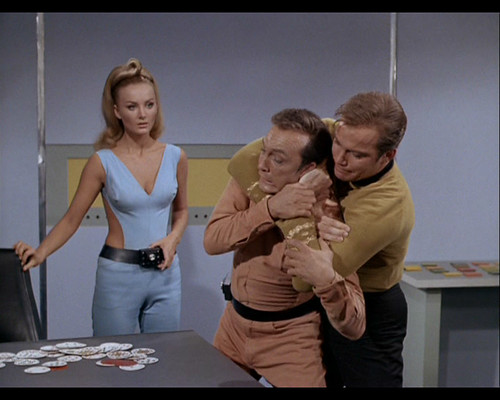
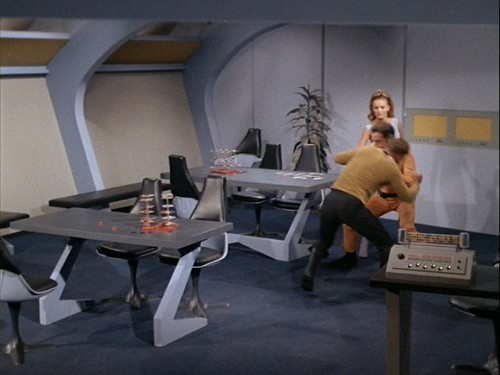
Two of them can be seen in the Recreation Room in "By Any Other Name" (Episode 50), where both game sets of Space Checkers get destroyed (rather spectacularly) during a fight between Captain Kirk and the Kelvan Rojan.
It can be seen ‘way over at screen left in "The Mark of Gideon" (Episode 72):
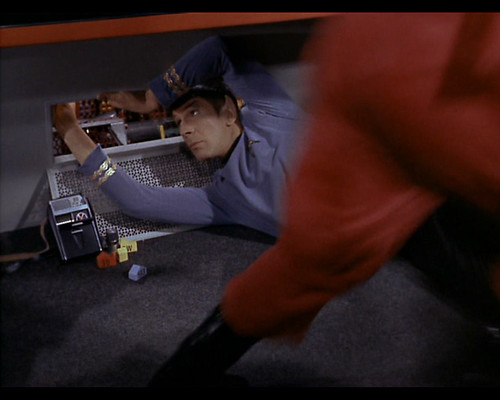
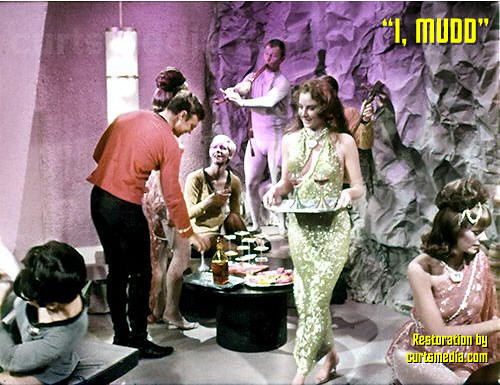
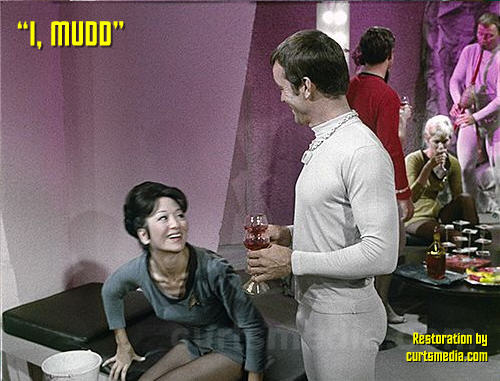
Lastly, there is a "cutting room floor" appearance of the Space Checkers in an unused "Party Scene" that was filmed for "I, Mudd" but not ultimately included in the final cut of the episode.
There's nothing that just
screams crazy out-of-control wanton revelry like Space Checkers!
I say "lastly," but the truth is there was one other appearance. In the
Star Trek: Deep Space Nine episode "Trials and Tribble-ations," Benjamin Sisko and Dax are inserted into the scene in the Recreation Room in "The Trouble with Tribbles"--the same scene in which we've already seen two sets of Space Checkers. For these "inserted" scenes, Sisko and Dax can be seen playing Space Checkers. (A keen eye can make out that this is actually not a vintage Space Checkers set. Rather, it is a reproduction of a Space Checkers set apparently made by the studio. The sizes and colors of the various components are just a little "off.")
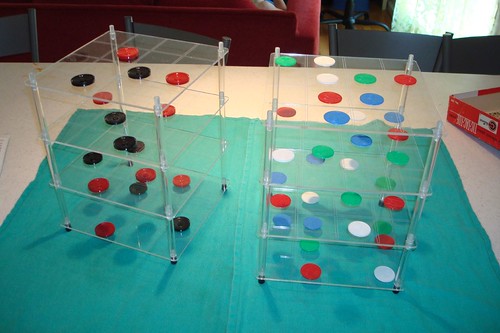
At any rate, here are my two sets of Space Checkers. The first set is the
proper set, with the
clear smaller boards. This is the style used in
Star Trek. These are notoriously hard to come by.
This other set is
not used in
Star Trek. It has the incorrect red small boards rather than the proper clear ones. These are easy to come by on ebay (but, of course, aren’t
Trek-accurate).
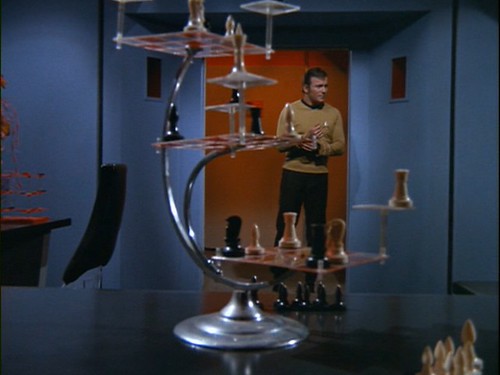
It bears mentioning that the
Three Dimensional Chess Set we see throughout
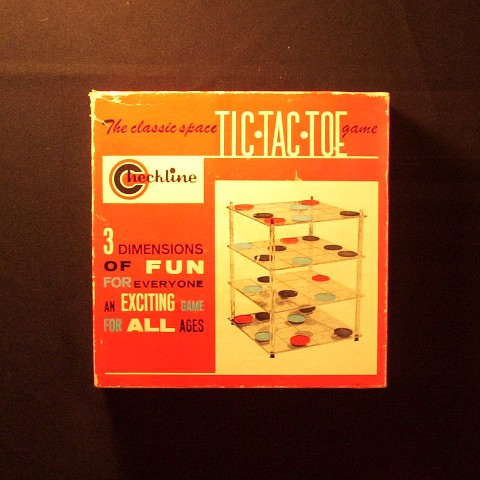
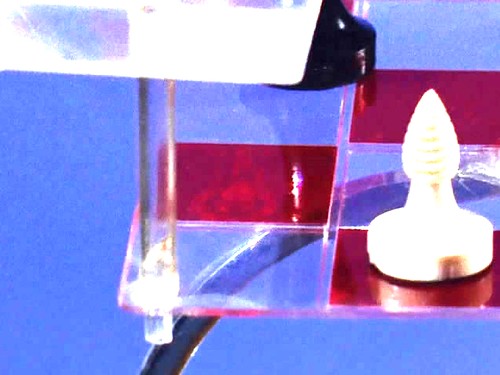
Star Trek was put together by cannibalizing parts from basically two different games. The larger, main boards of the Three Dimensional Chess Set are pulled from the "Checkline" 3D Tic-Tac-Toe game set. The smaller, movable "attack boards" are pulled from one of these "Space Checkers" game sets.
For those who might be on the look out for such a Space Checkers set on ebay--beware: as I indicated above, just because the cover of the box shows clear smaller boards, the game set inside might very well contain the (incorrect) red boards. So you can’t rely on the box's artwork.
So the next time we have a Recreation Room scene, keep your eyes peeled in the background for this prop.
Slideshow is at:
http://flickr.com/photos/10901121@N06/sets/72157608722638071/show/
(My sincere thanks to CompaniaHill at the Trek Prop Zone forum for his wonderful research and write-up of this prop.)