• Welcome! The TrekBBS is the number one place to chat about Star Trek with like-minded fans.
    If you are not already a member then please register an account and join in the discussion!

David’s Stargate Stuff

20210301_ShowcaseSG1_002.jpg

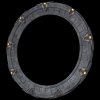
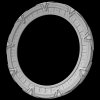
I've drawn and extruded the SG-1 version of the inner ring glyphs. There are a couple other variations visible, as well. Some (but not all) of the patterns on the outer rim are rotated 180 degrees from their orientation on the movie version. I also noticed I misaligned the row of large blocks above the glyph track. That's been corrected on the movie version, as well, but I'm not going back and re-rendering all those images again.

20210301_ShowcaseSG1_000.jpg 20210301_ShowcaseSG1_001.jpg

I decided to keep the chevrons and wings in the arrangement they had on the movie version, rather than moving the chevrons higher and the wings closer together (and drooping), as they were when on the SG-1 setpiece. I'll make that change on the Atlantis version, though, since for that one, the slots the chevrons were mounted in were smaller, and other aspects of the setpiece were realigned to fit with the higher chevrons.

And now we come to the whole reason I keep making stargate models, the point of origin symbols. This image has the official origin symbols used on the show and licensed tie-ins.

Origin_Official_Sampler.jpg

There are two versions of the Abydos symbol because we only saw it on the actual stargate once, on a laptop screen in the original cut of the pilot, where it was tiny, off-center, upside-down, and squished horizontally (even I have my limits). I think this looks silly, but it wasn't hard to do with what I already had, so I threw it in. The "behind the scenes" version is based on how the symbol appears in a glyph panel supposedly from the production of the show. While I don't think it was ever used on-screen, in size and orientation, it's a lot more like how you'd expect the glyph to look, so I consider that the "default" Abydos ring, and the other version an alternative for canon hardliners.

The "Phoenix Site" and it's associated origin symbol are from the upcoming Stargate SG-1 tabletop RPG from Wyvern Gaming.

Next up, more origin symbols, based on the movie versions of the glyphs I've already made. There are about 15 other planets that have had visible origin symbols on the show, but they were all one of the normal "address" glyphs, so I figure having new glyphs (or repurposed movie glyphs) that are based on the ones used by the show is a fair compromise, plus that leaves another 24 that can be used for any other arbitrary planets. Or people could just do the sensible thing and rotate the ring so the origin symbol is below the ramp and can't be seen. Anyway, once that's done, I'm going to start doing lighting and surfacing tests for the chevrons, see what techniques look best and render fastest. Then comes texturing, rig up some setup and demo scenes, then the Atlantis 'gate so I don't have time to forget how I did everything, then, either effects or environments.
 
I'm about finished with the SG-1 gate, though I'm still running the lighting-test animation for that version, so I'm holding off on putting together all the images to post before it's done. I've also got some housekeeping I want to finish up, rigging the model for animation and packaging it for download, but hopefully I'll be able to get all that done over the next week.

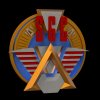
I did do a little quicky side project the other evening, the SGC logo plaque from the briefing room. Joseph Mallozzi, who was a writer and producer on the TV shows, has been posting high-res behind-the-scenes photos, concept art, and documents since the shows were still on the air, and recently posted a construction diagram of the plaque, which made it pretty easy to model in only an hour or two, most of which was spent squinting at the measurements and comparing with some photos of the finished plaque to see how things changed between the drawing and the actual piece.

There was also a 3D rendered version used on the show as a screensaver and decorative element on computer displays which was colored differently, so I made both versions. I didn't sweat getting the textures exactly right (and there were some shape differences with the digital version I didn't bother changing), just going for the spirt instead of a perfect duplicate. The gaudy '90s texturing is pretty rough, and now we've entered a glorious era where flat color in CGI actually look okay. And, looking at it now, it looks like I should've gone with a darker gray on the physical one, and that the inner sides of the chevron are gold, and that's not just reflections from the lights inside the plaque. Well, I'll fix it for next time. I'll keep the old one so you can see the difference.

EDIT: And by next time, I meant "after lunch."

SGC_Plaque_Comparison.jpg

SGC_Plaque_Physical.jpg SGC_Plaque_Digital.jpgSGC_Plaque_Physical.jpg
(The forum really needs a middle ground between full-screen and thumbnail.)

giphy.gif
 
Last edited:
I banked everything up, and now I have way, way too much to cram into one forum post. The SG-1 'gate is now finished, and all the details are up on my website. And I mean everything, we've got the model download, we've got orthos, we've got detail and lighting showcase renders in 5k, we've got turnaround videos, we've got dialing animations, we've got an entire separate blog post on how dialing works. It's nuts!

But, you're busy people, so here are some highlights so you don't have to click through.

SG1_Orthos_Sheet_1_half.jpg
20210309_ShowcaseSG1_002_on.jpg

The Stargate dialing using the canon method from the show.
To view this content we will need your consent to set third party cookies.
For more detailed information, see our cookies page.

The Stargate dialing the way everyone seems to expect it to dial, including several people who made the show, judging by how many times they mixed things up.
To view this content we will need your consent to set third party cookies.
For more detailed information, see our cookies page.

The lighting turnaround with the chevrons off
To view this content we will need your consent to set third party cookies.
For more detailed information, see our cookies page.

The lighting turnaround with the chevrons on
To view this content we will need your consent to set third party cookies.
For more detailed information, see our cookies page.
 
Had a bit of a loss of motivation as I realized the Atlantis stargate, while superficially similar to the Movie/SG-1 version, is actually almost entirely distinct. So, glass half full, I already know how to attack building the model, glass half empty, I have to make essentially the same model over again from scratch. But my mojo has been returning, and I got a shot in the arm yesterday seeing that my new model has been 3D printed by antediluviananimals. I think this is the first time something I've modeled has been 3D printed, and it was exciting seeing something I made in the real world.

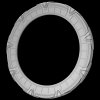
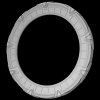
So, in these, you can already see several of the differences. For instance, the cross-section is different, the original gate is pinched on the inner edge, while the Atlantis version has a constant slope all the way down, so the inner rim is twice as wide (with two rows of emitter details), and also doesn't have the "lip" around it, but is flat from front to back. The chevrons sit higher up (actually a change from the movie to the SG-1 version, but I kept the movie arrangement in my SG-1 model because it aligned better). The "pills" and zig-zag lines on the inner edge, and the arches above the inner ring are aligned on a 711-segment radial division, rather than the 666-segment (spooky!) division. The patterns are also different (and you can't see it, but the front and back are rotated differently, with the half-height zig-zag point pointing vertically on the back). The grooves around the pills have extra cuts joining them with the circles that separate the groups of pills.

Up next, I'll be starting on what was my least favorite part of the prior versions of the model, the raised mosaic patters on the outer rim. Luckily, the pattern is a bit simpler and repeats three times on each segment between the chevrons, and the front and back are identical, so it'll only be about 2/9ths as much work. Hopefully I won't lose several months to it this time.

20210512_ShowcaseATL_002.jpg
20210512_ShowcaseATL_006.jpg
20210512_ShowcaseATL_000.jpg
20210512_ShowcaseATL_001.jpg 20210512_ShowcaseATL_003.jpg 20210512_ShowcaseATL_004.jpg 20210512_ShowcaseATL_005.jpg
 
The chevrons sit higher up (actually a change from the movie to the SG-1 version, but I kept the movie arrangement in my SG-1 model because it aligned better).

Now that you have the TV-accurate higher chevrons, any plans to retrofit them onto your SG-1 gate?
 
Now that you have the TV-accurate higher chevrons, any plans to retrofit them onto your SG-1 gate?
I'm not going to stop anybody who uses the model from scooching them up a bit to match the show if they prefer it that way, but like I said, I think the movie design looks better. Same with if someone wants make it so the chevrons on the back don't light up, or undo any of the other little tweaks I made to make the model a more perfect copy of the setpiece.

I'm keeping them moved up on the Atlantis gate because it seems like the designers took the opportunity of building it from scratch rather than out of salvaged parts to make the whole thing fit together more tightly, so there aren't any big seams or loose pieces that I can change without messing up something else. Like, I'm looking at a reference picture right now, and even as I imagine dropping the chevrons back down to align with the cutouts, I can see the whole row of dominos that would bring down, to the point where I'd basically be ending up with the location 'gate segment SGA inherited after SG-1 concluded that they repainted to look like a Pegasus stargate to get everything to still fit together.

NUP_130733_0094.jpg
Just including the photo I'm looking at because it's pretty rare view of an unusual angle at high resolution and doesn't seem to be online anymore. IIRC, it was part of a graphics kit the Sci-Fi Channel put up as part of a contest for fans to design a Stargate: Atlantis DVD box.
 
First of all, another appearance of my model in the wild: H. Keith Hamilton is using it in an animation he's making to show fan interest in a new Stargate show.

As I hoped, the mosaic tiles were much easier to trace out on this version of the gate, both due to their repetitiveness and due to a couple of extremely-clear reference photos. Unfortunately, while the chevron slot pattern is both symmetrical and identical on the front and back, there are no clear images of the bottom half of the rear slot (the part that's covered up by the glyph track on the front of the 'gate), so I had to make an educated guess based on what little I could make out. Not that it's visible in these images, since I haven't done any of the parts on the back yet. So, next up, the rear inner ring.

20210603_ShowcaseATL_002.jpg 20210603_ShowcaseATL_000.jpg 20210603_ShowcaseATL_005.jpg 20210603_ShowcaseATL_006.jpg
 
Last edited:
The rear inner ring is now complete, as are the "buttons" along the outer rim. I couldn't reuse the SG-1 version because the segments surrounding the chevrons were widened. I don't have a guess as to why. the rear ring also seems to have been moved outward slightly because of the wider inner rim, so it actually bulges out past the plane of the 'gate. It's a little tough to be sure, they hardly ever showed the rear of the setpiece on the show, and behind-the-scenes and auction photos are limited.

20210614_ShowcaseATL_009.jpg 20210614_ShowcaseATL_007.jpg 20210614_ShowcaseATL_013.jpg

I've also cleaned up the chevron blocks to fit correctly on the Atlantis version (at least, the exterior. The interior is kind of a mess, since I didn't want to remodel the whole block assembly from scratch and you're never going to see it since this version doesn't open, but still needed to rearrange it to fit with the more diffused internal lighting of this model of stargate. Early lighting tests are successful.

20210614_ChevLight.jpg

All this means major modeling operations are concluded. The last little thing up is carving the arcs. I already decided I was going to stick with the original design and have all nine segments have the same pattern of arcs, unlike the movie and SG-1 models, where I had the arcs vary over the entire ring. One of the reasons I did that is that the arcs were already continouous on the segments, by which I mean, the path of each engraving was interrupted by the line of arches, but continued on the other side. That's not the case on the Atlantis stargate, the arcs above and below the arches don't align (EDIT FROM THE FUTURE: Actually, it turns out all but one of them do align, the curves threw me off until I actually laid them out), so I couldn't do the same thing I did for the other versions even if I wanted to (at least, not if I wanted to preserve the canon pattern anywhere on the model).

Luckily, the more modern (or, if you're mean, lazy) construction of the Pegasus stargate saves me some trouble; the patterns on the front and back are identical. There are also no arcs on the glyph track in front. The arc patterns on the large rear inner ring segments between the chevrons seem to be the same as they are on the SG-1 version. The patterns on the rear inner ring segments surrounding the chevrons are different, and my reference for them is limited, but I can get close enough. And I think I took good notes on how I carved the arcs before, so it shouldn't be too much trouble. I'll be away from my main computer for a few days due to the California heatwave and my personal lack of A/C, but hopefully I'll be able to continue working on the model. I'm in the home stretch, after all, so I'd like to wrap up this year-long project.

Once the groves are in, then come the glyphs. The Pegasus symbols should be easy; it turns out, they're all based on one "superglyph" with different segments turned on and off (I suspect the original model used custom programmable LED arrays just behind the translucent inner ring). So all I need to do is model the superglyph once, and then delete the proper segments to make the 36 symbols (plus a few extras for non-Atlantis origins). I'm also planning to do the 38 Milky Way symbols in the same style (though not conforming to the superglyph), since theoretically, a big benefit of a "digital" stargate is that it could be moved and modify itself to reflect the local coordinate system.

And then will be texturing. I'll have to experiment to see if I can afford the render time, but I'd like to sandwich the glyphs between two layers of the inner ring, with the outer layer being translucent, to get some depth effects that go along with the geode-like appearance of the inner ring. The main body of the gate is two-tone, with the exterior being a lustrous polished silver, and engraved segments a dark gray, giving the effect that the entire 'gate was cast as one solid piece, and then the details were carved in, exposing the raw naquada under the surface, like it was an Apple laptop or something. Most of that can be done with judicious defining of surfaces, and I think I can clean up the interface between one texture and another nodally. I'd still like to stick with procedural textures.

And, there's a weird aspect where the chevrons seem to have been made of translucent plastic or rubber, with the recessed lights and the part extending over the glyph track being left bare, and the top half painted silver. That isn't complicated in theory, but it might take some fine-tuning and experimentation.

And once modeling, texturing, and rigging is done, what's next for the thread? Well, I could try the SGU 'gate, it's much more repetitive, so it could be a quick one. I'm also interested in doing some gate rooms and platforms so I can actually use these things in real pictures and animations, as well as a DHD (and power-pods, for space-gates), but honestly, I've been itching to doing some effects work. I've got ideas for recreating the flare when the 'gate opens and closes, the puddle, even the kawoosh and the movie-exclusive strudel.
 
Last edited:
I've finished engraving the arcs. I also got a tip from Julien Guyard, an artist who restores and crafts reproductions of Stargate props, about a recent auction listing for a piece of the original Atlantis stargate which had detailed photos of that one section of the back I had no reference material for, so I redid the lower half of the chevron slot and the grooves immediately to the left of it now that I could actually see what they were supposed to look like. These photos also gave me a better look at the paint job in neutral light and including sections that were supposed to be hidden, so I now realize there's a subtle bluish-purple (or purplish-blue) patina between the polished silver sections and the dark gray naquada color where the finish has worn away. Given the construction method suggested by the paint design, I'm tempted to make some sort of animation of the construction of a Pegasus stargate, starting with a cast "blank," and then showing all the engravings being milled out with lasers or some other kind of futuristic CNC machine.

20210630_ShowcaseATL_002.jpg 20210630_ShowcaseATL_009.jpg 20210630_ShowcaseATL_007.jpg 20210630_ShowcaseATL_011.jpg

I've started working on the "superglyph," and I've also researched the actual star patterns for the original 38 real-world constellations used on the Milky Way version of the stargate, to make the second set of glyphs to depict a Pegasus stargate being used in the Milky Way.
 
Last edited:
I like the idea of a rotating disk…maybe with weapons inlaid in the top of a saucer.

The old rotary stargates…
 
Here are the digital glyphs for the Pegasus Galaxy:
Pegasus_Digital_Glyphs.jpg

And the new digital Milky Way glyphs:
Milky Way Digital Glyphs.jpg

The last three symbols at the bottom-right are the "superglyph" all the Pegasus symbols are derived from and two new origin symbols I made from the superglyph. If I knew something about programing or scripting, it seems like it would be possible to make a simple program that would generate random symbols from the superglyph, so I could have a selection of potential origin symbols. But, I don't, so I'll just make them as I need them.

I went back to the actual constellations the Milky Way symbols are based on, though I tried to also keep them consistent with the original symbols (some of the connections made on the stargate symbols aren't the official lines drawn in the constellations). For some of symbols that were very different from the IAU depictions, I relied on this piece of production art, which helpfully compares the symbols as-drawn with the actual star patterns.

I'm out of stuff to procrastinate with, so it looks like I'm actually going to start digging into the texturing. I'm a little concerned about how this will turn out; the setpiece used very small, very bright lights under a translucent surface, and I've duplicated that arrangement, but I'm not sure how well it'll work in wider shots in a 3D render; the renderer actually has to hit the light element to see it, and if it's small enough, it won't matter how bright it is. I suppose I could render in layers, with the glyphs by themselves with much, much finer render settings (a trick I've used for fast-moving stars in animations in the past to prevent flickering), or I could make simpler versions of every symbol for distant shots.
 
ATL_Orthos_Half.jpg

ShowcaseATL_002_Out.jpg

I haven't quite finished all my lighting and animation demo renders yet, but I couldn't wait any longer to get this out into the world. The Pegasus Stargate is now up for download on my website, in Lightwave, FBX, and OBJ formats.

My computers will be tied up doing the rest of the rendering for a little bit, but once I get the chance, I'll be diving in (so to speak) with the puddle effect. I'm looking forward to using some of the features that didn't exist last time I tried to make it.
 
I'm a bit lost for words - this is astounding! I've been following your progress with the Stargate as I'm fascinated by both it and the associated technology. Your research and the level of detail is remarkable. :adore:
It was only when I was looking at some of your earlier posts that I realised that all the glyphs were based on constellations as I saw a few that I recognised (quite how I missed this when watching the film, I don't know?). So, I'm really happy that you've put up the digital Milky Way glyphs and that link to the production art. Thank you :)
 
It was only when I was looking at some of your earlier posts that I realised that all the glyphs were based on constellations as I saw a few that I recognised (quite how I missed this when watching the film, I don't know?). So, I'm really happy that you've put up the digital Milky Way glyphs and that link to the production art. Thank you :)

The Stargate wiki has a page on glyphs which has links to the Wikipedia pages for all 38 constellations, which might also be useful. I found the abbreviations "Mic" and especially "Cra" that they used behind-the-scenes a little inscrutable, personally.
 
After finishing my new Stargate model, I've started working on matching effects to go with them. Ideally, I'd like to have a full suite of effects for both the movie and TV versions, but at the very least, I'd like to match what I did in my last version in the 2000s and have a decent in-camera "puddle" effect.

I decided to start with the movie version. First, an example from the film. There were several shots of the puddle effect, but they were all pretty much from these two angles.

Puddle_Movie_Reference.jpg

The general effect seems to be a liquid mirror, combined with light shining through water. My first instinct was to try and do exactly that, using a spotlight and transparency, but I ran into a number of problems; in the PBR world, you can't have mirrored reflections without metalness, you can't have light refract through something without transparency, and you can't have metalness and transparency at the same time. So, then I tried for just getting the caustics being projected out from the puddle on to the surrounding set. More on that later, but suffice it to say, it also didn't work.

The next step was something I attempted on my prior 2000s model before coming up with a more universal solution, a spotlight pointed directly at the front of the puddle. This was a bit better, but from the side view, I noticed the highlights were exactly where they weren't in the reference image. Amazingly, stuff shining through water and stuff being reflected off water happens in exactly opposite parts of the ripples.

So then I decided to start cheating. And it worked! I used a Gradient node to define a certain section of slope from the ripple texture as bright white. The next issue was that the settings I was using for the side angle didn't work for the front, and vice-versa, but I was able to use Incidence nodes, clamps, and remaps to have the specific slope defined by the gradient shift depending on the angle of the camera. Then it was all just down to the fine-tuning.

I ran off a couple of test renders from both angles. One in a blank gray cube, one in an environment from HDRlabs. The trick is, both stargates in the movie are in very dark rooms, and that was the darkest interior HDR environment I have. I also used the Master Chief model from Halo 3 for scale and to give the puddle a human-shaped thing to reflect, since I don't have a James Spader model handy.

To view this content we will need your consent to set third party cookies.
For more detailed information, see our cookies page.

Looking at it, the first thing I'm going to fix is to ramp down the strength of the bump map towards the edges. Luckily, since that's entirely separate from my fake highlight effect, I can dial it down to get the reflections to look more accurate to the movie without damaging the main part of the effect, the highlights.

The puddle here is flat white, while in the movie, it has a bit of a blue cast. I'm pretty sure that's just grading and the color of the lighting in the rooms the 'gate is in, and it's supposed to be a neutral mirror. On the other hand, the on-set interactive lighting definitely seems to be blue, so maybe I'll give it just a tinge so it isn't perfectly neutral gray.

Then there are the bigger issues. The thing that bothers me the most is that, with the way Lightwave's Ripples procedural works, and the speed of the ripples in the movie, the pattern repeats three times a second. I'd like to introduce more randomness into it. I'm not sure if there's another procedural I could be using, either built-in or a plug-in (maybe I should try one of these, I never got around to loading them in to LW2020) or if I should just layer in some more procedurals to break it up.

I'd also like to be able to get the interactive ripples when something passes through the puddle automatically, but I have no idea how to make that happen. Ideally, it'd respond to actual geometry, but another idea I had is for a texture that generates ripples of a given size and speed when properly-named nulls are close to the surface of the object. If worse comes to worse, I can just cheat it, pre-making some kind of splash-map in After Effects or something and layering it in to the texture, but it feels so gross to have to save a different version of an object every time I use it in a shot.

Once I get those resolved, or become tired of trying, the next thing should probably be the interactive lighting being projected out from the stargate. On set, this was simply a spotlight being reflected off shaking mylar. I'd like to do something a little more elaborate. On my old Stargate model, I actually had a great success using a dummy object, a spotlight, and caustics.

To view this content we will need your consent to set third party cookies.
For more detailed information, see our cookies page.

Unfortunately, that broke with a subsequent Lightwave update. The effect stopped animating properly, instead of that lovely multilayered swirl, it just sort of flickered inward, like the animation had been set too fast and it was doing every cycle in less than a frame. Like video of a helicopter.

Anyway, my goal is to match that effect. I got exactly nowhere in my first tests, with the spotlight shining through seeming to be totally unaffected by my rippling puddle object. I made a separate scene to play with after reading over this thread, an inside-out cube with the top face set as my test "water" texture, trying to dumb things down to the bare minimum to achieve the sunlight-in-a-swimming-pool effect. Didn't have much success either, though I got something recognizably caustic-y on the walls of the "pool" that were closest to the surface of the water. Something interesting I did note was that I was having trouble seeing the practical difference between the light refracting through the transparent polygon with the basic renderer versus when caustics were active under the GI tab. Each seemed to be trying to give the same effect in different ways.
 
View attachment 21098

I've drawn and extruded the SG-1 version of the inner ring glyphs. There are a couple other variations visible, as well. Some (but not all) of the patterns on the outer rim are rotated 180 degrees from their orientation on the movie version. I also noticed I misaligned the row of large blocks above the glyph track. That's been corrected on the movie version, as well, but I'm not going back and re-rendering all those images again.

View attachment 21099 View attachment 21100

I decided to keep the chevrons and wings in the arrangement they had on the movie version, rather than moving the chevrons higher and the wings closer together (and drooping), as they were when on the SG-1 setpiece. I'll make that change on the Atlantis version, though, since for that one, the slots the chevrons were mounted in were smaller, and other aspects of the setpiece were realigned to fit with the higher chevrons.

And now we come to the whole reason I keep making stargate models, the point of origin symbols. This image has the official origin symbols used on the show and licensed tie-ins.

View attachment 21101

There are two versions of the Abydos symbol because we only saw it on the actual stargate once, on a laptop screen in the original cut of the pilot, where it was tiny, off-center, upside-down, and squished horizontally (even I have my limits). I think this looks silly, but it wasn't hard to do with what I already had, so I threw it in. The "behind the scenes" version is based on how the symbol appears in a glyph panel supposedly from the production of the show. While I don't think it was ever used on-screen, in size and orientation, it's a lot more like how you'd expect the glyph to look, so I consider that the "default" Abydos ring, and the other version an alternative for canon hardliners.

The "Phoenix Site" and it's associated origin symbol are from the upcoming Stargate SG-1 tabletop RPG from Wyvern Gaming.

Next up, more origin symbols, based on the movie versions of the glyphs I've already made. There are about 15 other planets that have had visible origin symbols on the show, but they were all one of the normal "address" glyphs, so I figure having new glyphs (or repurposed movie glyphs) that are based on the ones used by the show is a fair compromise, plus that leaves another 24 that can be used for any other arbitrary planets. Or people could just do the sensible thing and rotate the ring so the origin symbol is below the ramp and can't be seen. Anyway, once that's done, I'm going to start doing lighting and surfacing tests for the chevrons, see what techniques look best and render fastest. Then comes texturing, rig up some setup and demo scenes, then the Atlantis 'gate so I don't have time to forget how I did everything, then, either effects or environments.
Nice!
If my computer wasn't such a piece of ████ i would be modeling this too!

Please let me know if there are any references for Origin Symbols for any of the following (my own searches had no luck):
https://stargate.fandom.com/wiki/Asdad
Ba'al's outpost
Asdad was a planet where the System Lord Ba'al experimented with gravity technology. It has one moon.
https://stargate.fandom.com/wiki/Hak'tyl_ll
Following Moloc's death on Hak'tyl ll, Ba'al claimed his domain and forces as his own. (SG1: "Sacrifices")
https://stargate.fandom.com/wiki/P2X-887
P2X-887 was a planet in the Milky Way formerly controlled by the Goa'uld Anubis. SG-1 went there in the hopes that Anubis had left behind advanced technology. Ba'al made it appear that he had captured SG-1 and offered Brigadier General Jack O'Neill to return them in exchange for Camulus. However, SG-1 was simply trapped in Anubis' base on the planet, without any technology. SG-1 eventually escaped after Camulus was sent to Ba'al, but managed to evade Ba'al's Jaffa. (SG1: "Zero Hour")
Any planet controlled by Ba'al.

Great job you've done with these! Love it!
 
If you are not already a member then please register an account and join in the discussion!

Sign up / Register


Back
Top