-
Welcome! The TrekBBS is the number one place to chat about Star Trek with like-minded fans.
If you are not already a member then please register an account and join in the discussion!
You are using an out of date browser. It may not display this or other websites correctly.
You should upgrade or use an alternative browser.
You should upgrade or use an alternative browser.


Thanks!
The whole model has been extremely nerve racking in the fact that I knew that if I made a mistake, I couldn't afford to fix it in the relatively near future. So a lot of what you see is me avoiding problems rather than attempting things I would have wanted. When I'm in a better position to take some risks, I'll experiment with a few things I opted to set aside for now.
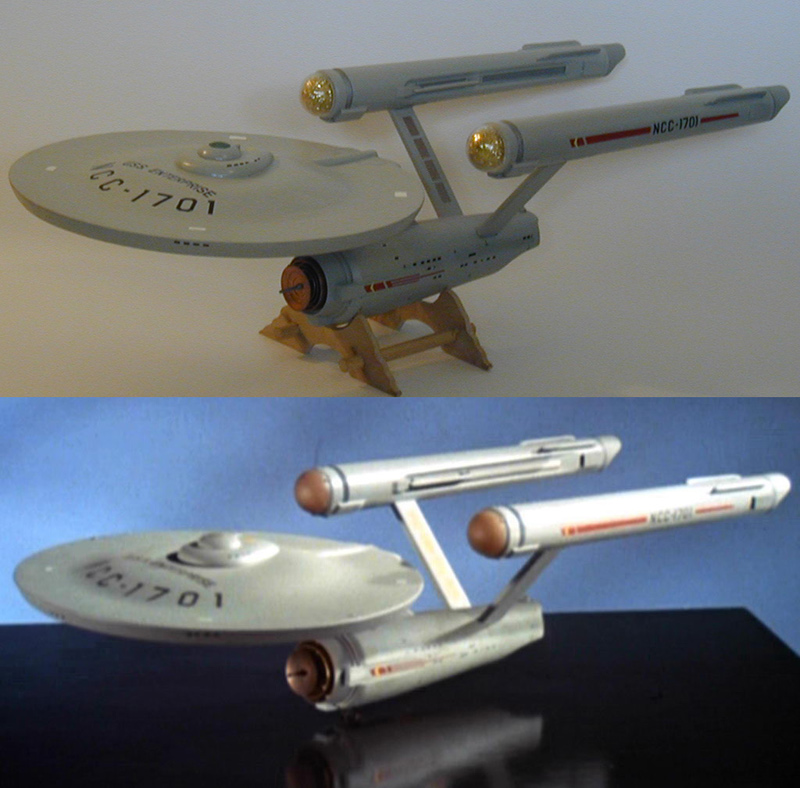
A last set of images from before I disassembled her to finish up on the nacelles. In these I have her next to the Constellation (which is basically the stock 22 inch kit).
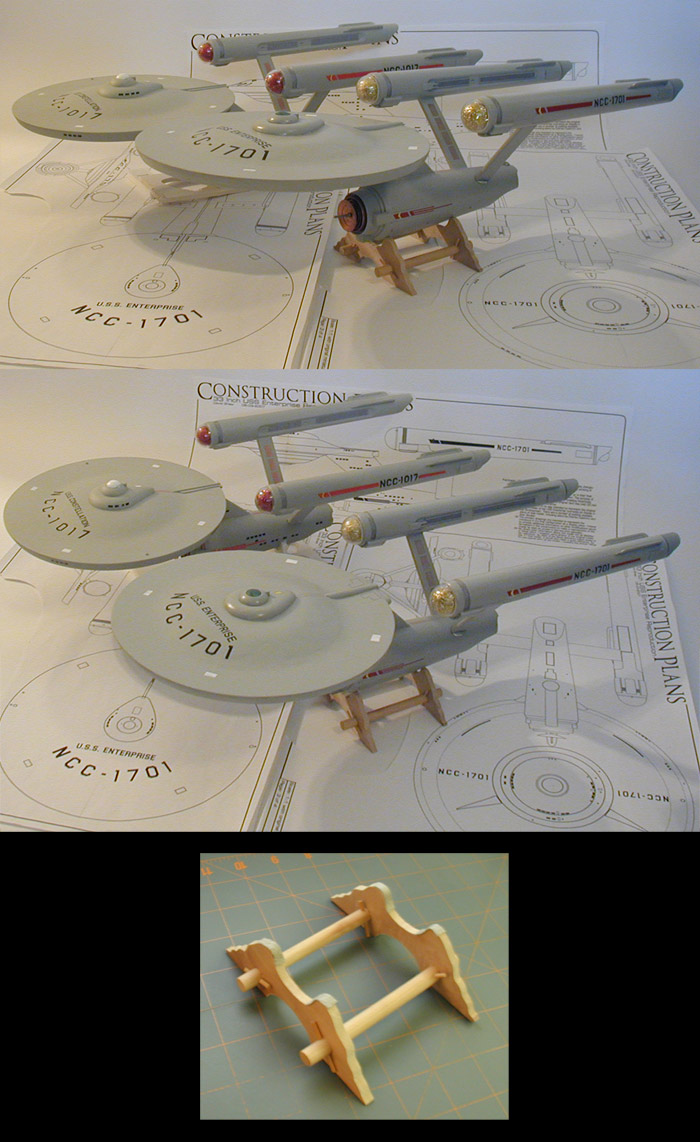
These I'm leaving unpainted... but also unattached. They will be removable and replaceable, so I plan on having a variety eventually.Are you planning to coat the nacelle caps with a clear red, or will you leave them unpainted?
The whole model has been extremely nerve racking in the fact that I knew that if I made a mistake, I couldn't afford to fix it in the relatively near future. So a lot of what you see is me avoiding problems rather than attempting things I would have wanted. When I'm in a better position to take some risks, I'll experiment with a few things I opted to set aside for now.
A last set of images from before I disassembled her to finish up on the nacelles. In these I have her next to the Constellation (which is basically the stock 22 inch kit).
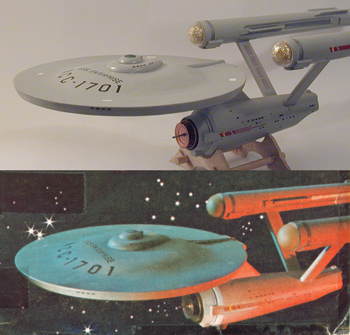
The top looks right but I'm not sure the curve is right on the bottom of the saucer but it could be an optical illusion in your photos.
I always got the impression the tapering bottom 33" model looked like it had been pressed as if a scoop of mashed potatoes under a heavy pan, leaving a bit wider surface for the lower sensor dome to attach to.
Keep it up, though! Great work!
I always got the impression the tapering bottom 33" model looked like it had been pressed as if a scoop of mashed potatoes under a heavy pan, leaving a bit wider surface for the lower sensor dome to attach to.
Keep it up, though! Great work!
Great work there Shaw
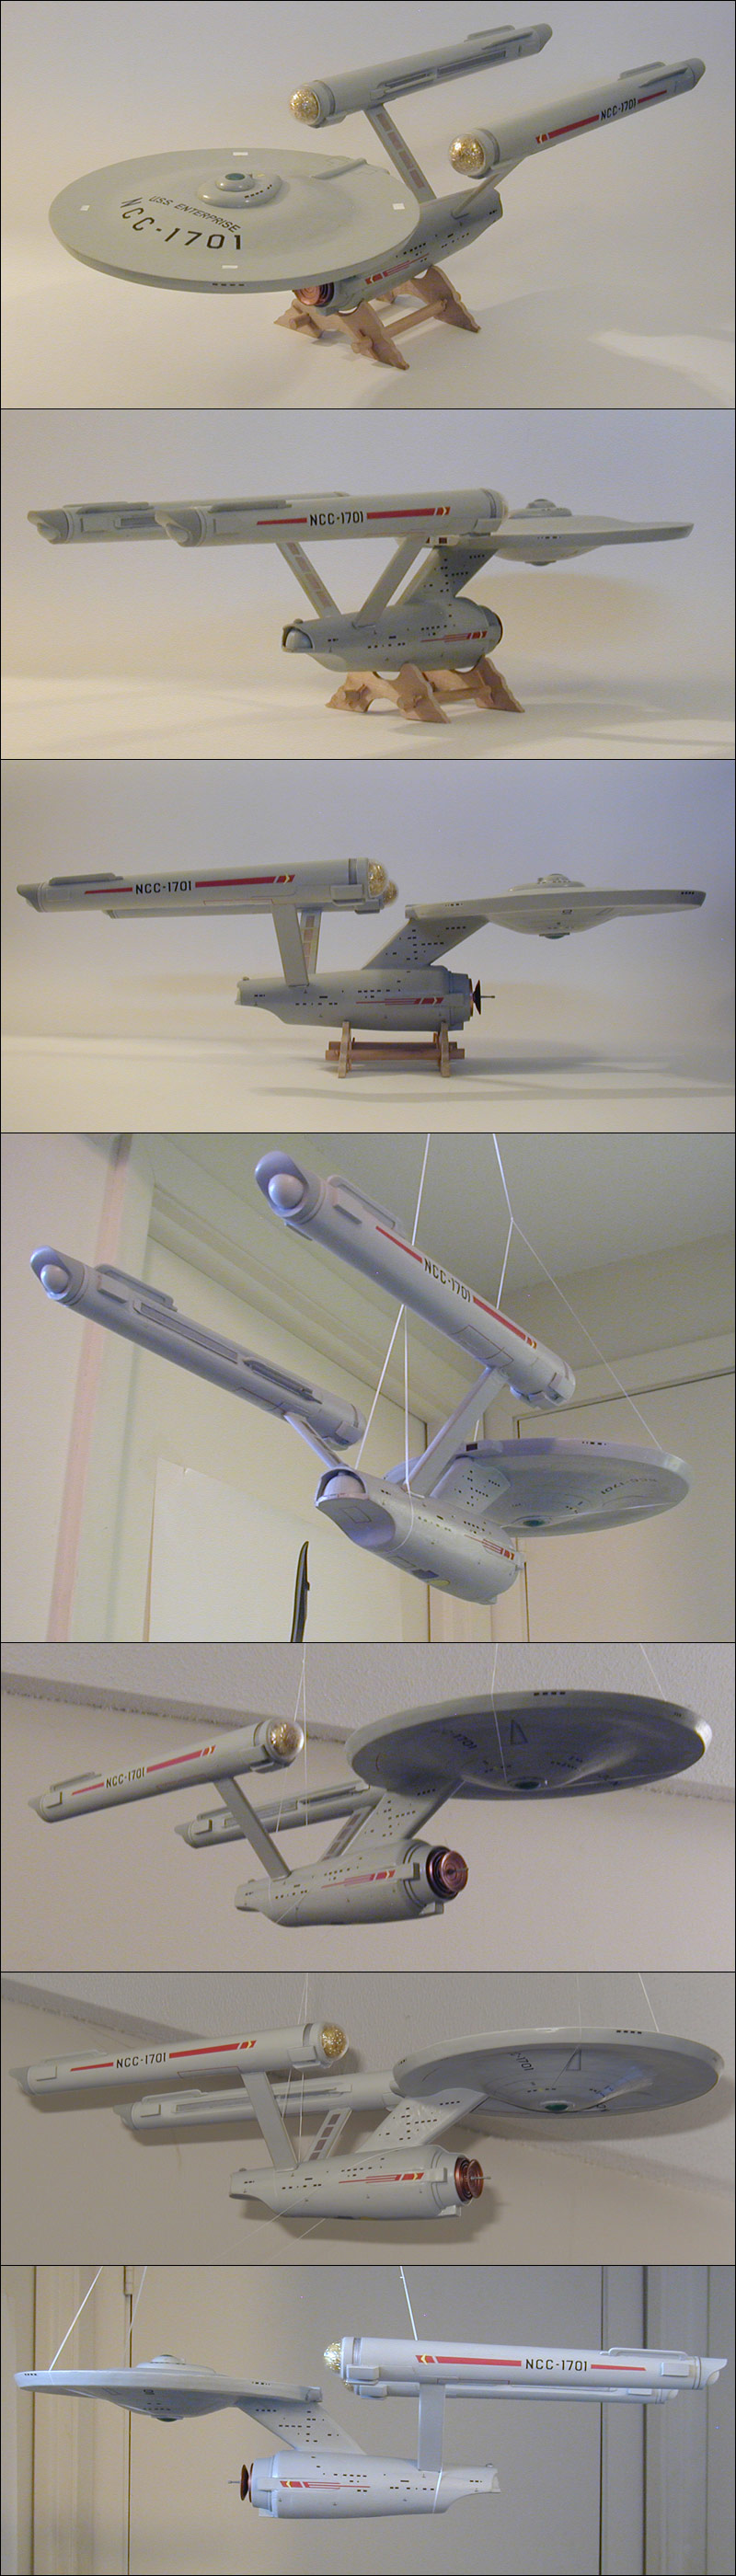
Heh. Yeah, love the stand. As long as it doesn't shake too much, right?Top notch as always, Shaw. I also really love that display stand.")
")
So this is pretty much the finished model... I figure I'll make another attempt at this model (at the same scale) in a few months applying what I learnt while building this one.
Shaw,
I absolutely love your ship!
I absolutely love your ship!
That is some gorgeous modeling, Shaw... well done!
It looks like a fine piece of work to me, Shaw.
Now you need to take it outside and photograph it against the sky.
Thanks Guys!
Most of the compromises I made while building this model stemmed from a lack of experience (and lack of confidence in my abilities). There are a number of things I would do differently when making another attempt... specially now that I'm pretty sure I could accomplish them.
Most of the compromises I made while building this model stemmed from a lack of experience (and lack of confidence in my abilities). There are a number of things I would do differently when making another attempt... specially now that I'm pretty sure I could accomplish them.
So yesterday I went to show a friend the comparison shots of my model and found that I hadn't posted them here (which was the easiest thread to find on someone else's system)... sorry about the over sight. 
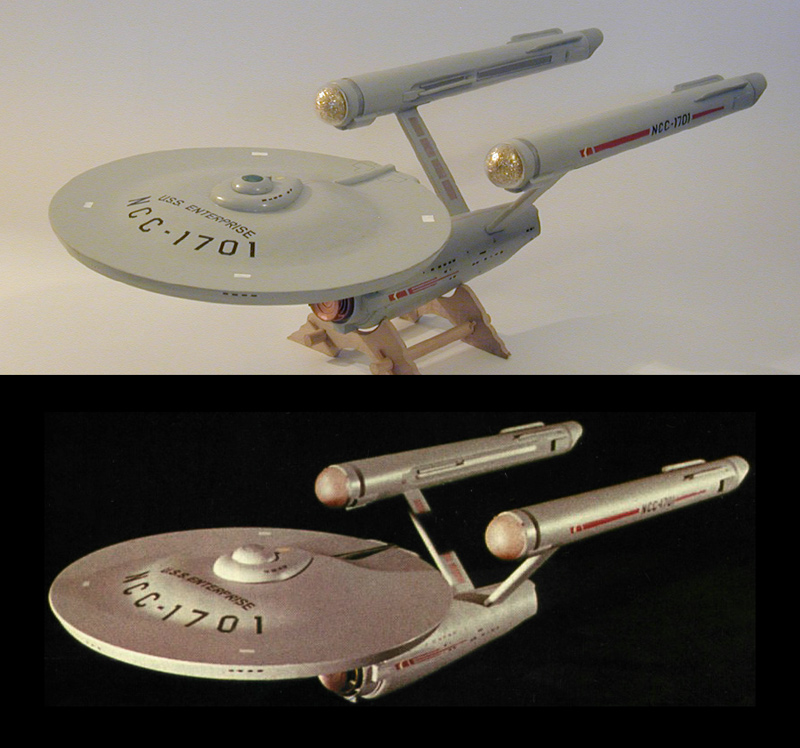
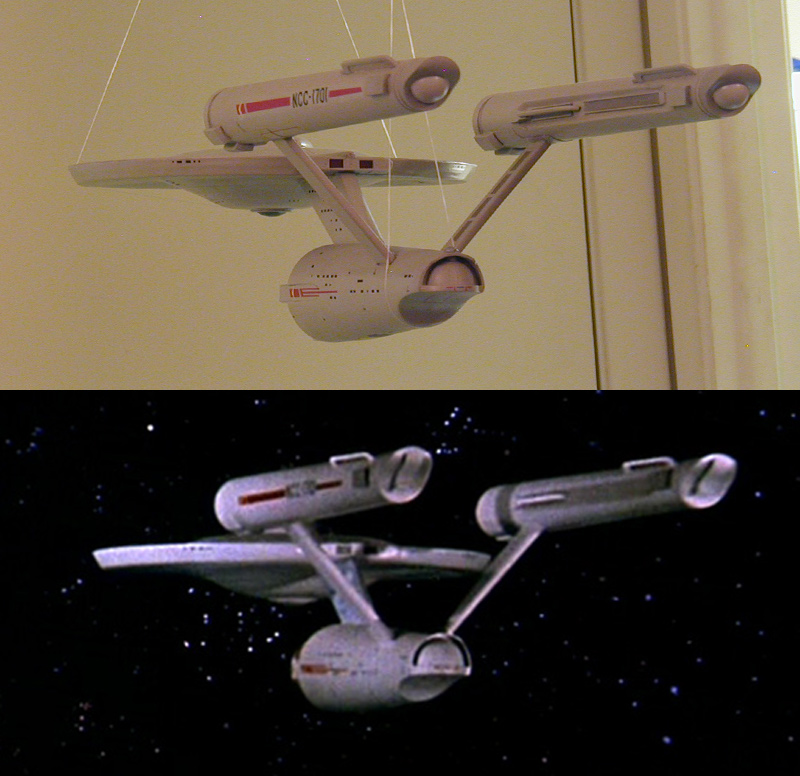
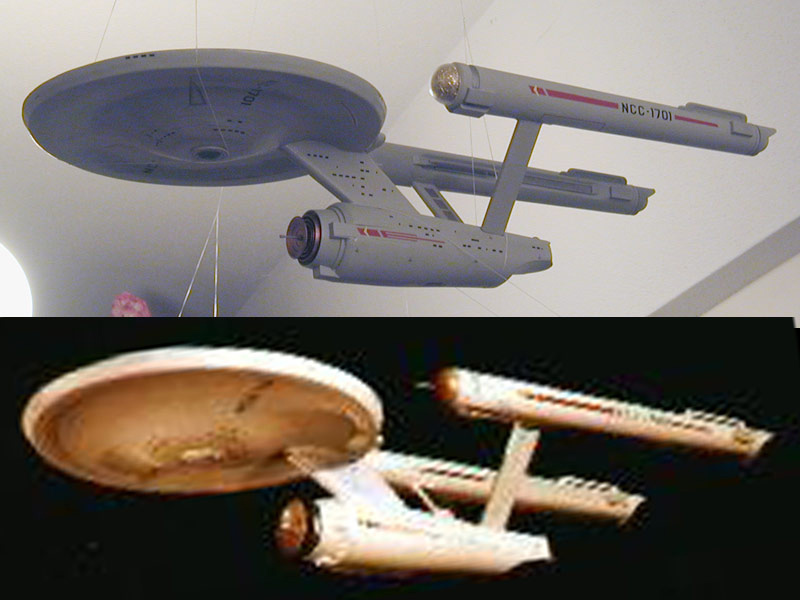
I've been planning out a future second attempt at this model. I figured the best way to evaluate how I did on this one was to set the model side by side with the original 33 inch model (or at least some of the images we have of that model). Even though this type of comparison tends to highlight the shortcomings of my modeling skills, I figure each new build should learn from the mistakes of the previous ones.

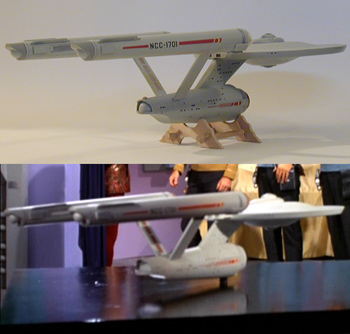


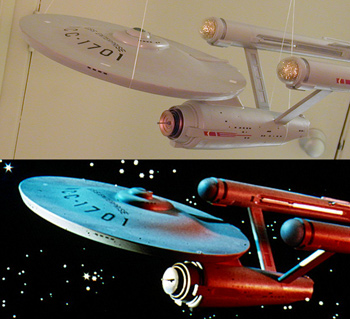
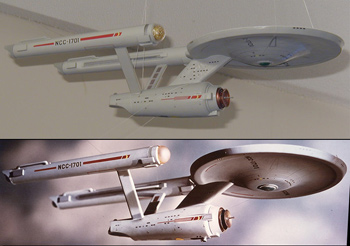
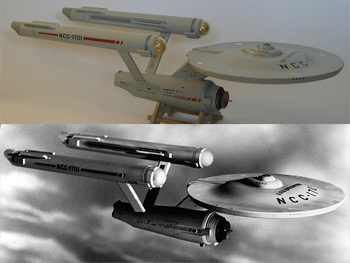

Some of the angles don't match up exactly, but they should be good enough for comparison purposes. And the shots of the 33 inch model are from throughout it's production life, but the overall physical shape of the model didn't really change much (other than after it was dropped between the second and third seasons... which effected the nacelle alignment).
I figured as long as I had put the images together, I may as well share them. And I think looking at them I've come up with some good strategies for improving on this one (beyond just improving my basic model building skills).
I've been planning out a future second attempt at this model. I figured the best way to evaluate how I did on this one was to set the model side by side with the original 33 inch model (or at least some of the images we have of that model). Even though this type of comparison tends to highlight the shortcomings of my modeling skills, I figure each new build should learn from the mistakes of the previous ones.


Some of the angles don't match up exactly, but they should be good enough for comparison purposes. And the shots of the 33 inch model are from throughout it's production life, but the overall physical shape of the model didn't really change much (other than after it was dropped between the second and third seasons... which effected the nacelle alignment).
I figured as long as I had put the images together, I may as well share them. And I think looking at them I've come up with some good strategies for improving on this one (beyond just improving my basic model building skills).
If at first you don't succeed, try, try again.

Words to live by (specially if you make a lot of mistakes like me).
I've cut out six of the eight pieces of foam core board that will be used for my second attempt at a two-thirds scale replica of the 33 inch Enterprise's primary hull. And I've started gluing them of those together.
As I stated earlier in this thread, on my first attempt I wasn't sure how to proceed towards making the primary hull and dorsal, so I got started on modifying the rest of the pieces and built foam core board stand-ins so I could judge how the model was working during test assemblies. I eventually experimented with the stand-in pieces which became the final pieces of my first attempt. But because they started as stand-ins and because I wasn't sure of what I was doing, my primary hull was less than perfect (which is why I didn't even venture an attempt at making a casting of it).
This time, armed with experience and some better ideas, I hope to end up with a primary hull and dorsal that are worthy of using as masters.
I'm hoping to finish far quicker than before (like within a month and a half) as I won't be worrying as much about how to proceed at each step of the way. Plus it isn't like I don't already have a nice model, so there is significantly less pressure over screwing up.
I had considered attempting a one-to-one build rather than another two-thirds attempt, but when I rolled out the larger plans I realized just how much bigger a model it would be (specially when I couldn't find a place where I could completely roll out the plans flat). So I'll have to figure out a solution to that issue at some later date.
Here are some of the steps I've taken so far...
Gluing some of the pieces together (the lower primary hull pieces).
I took more care in the cutting of these than before and I'm taking extra care in keeping everything as flat as possible,
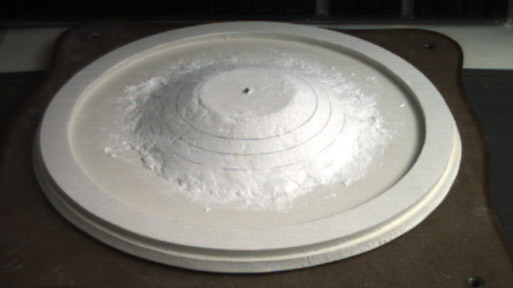
Start of sculpting the curves of the lower primary hull. I'm reducing the amount of sculpting (by taking many more steps in the build up) so to take greater care on symmetry this time.

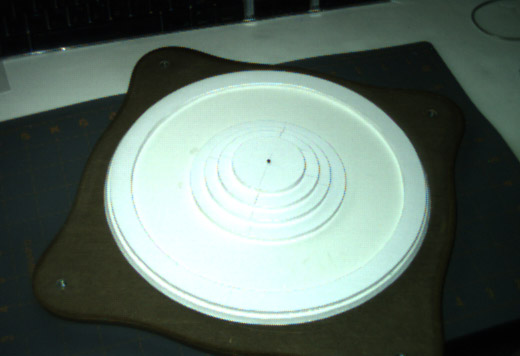
I did some sanding and used a compass to draw a number of rings on the surface. These ring should look like straight lines when viewed from the sides and should help in identifying errors.
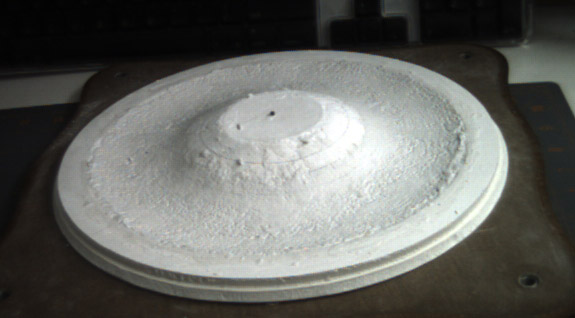
I started filling in the undercut. One of the issues of the stuff that I'm using to build this part (AMACO Sculptamold, which is a cellulose-based paper maché) is that it tends to stick to any porous/non-smooth surface... like fingers. Additionally, fingers aren't the best tool for creating uniform curves. My solution was to cut the top off a 2 litre Coke bottle and use that rounded surface as a sculpting tool. The stuff doesn't stick to the surface of the plastic and seems to be giving me a much nicer shape.
Another issue with the first attempt was that the primary hull started warping... and not in the Star Trek sense. The original was totally assembled from all the foam core board pieces before I had started sculpting the surface. So the water in the paper maché effected the flatness, and because both sides were raised, there wasn't really a surface to flatten it against. Plus I only noticed the warping quite a ways into the process.
Because the underside require so much more work, I haven't even attempted to add the pieces to the top and have it set on a small board which helps keep it flat. Currently I have a plastic bowl with holes in it that has the same diameter of the outer flat area (around 9 inches) set on top while drying... plus a 5 lb. weight on top of that. I figure that should keep it flat while it dries and cures.
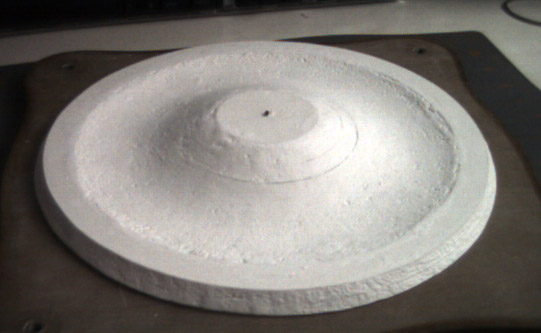
Couple more progress pics... more surfacing and sanding (and checking the curves).

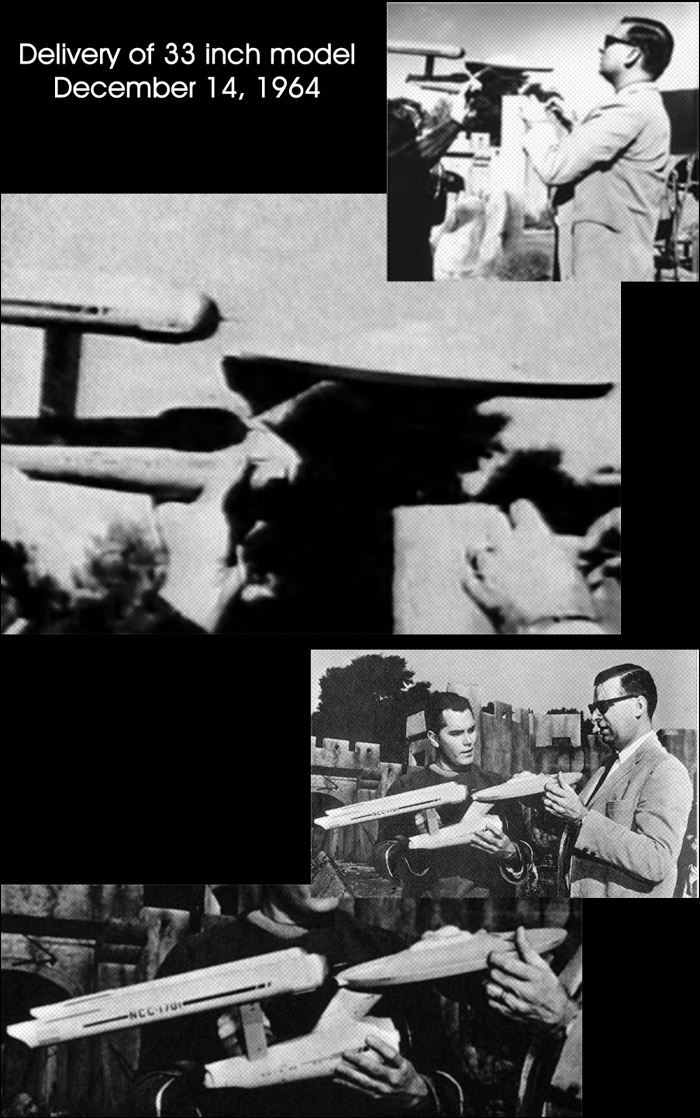
And on a similar topic... I didn't want to over look this date. 45 years ago today (December 14th) the 33 inch model was delivered to Roddenberry while The Cage was being filmed in Culver City.
Words to live by (specially if you make a lot of mistakes like me).
I've cut out six of the eight pieces of foam core board that will be used for my second attempt at a two-thirds scale replica of the 33 inch Enterprise's primary hull. And I've started gluing them of those together.
As I stated earlier in this thread, on my first attempt I wasn't sure how to proceed towards making the primary hull and dorsal, so I got started on modifying the rest of the pieces and built foam core board stand-ins so I could judge how the model was working during test assemblies. I eventually experimented with the stand-in pieces which became the final pieces of my first attempt. But because they started as stand-ins and because I wasn't sure of what I was doing, my primary hull was less than perfect (which is why I didn't even venture an attempt at making a casting of it).
This time, armed with experience and some better ideas, I hope to end up with a primary hull and dorsal that are worthy of using as masters.
I'm hoping to finish far quicker than before (like within a month and a half) as I won't be worrying as much about how to proceed at each step of the way. Plus it isn't like I don't already have a nice model, so there is significantly less pressure over screwing up.
I had considered attempting a one-to-one build rather than another two-thirds attempt, but when I rolled out the larger plans I realized just how much bigger a model it would be (specially when I couldn't find a place where I could completely roll out the plans flat). So I'll have to figure out a solution to that issue at some later date.
Here are some of the steps I've taken so far...
Gluing some of the pieces together (the lower primary hull pieces).
I took more care in the cutting of these than before and I'm taking extra care in keeping everything as flat as possible,
Start of sculpting the curves of the lower primary hull. I'm reducing the amount of sculpting (by taking many more steps in the build up) so to take greater care on symmetry this time.
I did some sanding and used a compass to draw a number of rings on the surface. These ring should look like straight lines when viewed from the sides and should help in identifying errors.
I started filling in the undercut. One of the issues of the stuff that I'm using to build this part (AMACO Sculptamold, which is a cellulose-based paper maché) is that it tends to stick to any porous/non-smooth surface... like fingers. Additionally, fingers aren't the best tool for creating uniform curves. My solution was to cut the top off a 2 litre Coke bottle and use that rounded surface as a sculpting tool. The stuff doesn't stick to the surface of the plastic and seems to be giving me a much nicer shape.
Another issue with the first attempt was that the primary hull started warping... and not in the Star Trek sense. The original was totally assembled from all the foam core board pieces before I had started sculpting the surface. So the water in the paper maché effected the flatness, and because both sides were raised, there wasn't really a surface to flatten it against. Plus I only noticed the warping quite a ways into the process.
Because the underside require so much more work, I haven't even attempted to add the pieces to the top and have it set on a small board which helps keep it flat. Currently I have a plastic bowl with holes in it that has the same diameter of the outer flat area (around 9 inches) set on top while drying... plus a 5 lb. weight on top of that. I figure that should keep it flat while it dries and cures.
Couple more progress pics... more surfacing and sanding (and checking the curves).
And on a similar topic... I didn't want to over look this date. 45 years ago today (December 14th) the 33 inch model was delivered to Roddenberry while The Cage was being filmed in Culver City.
Wow! Now there is a day to remember! When was the 11 footer delivered?And on a similar topic... I didn't want to over look this date. 45 years ago today (December 14th) the 33 inch model was delivered to Roddenberry while The Cage was being filmed in Culver City.
Similar threads
- Replies
- 25
- Views
- 10K
- Replies
- 43
- Views
- 12K
If you are not already a member then please register an account and join in the discussion!