Constitution Class Refit (High Resolution model)

Discussion in 'Fan Art' started by Viper, Mar 18, 2019.

  1. Donny

    Donny Commodore Commodore

    Joined:
    Mar 13, 2008
    Location:
    Los Gatos, CA
    Hmm. I dunno if that flatness is accurate. There's definitely a curve towards the forward end, although I could see how someone does think it's flat because it does appear to flatten out towards the aft end from some angles.
    [​IMG]
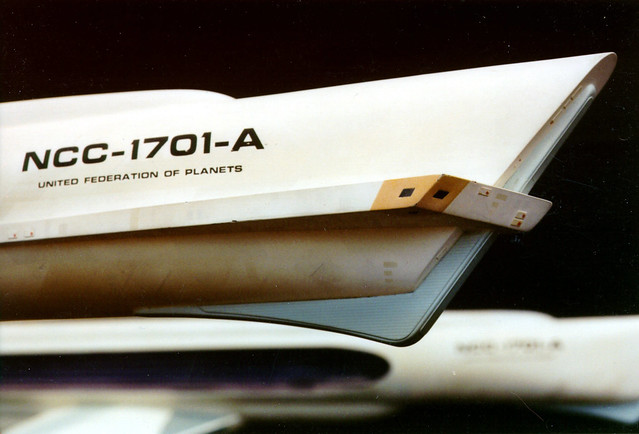
    However, I would say the slits of the inner nacelle grille do appear they need to be wider on Viper's model, unless he was purposefully departing from the studio model
     
    Last edited: Apr 10, 2019
    137th Gebirg likes this.
  2. Viper

    Viper Commander Red Shirt

    Joined:
    Mar 11, 2019
    It's definitely curved all the way. And yeah, I think you are right about the spacing. I'll add that to the list of corrections :)
     
  3. Viper

    Viper Commander Red Shirt

    Joined:
    Mar 11, 2019
    Meanwhile, got through most of the decals tonight:
    [​IMG]
    [​IMG]
    [​IMG]
     
    Michael, TOMFAN, Kaelef and 13 others like this.
  4. Tallguy

    Tallguy Rear Admiral Rear Admiral

    Joined:
    May 2, 2005
    Location:
    Beyond the Farthest Star
    That close up of the torpedo (torpedoe?) launchers is lovely.
     
    Viper likes this.
  5. Donny

    Donny Commodore Commodore

    Joined:
    Mar 13, 2008
    Location:
    Los Gatos, CA
    This is a nitpick and something I ran into myself with my interior sets, but the font you're using for the non-outlined text looks a little too "thin". What font are you using? Are you using the outlined registry font (Starfleet Bold Extended) but just subtracting the outline? If so that could explain why it looks a little thin. I'd tried the same thing with my corridor set decals and abandoned this method once I realized it didn't look right.
    [​IMG]
    [​IMG]

    The font used on the filming model for the non-outlined font was Eurostile Bold Extended, but with an adjusted "1" to match Starfleet Bold Extended.
     
    Last edited: Apr 10, 2019
    TOMFAN likes this.
  6. Viper

    Viper Commander Red Shirt

    Joined:
    Mar 11, 2019
    Yeah, I can see the issue. I'm using the Jefferies font that does not have the outline built in, so it's much easier to work with. It also doesn't have the round curves on the edges of the letters. You can see in the second picture you posted that the number 7 only has a curve on the inner angle. All other angles are straight.

    I'll see if I can apply a style in Photoshop to get the fonts a bit thicker. I don't think the font you mentioned works though. The C's look much taller than the Jefferies font.
     
  7. Donny

    Donny Commodore Commodore

    Joined:
    Mar 13, 2008
    Location:
    Los Gatos, CA
    Sure about that? Obviously the "1" and hypens need to be adjusted, but looks like a match to me.
    [​IMG]
     
  8. Viper

    Viper Commander Red Shirt

    Joined:
    Mar 11, 2019
    :brickwall: That's completely different from the previews on Adobe's website. I'll check it out in Photoshop later.

    Also, quick tip, instead of typing -, try Alt + 0150: –
     
  9. Donny

    Donny Commodore Commodore

    Joined:
    Mar 13, 2008
    Location:
    Los Gatos, CA
    Sorry, I meant to say Eurostile Bold Extended. I’ve corrected my post above as well.
     
  10. Viper

    Viper Commander Red Shirt

    Joined:
    Mar 11, 2019
    Just spent a couple of hours modelling some proper docking ports. I was never happy with what I had before, which is why there were always holes on one side of the ship. It's missing a few minor details, but I was anxious to see how it fit :)

    [​IMG]
    [​IMG]
    [​IMG]
    [​IMG]
     
    TOMFAN, Kaelef, BK613 and 10 others like this.
  11. blssdwlf

    blssdwlf Rear Admiral Rear Admiral

    Joined:
    Feb 26, 2010
    @Viper - Wow your Enterprise looks beautiful. Is one of your alterations the addition of the Enterprise name to the side of the torpedo launcher?
     
    Viper likes this.
  12. Jesse1066

    Jesse1066 Fleet Captain Fleet Captain

    Joined:
    Dec 11, 2014
    Location:
    Washington State
    That was a feature of the closeup model, and I think even then only on the Enterprise A. Most models leave it out since it's usually not there.
     
    blssdwlf and Viper like this.
  13. Viper

    Viper Commander Red Shirt

    Joined:
    Mar 11, 2019
    Thanks! It is, but I didn't come up with that per say. The closeup model for the damage scenes in TWOK and TSFS has that detail:
    [​IMG]

    I also took a few other changes from that model that I liked. Easy to spot if you compare :)
     
    blssdwlf and Jesse1066 like this.
  14. Viper

    Viper Commander Red Shirt

    Joined:
    Mar 11, 2019
    I still have a few things to do on the ship to be able to call the exterior done, but I couldn't resist trying my hand at a more finished render. Low resolution for now as it's just a test. Eventually I'll render some 8k versions. For now, let me know if you think this is a good style and look.

    [​IMG]
     
  15. Nightowl1701

    Nightowl1701 Commodore Commodore

    Joined:
    Oct 29, 2011
    Location:
    Orlando, FL
    If I didn't know better... if I hadn't been watching you put this together... I'd swear that was a photo of the actual model. It looks solid. :adore::drool::eek:
     
  16. Donny

    Donny Commodore Commodore

    Joined:
    Mar 13, 2008
    Location:
    Los Gatos, CA
    Looks fantastic! My only critique would be, and this may just be personal taste, but the green of the deflector/strongback/etc looks a little too high in saturation. On the other hand, I think mine might be a little too grey. Otherwise, it’s freaking perfect.
     
  17. Viper

    Viper Commander Red Shirt

    Joined:
    Mar 11, 2019
    Goal achieved then! Thanks for the kind words :beer:

    Thanks! It's a fine balance I think. I like the idea of having the green standout to break the white of the ship a bit. I can try desaturating it just a bit. On the other hand, it's possible the problem here was the post processing.
     
  18. Tallguy

    Tallguy Rear Admiral Rear Admiral

    Joined:
    May 2, 2005
    Location:
    Beyond the Farthest Star
    Fantastic. And IMHO the green washes out at not too much of a distance.
     
    Viper likes this.
  19. Tom Servo

    Tom Servo Commodore Commodore

    Joined:
    Aug 25, 2004
    Location:
    New York, New York
    This thing is absolutely beautiful. Even those earlier pre texture renders look like such the idealized Enterprise in my eye. It really makes me want to fire up Blender and build one myself.

    Technical question however, and its something I've always wondered. I'm on the compositing side of VFX and have done enough modeling to know my way around a 3d program, but I have always been curious...how did you do your panel lines? It seems like such a simple thing, but whenever I see a 3d model with beautiful fine panel lines, I can't figure out where in the process they are created. I feel like they are probably too much of a pain to be modeled into the mesh (though I could be wrong), since they would be so hard to edit, but they are there before you did your UVing, so they aren't a baked in texture map. Is it a separate process you are performing after you building the base mesh? They seem too fine and precise to be a bump or displacement map that you had as part of your texturing work flow, which is honestly how I would have approached the problem, but with a model that is built to withstand such scrutiny as this one, that would fall apart at really close distances.

    Any insights would very much be appreciated. And again, just beautiful work.
     
    Viper likes this.
  20. Viper

    Viper Commander Red Shirt

    Joined:
    Mar 11, 2019
    Thanks very much :) The panel lines are an interesting subject. I started to work on this ship a year ago, and hit a wall when it came to the panels. I didn't want to boolean them in as that's all sorts of nightmares. On the other hand, if you do it via textures, you loose a lot in terms of resolution and definition as you said. So the project got shelved for quite a while until this year. I decided to re do it, but I still didn't know how to approach it. The solution came from taking a look at Blender. It has a tool called shrinkwrap. With it, I can make each individual panel in a 2d plane and wrap it to a base mesh. The other thing is that my panels are actual panels. They are separated completely and they have a thickness instead of doing a small dip. It creates other problems of course, but I the results are much better. For my goal, which is to have a VFX ready model, it was also a better workflow. It means I can do things like exposing the interior or damage much easier than if I had an airtight model.

    Let me know if you have more questions. Happy to help :)
     
    Bill Thompson likes this.