• Welcome! The TrekBBS is the number one place to chat about Star Trek with like-minded fans.
    If you are not already a member then please register an account and join in the discussion!

Madman's Enterprise, Version 6

MadMan1701A

Commodore
Premium Member
Hey, everybody!

I know I said, back in the version 5 thread, that I wasn't going to do this. :) 
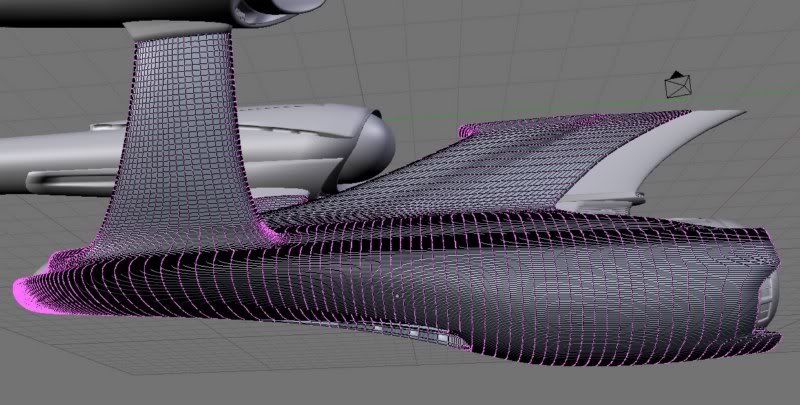
But, I've been working on a project lately, where I've learned a lot... mainly about subsurf modifiers, which I had no idea existed. It's helped out my chunky modeling, alot. :)

For some of you that have downloaded and looked at the previous model, you'll be happy to know, that I'm trying to get away from using booleans all the time. :) So far, I haven't used a single one.

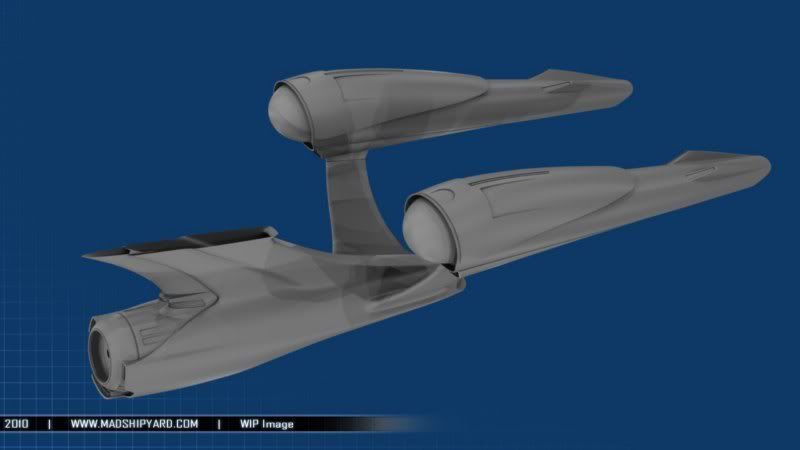
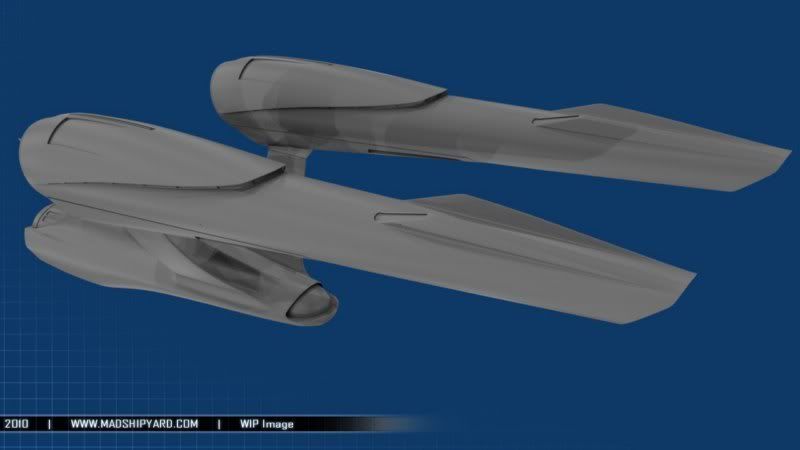
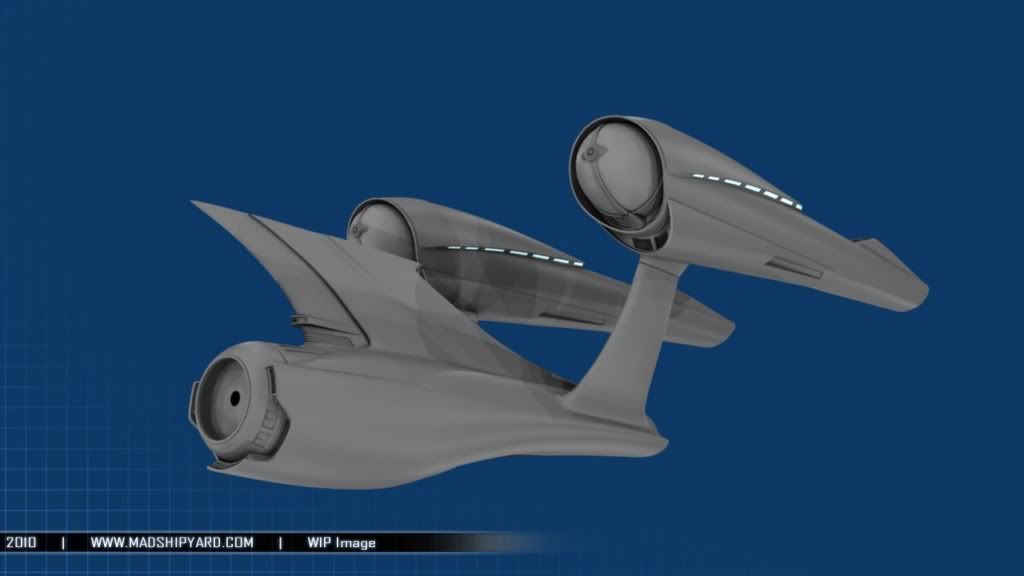
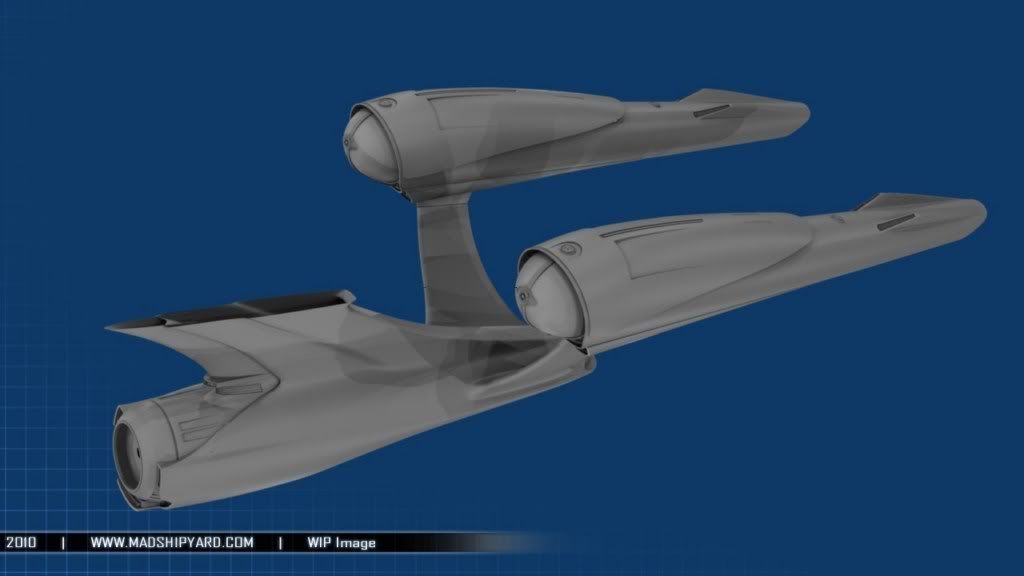
Anyway, here's pictures...

STXIV6_WIP_012800x600.jpg


STXIV6_WIP_011800x600.jpg


STXIV6_WIP_010800x600.jpg


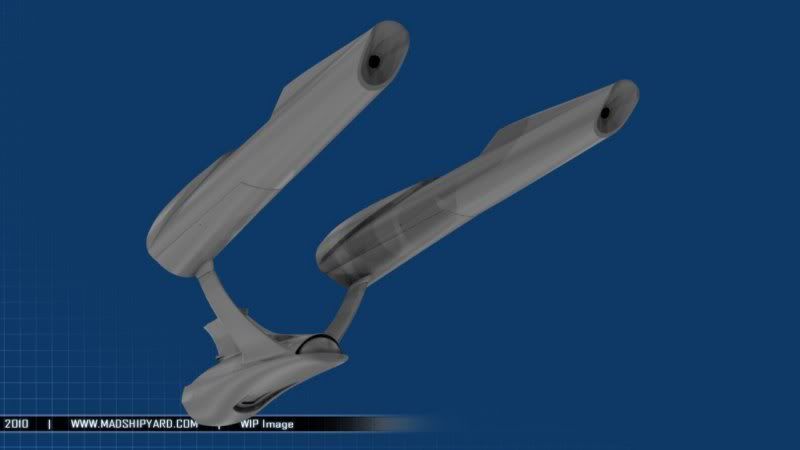
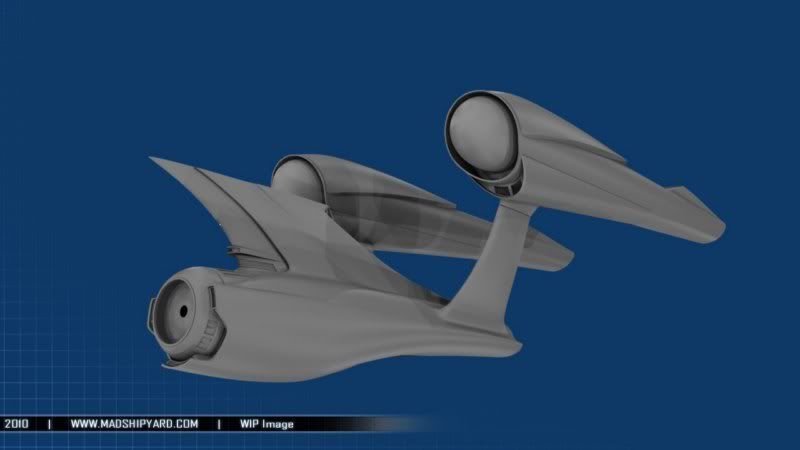
This is really meant to be an update to my version of this ship... it's probably not going to be 100% screen accurate, since I am keeping some of the changes I make with the previous couple of versions, mainly like the thinner neck in the front.

What do ya'll think?

More later...
 
I like how you haven't included the saucer. One little nitpick I had was that the whole ship in the new movie looked different...except the saucer. I thought it looked exactly like the refit saucer.
 
Thanks, guys. :)

Nardpuncher, it does look similar, until you really start looking at it, and you notice there are major changes. :)

Updates later on...
 
Maybe you can do this version with the saucer as depicted in Ryan Church's painting, rather than the film-used model?
 
This looks really good. Subsurface or sub-d modeling really is the key to this and a lot of later Trek design (like Picard's Enterprise) - I only started to teach myself to use it in a major way on the Challenger.

I used one of your earlier JJPrise models as early reference for the nacelles on that model, BTW - I thought you effectively took the meshing as far as it could be taken without reallly getting into subdivision, so I started from there.
 
Like where this is heading.

Thanks. :)

This looks really good. Subsurface or sub-d modeling really is the key to this and a lot of later Trek design (like Picard's Enterprise) - I only started to teach myself to use it in a major way on the Challenger.

I used one of your earlier JJPrise models as early reference for the nacelles on that model, BTW - I thought you effectively took the meshing as far as it could be taken without reallly getting into subdivision, so I started from there.

I thought some of the lines around the top of the cowling looked a little familiar. :) One way mine were always wrong, was that the lacked that bulge towards the front, they were always too flat. Thanks or the compliments, though... I really appreciate it. :) I think now, it's probably better to get pratice modeling directly with the mesh first, then learn the SubSurface stuff... it really helps for extra details added after the modifier gets applied. :)

Well, I did a little bit last night. Mainly just detailing the cowlings above, and cutting those vents in the bottom...

STXIV6_WIP_013800x600.jpg


STXIV6_WIP_015800x600.jpg


And, here's a shot showing the actual mesh. It's a little higher poly than my earlier attempts. :)

Mesh1800x600.jpg


More later on, have fun guys...
 
Ah! Thanks for that image of the mesh. I'm pleased to see this whole ship isn't one piece. I think Vektor works that way, crafting fantastically detailed meshes out of one object, but I just can't work that way.

Why did you choose to commit the subsurface to a mesh so soon? I'm not criticizing, just curious about your workflow and plans.
 
Yeah, I wouldn't know how to texture the thing, if it was all one chunk. :)

The main reason is that I just used the subsurf to get the curvy shape... when I tried to extrude in the undercut, for example, Blender tried to smooth out all my hard edges, too much. The only way to stop that, was to subdivide again, and again, and then it got too dense in those areas. So, a method that seems to work for me, is to subsurf all the smooth parts, apply it, and then do my extruding, etc. I keep a backup model of each phase, of course. :)
 
Gotcha! You have some options. First, do an edge loop cut (ummm ... I think it's ctrl-R) to lay down a new edge loop on your mesh. You can then slide it in very close to where you want a hard line and hit the left mouse button to get excellent control over just how hard that line is. This does increase mesh density in that area, and you might have some trouble selecting the right edge later on if you return to that area.

The other approach is to make the seam using edge crease. Pick the edge you want to sharpen and use shift-E to adjust. This works well sometimes, but I also find I get much better control using the first method.

Oh! And keep an eye out on the newer releases for the upcoming Ptex support! This is going to revolutionize texturing our models in Blender.

EDIT TO ADD:
Have you ever visited BlenderCookie? If you haven't, I highly recommend it -- especially Jonathan Williamson's tutorials.
 
Last edited:
Hey, I forgot you were a Blender user, too. :)

Yeah, I tried using seams, but they sometimes render weird, when I do a set smooth and autosmooth on them.

That Ptex looks cool... I've got to advance beyond projecting uv's. :)

Since you are familiar with what I'm doing I'm going to bounce something off of you. When I get to the saucer, how would you model the grid lines? In the past I subdivided out the lines, and removed them, but that means the lines got wider, as they got towards the edge. I guess my other option is extruding the panels themselves, but that's really tedious. :) I think I read that that's how Tobias Richter does his...
 
... Yeah, I tried using seams, but they sometimes render weird, when I do a set smooth and autosmooth on them.
Yep. That's why I only use crease for simple parts now ... if at all. Everything else gets one or two extra edge loops and the result is much cleaner. Or break it into separate objects, as you're doing.

That Ptex looks cool... I've got to advance beyond projecting uv's. :)
UVs and I never get along. I manage okay, but I'm forever cleaning up along seams. Ptex will eliminate that.

Since you are familiar with what I'm doing I'm going to bounce something off of you. When I get to the saucer, how would you model the grid lines? In the past I subdivided out the lines, and removed them, but that means the lines got wider, as they got towards the edge. I guess my other option is extruding the panels themselves, but that's really tedious. :) I think I read that that's how Tobias Richter does his...

Work the saucer as a series of pie segments. Spend a lot of time doing one segment perfectly with all the raised panels and other details, then spin-duplicate it. Don't forget to merge duplicate vertices. I'd work on the top, bottom, and sides separately, but make sure they have the same number of vertices in the same places along the edges so the final parts will "weld together" cleanly. Treat the bridge and lower navigation arrays as separate objects, obviously. Then add details that aren't radially symmetrical.

Retopo is your friend for windows since you can now project vertices from one mesh onto the surface of another.
 
Ah, I think I see. This tutorial looks similar to what you mentioned...

http://www.foundation3d.com/forums/showthread.php?t=1774

Does Retopo work in older versions of Blender? I'm still using 2.45... it's the last version that I really liked, before they started messing with keyboard shortcuts and stuff. :) If I could project vertices like that, I wouldn't need to use a boolean, ever again! :)
 
Thanks. :)

Some more stuff...

STXIV6_WIP_0181024x768.jpg


STXIV6_WIP_0171024x768.jpg


STXIV6_WIP_0161024x768.jpg


I'm trying to decide how much to do, before the saucer arrives. :)

More later on...
 
If you are not already a member then please register an account and join in the discussion!

Sign up / Register


Back
Top