• Welcome! The TrekBBS is the number one place to chat about Star Trek with like-minded fans.
    If you are not already a member then please register an account and join in the discussion!

1/350th + art

Thank you very much, on both counts. I had to take a day off from it. I've been working on a completely new set of details, as well as reworking the old ones since the 4th and needed to get away from it. It's nice to see someone enjoy watching it come together.

Keep on Trekkin! :thumbsup:

KTM

aridas sofia said:
Very impressive work, KTM. I'm green with envy at your scratchbuilding skills.

BTW, welcome back. :thumbsup:
 
Well, I've got a few more updates that I haven't posted...

I'm still trying to get the main components as smooth and clean as I can, before I add some gloss coat and apply the decals.
http://i45.photobucket.com/albums/f63/6242amu/ATK200.jpg
http://i45.photobucket.com/albums/f63/6242amu/ATK201.jpg

I'm also going over and refining a few parts..... Excuse my photography.
http://i45.photobucket.com/albums/f63/6242amu/ATK213.jpg
http://i45.photobucket.com/albums/f63/6242amu/ATK214.jpg

Got a set of clear-cast domes from plastruct.
http://i45.photobucket.com/albums/f63/6242amu/atk71.jpg

Here's what they look like covered with Rustoleum, spray can, frost.
http://i45.photobucket.com/albums/f63/6242amu/_anp4.jpg

I robbed a big screen TV of parts awhile back and I'll be making a light box for it and back lighting it.
http://i45.photobucket.com/albums/f63/6242amu/ATK199.jpg

I also picked up some copper fittings at the local Home Depot, to add as real metal parts.
http://i45.photobucket.com/albums/f63/6242amu/atk92.jpg

Hope to be getting some electrical supplies soon as well as a few other things to set this project off.

I'll be glad when I can post pics, I know have to be tired of clicking on the links, then again, it can be fun, I guess, kind of a mystery. :)
 
There's been much discussion, at some points, in the history of this project concerning the need for a lathe, especially when it comes to making circular parts and maintaining symetry.

I wanted to share some pictures and quotes from another thread, to show what I learned from REL, which actuallu confirmed much of what I've said in the past about scratch-building.

Since this is what I'm working on now, I thought it applicable.

My previous post on this subject, to set the stage...

"Well....the TOS Enterpise is just a series of cones and spheres.... I mean I've gotten pretty good results with tubes, cones and spheres, made out of paper and balsa wood. An associate of mine, took my finished parts and matched them up with the MR and said that even though the masters had been made by me, out of paper, tape, foam and fiberglass, that they matched up very close to the MR, several parts were spot on and I had started my masters back in Oct of last year.

I'm not saying that they wouldn't be accurate down to .001, if you used a lathe, but what to do if you have no lathe, or turn table, or expensive equipment?

You use what methods are available. REL's work on the E-D and others is a perfect example.

I find it amazing that I get the results I do. This is my first go round and I've never sculpted anything like this in my life. So, to see what's possible is just astounding.

I tried all of this, in the begining, by going through a machinist, but they wanted an arm and a leg to do anything and took forever to do a thing. I still have half of a ship sitting in a machine shop 30 miles from here, it just never got finished. The thing is, I've done my fair share of machining, but I don't own the equipment. I even offered to do some work for the guy, to help speed things along..."

Quoting REL.

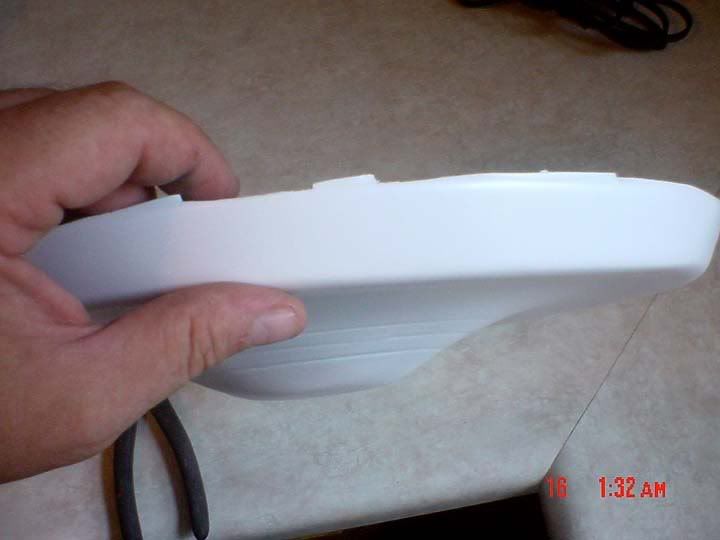
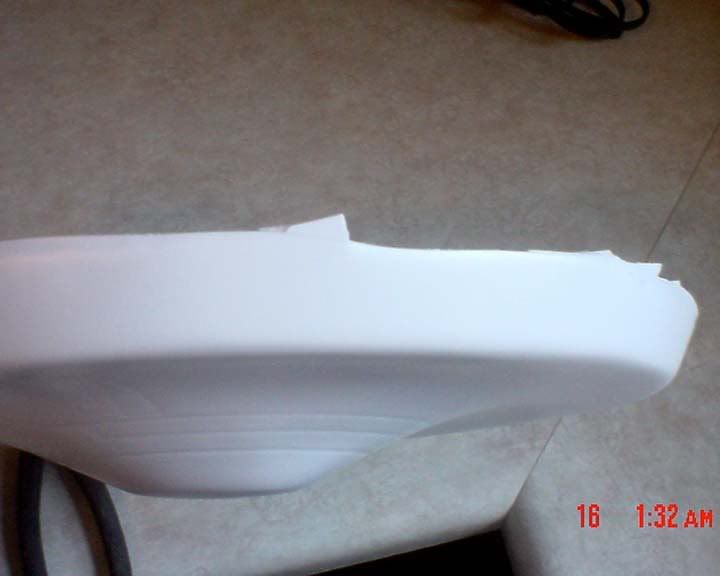
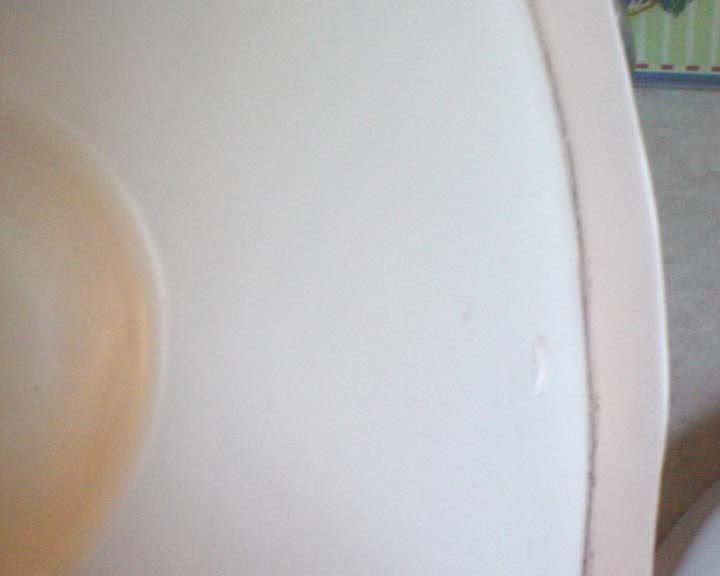
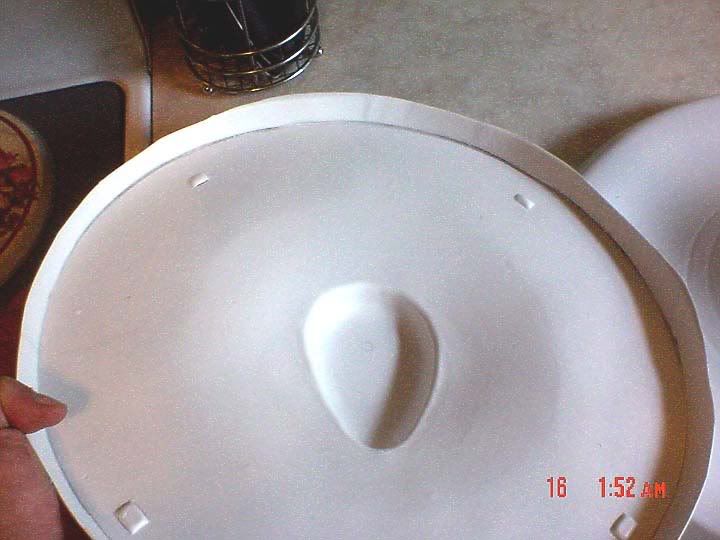
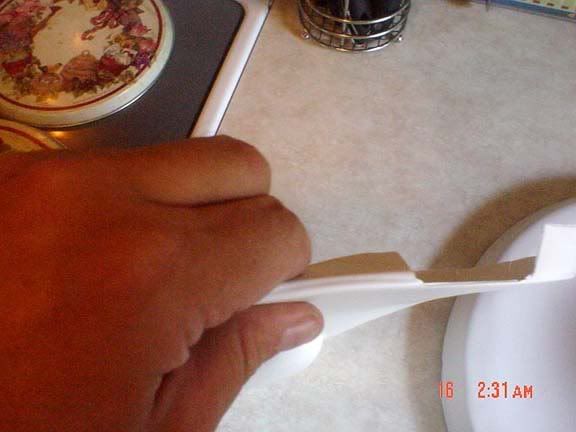
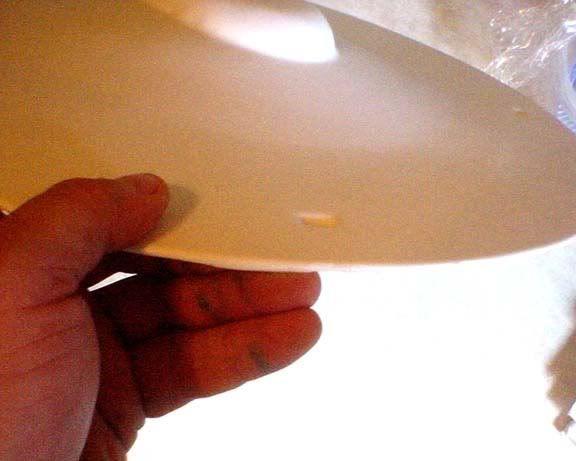
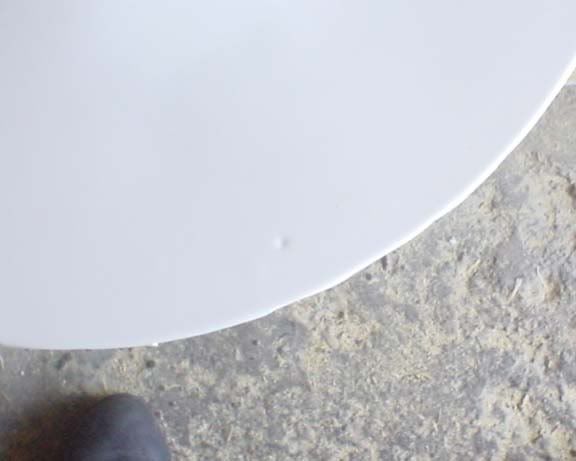
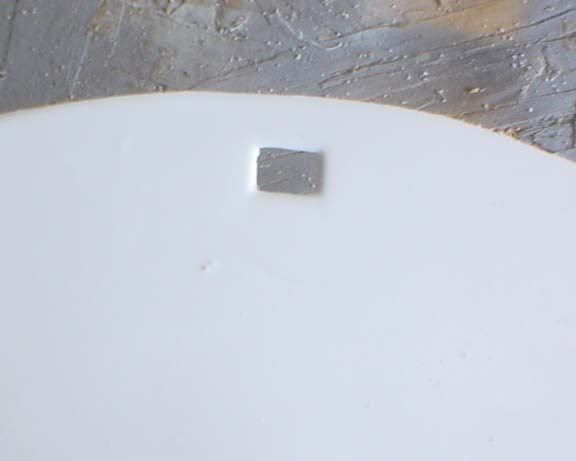
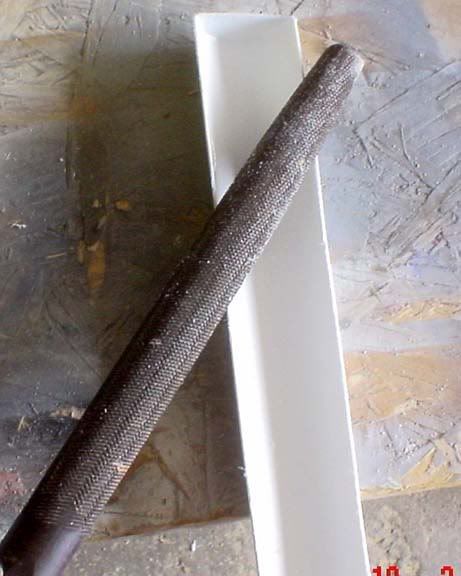
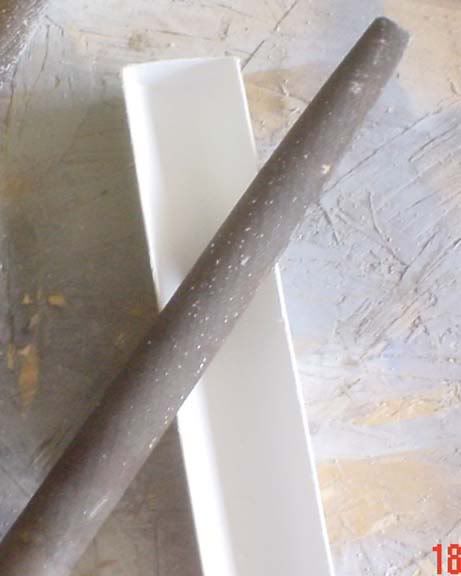
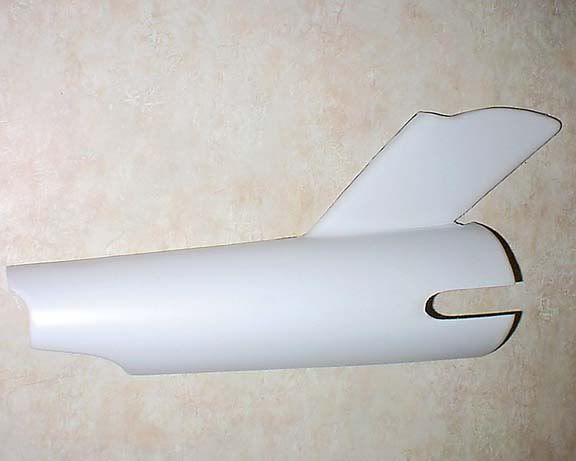
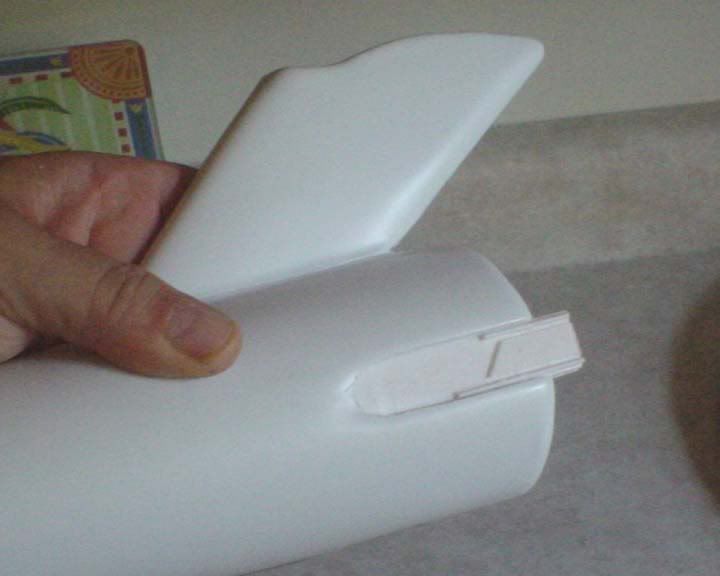
"Actually I did use a screeding/cross section method on the saucer to the D, but because of it's oval shape I couldn't use the traditional method of mounting it on a board with a pin in the middle. I also knew that cross sections would get me the basic shape, but no matter how much I sanded, I would still see a ribbed area from each cross section when it was smoothed out.

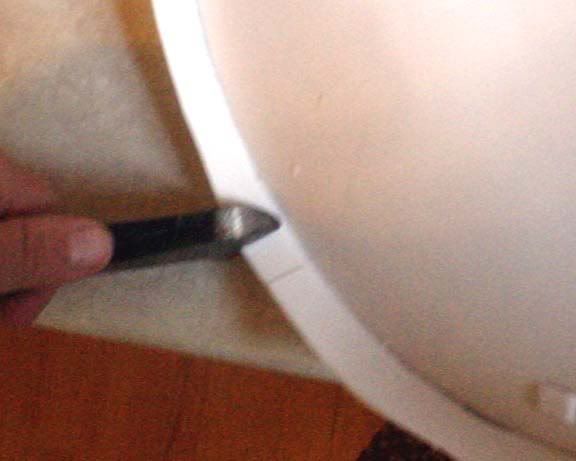
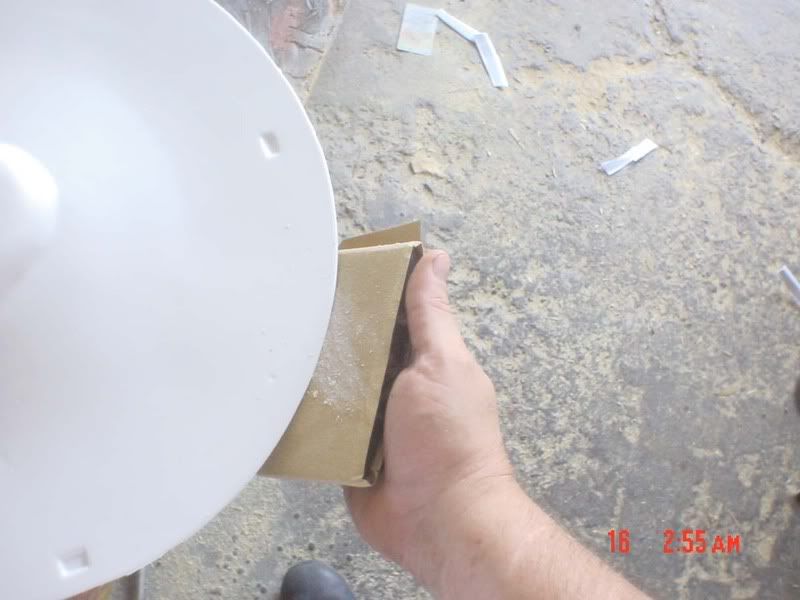
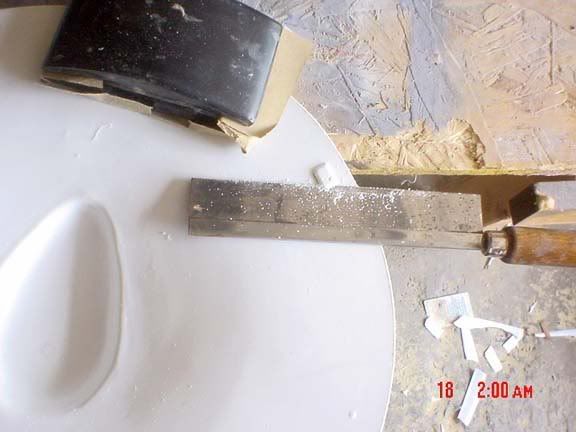
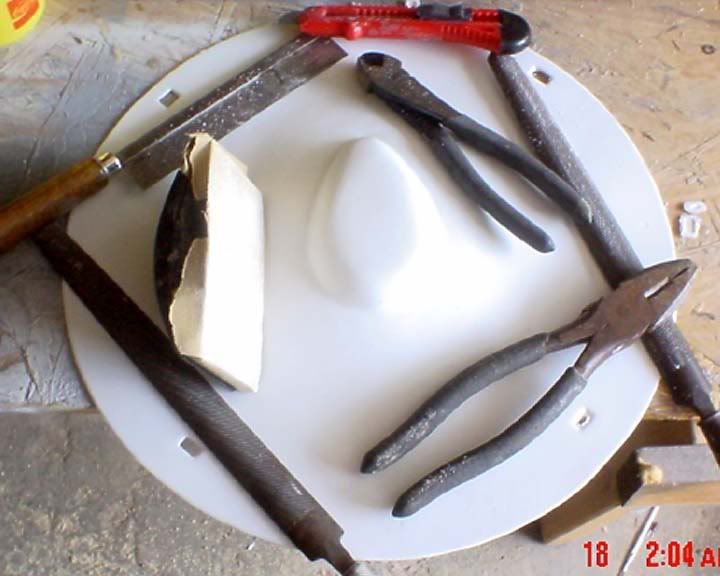
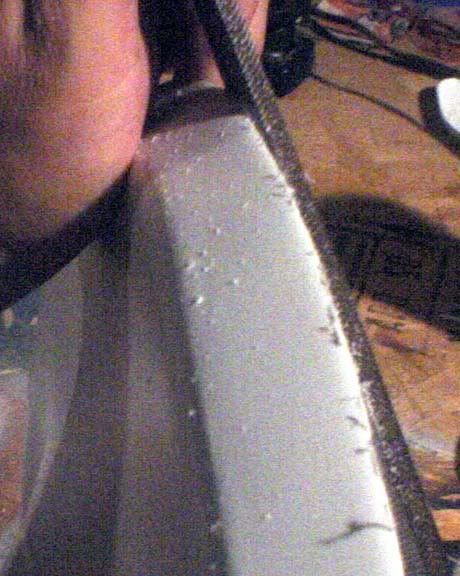
So after filling in the cross sections with foam and skinning it with bondo, I made a hand held piece of plexi in the shape of the saucer contour that had a notch at the base so it could slide along the outside edge of the saucer, then piled bondo into the middle and worked it around the top of the cross sections. I used the same technique on the Bird of Prey to get the saucer on that.

So this works very well for surfaces that aren't round but when you still need a nice smooth and perfect edge.

Not trying to hijack your thread KTM, just offering some easy tips.


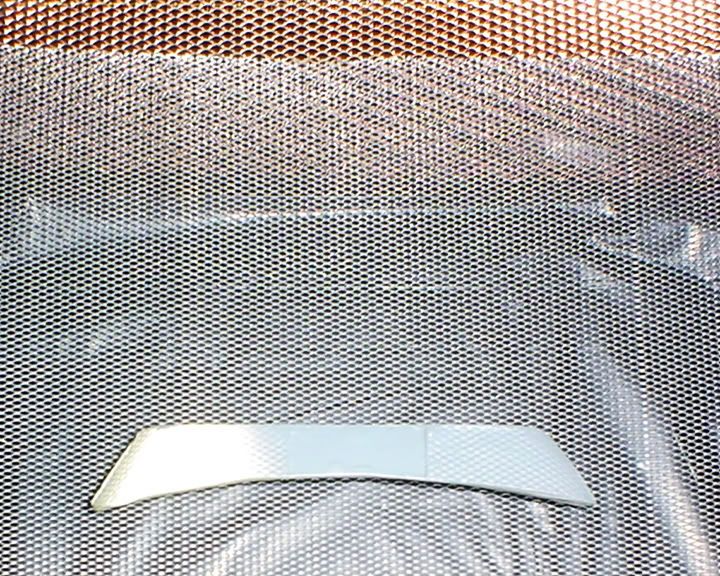
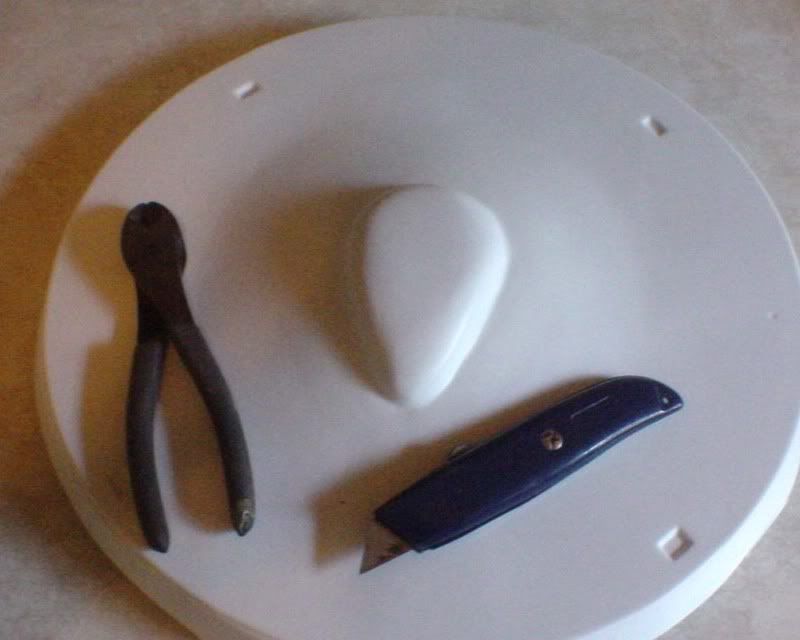
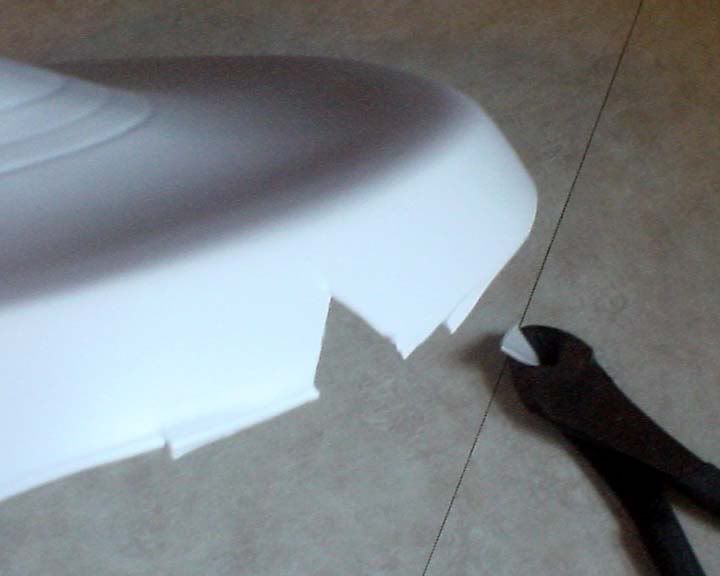
Illustration of what I did on the D's saucer.
http://sovereignreplicas.com/hand_screed.jpg

http://sovereignreplicas.com/D_054.jpg

To whit my response was.....

"Thanks REL, perfect example of what I was trying to articulate. Right on. I appreciate that."

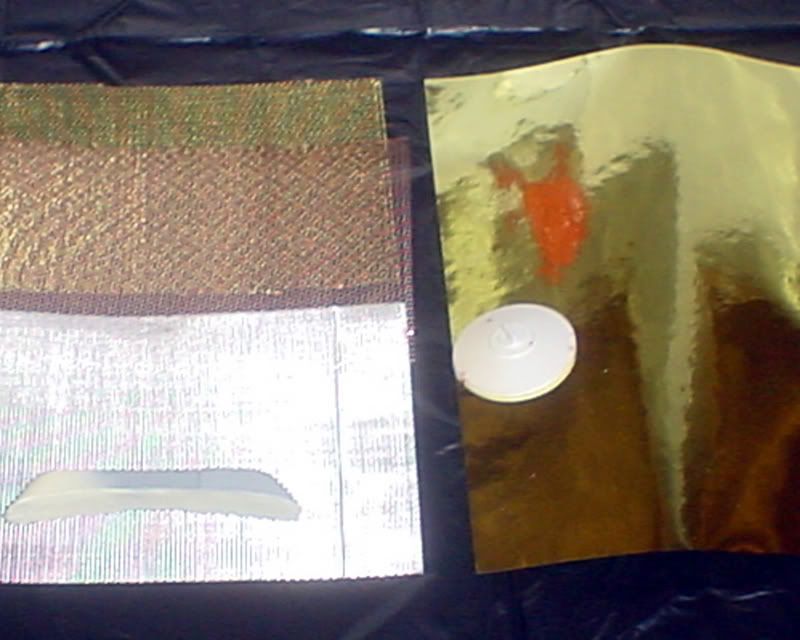
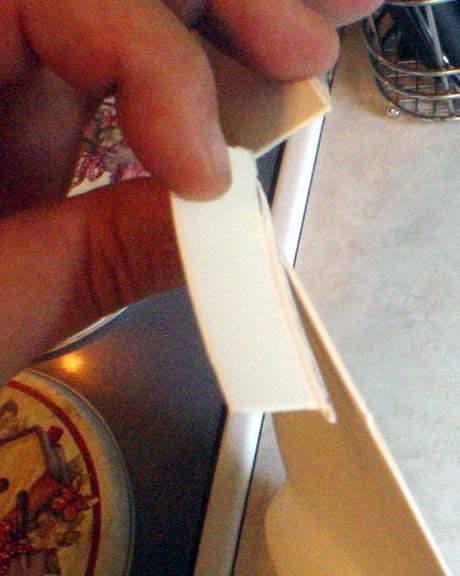
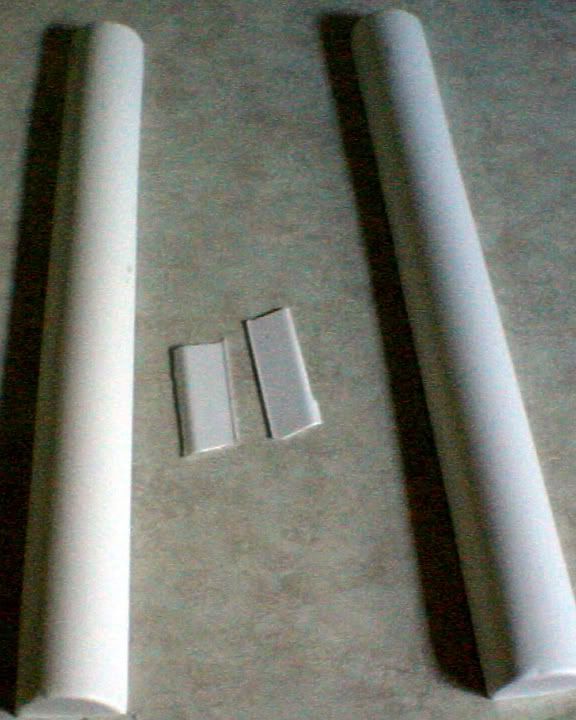
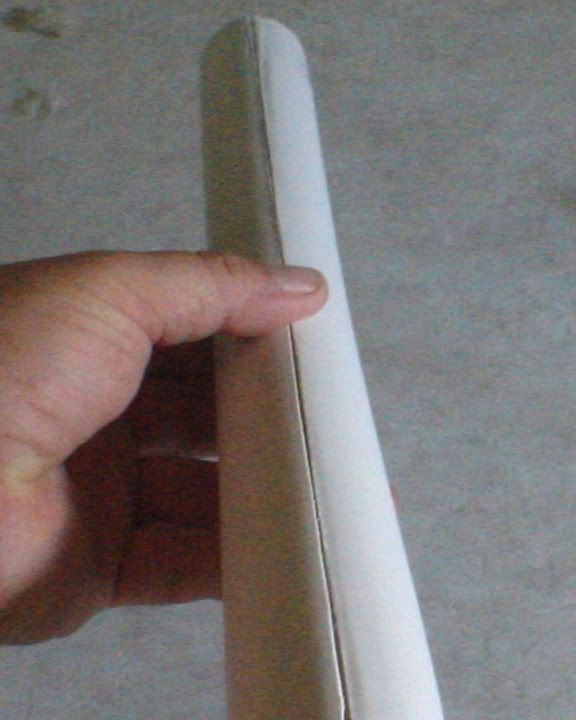
REL was again kind enough to illustrate....

http://sovereignreplicas.com/hand_screed2.jpg

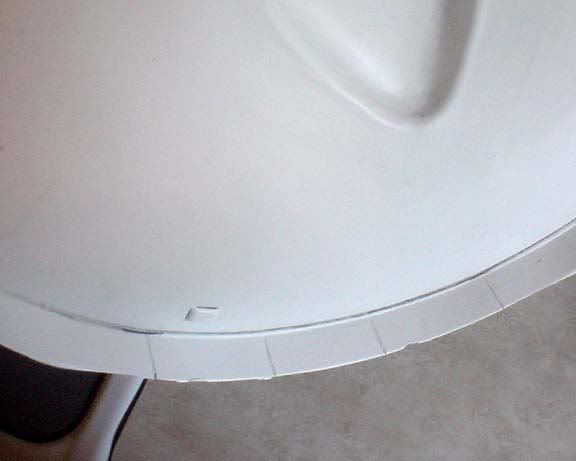
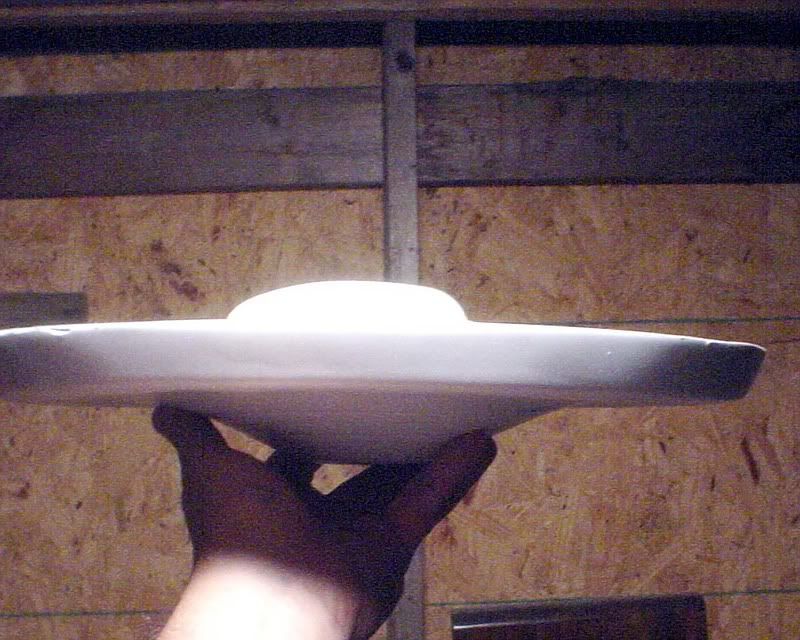
This is essentiall exactly what I was doing initially, only without and exact cut template. I've since when with the cut template and am finishing both the upper and lower saucer sections. I'll have links to new updates soon.
 
Quote from: USS Jack Riley

Thanks for the info from REL on using the blade template to cut the bridge design (tell him to stop by here and give us an update when you get the chance, his work on the Ent. E was downright gorgeous). My question is where do you get a a blade that matches the template's curvatures for the saucer section (or any section for that matter)? I have a router and would like to be able to employ it in some fashion to scratchbuild parts like this, but the only way I can see being able to do something like that would be to machine my own blade and that is something I am not comfortable doing (I enjoy the full use of all of my fingers too much ).

Regards,

USS Jack Riley

There's really no need to machine the template, all you need to do is cut out a paper template and lay it over a piece of plex, mark and cut the plex to match your original template. You can print up a template that's appropriately size from your blueprints. Does that help?

While I'm at it here are some recent updates....

I've got a copy of JT Graphics decals that were the same ones made for the MR. I've been getting the primary components ready to decal, but I want to make sure everything is perfect, before I put JT's decals on.

I've also been working on a nacelle effect for the model.

I had not originally intended to light this as the nacelle pylons were not set up to run enough wire, however, I'm seriously considering cutting into the pylons and making room for the wiring. I figure if I'm going to do that, I might as well replace the grill detail.

Anyway, the photos below show some of what I've been working on.

Here are JT's decals.
atk110.jpg

atk111.jpg


I've been working with several different hemispheres and sizes, trying to work out a decent nacelle effect.
atk251.jpg

The picture below shows the original resin part with the frosted nacelle cap layed over it. I like the looks of this and can see that if you show a light through a clear dome painted with copper, that the initial effect will look very close to what we see on screen. The copper wire in the first shot is to create my own set of blades.

I wasn't happy with the impulse deck, so I'm going to sand it down and overlay the new screen and see if that doesn't work better.
atk253.jpg

Using this shot from Charles Adams 98 article, I think I'm pretty close to what I'm shooting for.
imp_fabr.jpg

I've also picked up some gold, bare metal foil, to cover the deflector dish with, but I have to finish reworking the dish first.
atk254.jpg


I've made a lot more progress and will have more to show very soon.

Keep on Trekkin! :thumbsup:
 
Ptrope said:
Why not simply add the credits to the images, rather than deleting them? If you have the ability to composite them to begin with, it should be easy to add the credits and replace the images online - no need to delete them.

The credits don't need to be large - just present. And we have certain leeway when it comes to things like screen captures and the like - a small notice of Paramount's copyright should be sufficient. More than anything, acknowledging your fellow fan-artists' creations and hard work is the very least any of us should do - we would expect the same, yes?
That raises an interesting question...

Many digital photography formats use metadata to store various information about the pictures. This metadata is not visible in the image itself, but is present in the file (and can be reviewed) easily enough.

Is "metadata" crediting acceptable, or must the crediting be in human-readable form on top of the image?
 
Wasn't that issue taken care of when I deleted the pictures. I really think Ptrope want's to see written credits.

BOT what do you think of my recent work?

Cary L. Brown said:
Ptrope said:
Why not simply add the credits to the images, rather than deleting them? If you have the ability to composite them to begin with, it should be easy to add the credits and replace the images online - no need to delete them.

The credits don't need to be large - just present. And we have certain leeway when it comes to things like screen captures and the like - a small notice of Paramount's copyright should be sufficient. More than anything, acknowledging your fellow fan-artists' creations and hard work is the very least any of us should do - we would expect the same, yes?
That raises an interesting question...

Many digital photography formats use metadata to store various information about the pictures. This metadata is not visible in the image itself, but is present in the file (and can be reviewed) easily enough.

Is "metadata" crediting acceptable, or must the crediting be in human-readable form on top of the image?
 
Not really an update, but I was looking through my site and I ran across these shots. Everyone kept telling me "You have to have some type of rudimentary interior structure, so I took these shots to show that you most certainly do not. If you engineer a thing correctly, you don't. I made this ship and the masters out of composite materials and designed it in such a way so that it would not need an elaborate interior armature, or structure, to support it's weight. What do you think?
http://www.compositecreationsltd.com/1ATK47.jpg
http://www.compositecreationsltd.com/1ATK48.jpg
http://www.compositecreationsltd.com/1ATK50.jpg
http://www.compositecreationsltd.com/1ATK51.jpg
 
KirkTrekModeler said:Not really an update, but I was looking through my site and I ran across these shots. Everyone kept telling me "You have to have some type of rudimentary interior structure, so I took these shots to show that you most certainly do not. If you engineer a thing correctly, you don't. I made this ship and the masters out of composite materials and designed it in such a way so that it would not need an elaborate interior armature, or structure, to support it's weight. What do you think?
Well, it's not necessarily a unique idea... next time someone tells you that you MUST have internal structure, you might want to point out the monocoque structure used in aircraft fuselages.

That said, I'm still fond of using internal structure whenever possible in a model. I usually build up a plywood framework (model aircraft plywood, I mean... not construction-grade plywood!), and I ALWAYS do that if I'm working with thin plastic (say, vac-form). It just makes life a lot easier.

One thing to remember about monocoque airframes is that they are, by design, FLEXIBLE... particularly when the inside pressure and outside pressure are equalized. In an Enterprise model, I'd think that the inherent flexibility you have there would be undesirable, from an alignment/appearance perspective.
 
Actually I did point out that air craft fuselages were made that way. That was even before the Beoing 787 hit the market which is almost completely made of composite materials. I love that word...Composite. I also noted that model rocketry uses composite materials and they are under extreme stresses. If flexibility is designed into something then yes, it will be flexible, if it's designed to be firm, or stiff, then that's the way it works. Composites can be lighter than aluminum and stronger than steel and they are not subject to corrosion, but you just can't tell some people anything, you how it goes.

Cary L. Brown said:
KirkTrekModeler said:Not really an update, but I was looking through my site and I ran across these shots. Everyone kept telling me "You have to have some type of rudimentary interior structure, so I took these shots to show that you most certainly do not. If you engineer a thing correctly, you don't. I made this ship and the masters out of composite materials and designed it in such a way so that it would not need an elaborate interior armature, or structure, to support it's weight. What do you think?
Well, it's not necessarily a unique idea... next time someone tells you that you MUST have internal structure, you might want to point out the monocoque structure used in aircraft fuselages.

That said, I'm still fond of using internal structure whenever possible in a model. I usually build up a plywood framework (model aircraft plywood, I mean... not construction-grade plywood!), and I ALWAYS do that if I'm working with thin plastic (say, vac-form). It just makes life a lot easier.

One thing to remember about monocoque airframes is that they are, by design, FLEXIBLE... particularly when the inside pressure and outside pressure are equalized. In an Enterprise model, I'd think that the inherent flexibility you have there would be undesirable, from an alignment/appearance perspective.
 
Okay - I think I see where I was getting confused. Is the bondo still wet when you spin the piece around the template? That makes sense. I thought you were letting it set and then cutting it down. All I could imagine was chunks of dry bondo flying around my garage followed by "She Who Must Be Obeyed" coming into the garage to see what caused all the noise and then killing me on the spot. :eek:
 
USS Jack Riley said:
Okay - I think I see where I was getting confused. Is the bondo still wet when you spin the piece around the template? That makes sense. I thought you were letting it set and then cutting it down.

Yes, exactly right. Lay the Bondo down and slowly spin the master around the central axis. This will take several passes, then you need to sand and finish sand, afterwards you can check with your template. :thumbsup:
 
Now that I can show pictures, I thought I'd do a little review and basic build techniques on vacuum formed models.

Some people have major issues with vac formed models and I don't think they really know how easy it can be. sure it takes a little work, but it's not as hard as some let on.

I took the parts below and made some purposefull mistakes, to show people that even if you make mistakes, they can be fixed and all is not lost.

I did a real hack job on this saucer to show that you can fix things, even if you think you've totally messed it up.

atk20.jpg

atk21.jpg

atk23-1.jpg

I even cut a notch out of the lower saucer section, with diagonal cutters, to show how to fix it later.
atk22.jpg


Below is the inside of the upper saucer section. here I'm trying to show how easy it is to clean up your parts with basic tools.
atk24.jpg

atk25.jpg

atk26.jpg

atk27.jpg

atk28.jpg

atk29.jpg

atk30.jpg

atk31.jpg

Below, I'm clean up a saucer with a basic sanding block.
atk32.jpg

atk33.jpg


More to come. I'll have new pictures of the recent work, as soon as I show a bit more on how to clean up parts and do a basic build. These methods will work for any vacuum kit. :thumbsup:
 
Here's a little more on the buildup of a vacuum kit.

On the upper saucer section I used a razor saw to cut the dimples out where the styrene formed over the windows and clean them up with a file.
atk46.jpg

atk48.jpg

Here are some basic hand tools that are needed in construction of vac kits. Some of it is suggested and some of it is required. You definately need a couple of files and I would suggest a sanding block.
atk49.jpg

Here's an example of how I cleaned up some of the parts.
A course half round file.
atk52.jpg

Then a fine half round file.
atk53.jpg

I used the same method on the lower saucer.
atk63.jpg

Here are both halves after the clean up process.
atk65.jpg

Below is a little work up on the Engineering section.
atk37.jpg

atk40.jpg

atk43.jpg

After cleaning up the nacelle halves....
atk94.jpg

I used some left overr flash to create alignment points and a surface area for glue
atk95.jpg

The nacelle before putty and primer.
atk96.jpg

After going over everything with a sanding block and adding a little primer....
atk104.jpg
 
I did say and art. I think this is one of my firat posted works here at TrekBBS.

astarkirk.jpg


I have been working on the Enterprise build up, but I'm kind waiting to finish the electronics and I really want it to look spectacular!
 
Here are a few recent shots of the TOS Command Delta base that I plan on incorporating into the display. This is going to be awesome!

_a1delta1.jpg


_a1delta2.jpg


_a1delta4.jpg


_a1delta32.jpg


I've got to do a little clean up with my dremel, but it's getting there. The star is being redone and I hope to have it done soon.
 
I have been a busy beaver today, between fighting the nerd herd, working on the garage, working on the Klingon D7 and everything else, I've also been finalizing another set of graphics for some laser cut details for my ship.

Since I have'nt really got a lot on input, I thought I would ask you your thoughts on my patterns. You know what they are.... Do you think I'm on the right track with these?

Impulse......
_A1aTOS-impulse-grill-fini.jpg


Plyons......
anacellegrilfinal2areverse.jpg


Inner nacelle.....
anacellegrilfinal.jpg


Much more to show, just been wery busy.
 
In case anyone is still interested, and hasn't been following this topic over on HobbyTalk, this project has been scrapped and will be restarted with our ol' buddy REL doing the masters. Should make for a much nicer looking product.
 
If you are not already a member then please register an account and join in the discussion!

Sign up / Register


Back
Top