• Welcome! The TrekBBS is the number one place to chat about Star Trek with like-minded fans.
    If you are not already a member then please register an account and join in the discussion!

You build it.... How to Build-up.

When I originally began work on the 1/350th Enterprise, almost a year ago, I started the thread out by saying that not only would I build a scale model, but that I would show *you* how to do it.
I've been a member of a forum that's primary devotion is to scratch building starships, for some time and thought I would bring some of what I've learned, over the years, to this forum and show a ground up scratch build.
I have a project that I'm begining now and thought this would be a great opportunity to share the wealth, so to speak.
Essentially this would be a follow along build-up showing the entire process from begining to end and you could follow along and build one up as well.
Is there any interest in this? When I did the 1/350th Enterprise, I tried to break everything down and use the cheapest available products, to show that there's more than one way to skin an Enterprise and to show that you didn't need a lot of fancy equipment, or expensive tools, or machinery and that you can start simple and still get the desired results.
The Enterprise project went through a lot of changes and was needlessly delayed, for reasons that were totally out of my control, but the original masters were made in only a couple of weeks.
Would there be continued interest in someting like this?
 
I've actually started on it, but I can back track and show the begining stages. There's already an off scale, or studio scale Kingon Cruiser, so I figured I'd knock out a 1/350th TOS Klingon D-7, in scale with the TOS Enterprise I'm doing the build-up on. I started working on it last night and already have my templates and balsa wood cut, have filled it with foam and I'm in the process of covering it with fiberglass. Shouldn't take to long to finish. I've got scale drawings and pictures, so I figured I'd share the process with the community.
 
Cool. I'm bound to it anyway. I've brought it up and started the thread, I'm bound to finish it. I'll collect everything up and start posting pictures and directions Tomorrow.

Trek on!
dru said:
I'm interested :)

I wanted to edit this in. I'm essentially going to reverse the process used to make the AMT kit, which was pantographed from the original designed by Matt Jeffries and copied by Greg Jein and recast by others. This will be in 1/350th scale and will not be *Studio Scale.*

Check out these links.

http://members.aol.com/IDICPage/AMTprototype.html

http://members.aol.com/IDICPage/TOSKlingon.html

http://members.aol.com/IDICPage/TOSKlingon.html
 
OK, here we go. First off, let me say that my methods are not the same as everyone elses, it's just the way I do things, also, I try to break things down to the simplest possible methods. I don't mind working hard, but I prefer to work smart.

What you will need to start. A pencil, paper, tape, Elmers glue [white glue], and a ruler. There may be other things along the way, but I'll add those as I go.

There are two basic ways of recreating an existing model, one is to create one directly from the blueprints, if you have accurate prints, another way is to resize and existing model, by simply taking measurements of each aspect and up sizing, or down sizing.

Sizing. If I have an existing Klingon Cruiser and I know it to be accurate and I know the scale, which in this case I do, it's simple math to resize a ship. If I have a 1/650 scale model and want a 1/350th scale I divide 350 into 650 and take that factor and multiply every measurement by that factor. In this instance it's 1.8571428.... For the sake of simplicity, I'm going to round up to 1.86. So, every length, width, diameter etc, needs to be multiplied by that factor.

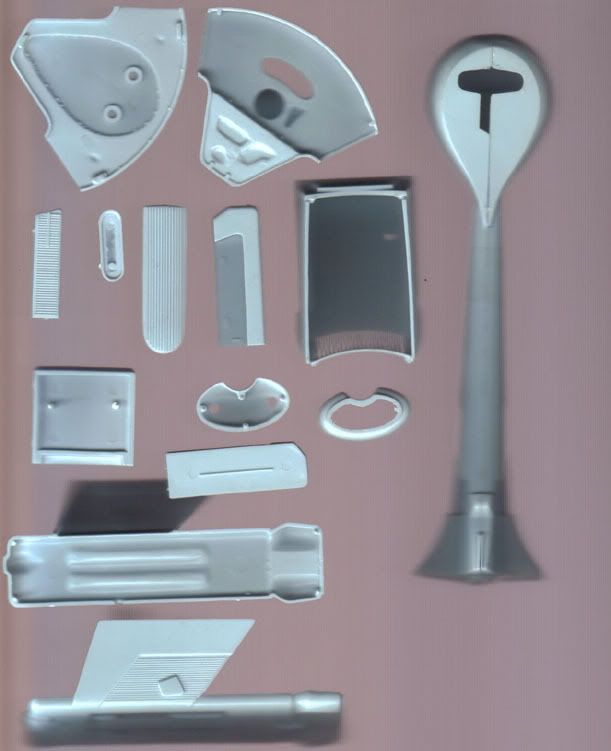
Tracing. One of the easiest ways to get measurements for any ship is to trace along flat surfaces and use the above method, you can also use this method to create blueprints.

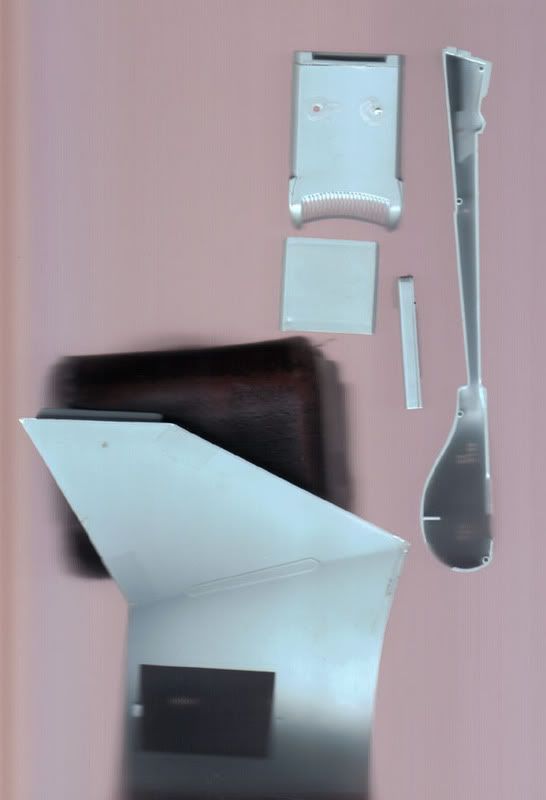
Another way is to scan the actual parts, I'm going to use a combination of these methods to describe this build.

See below.

_AK1a.jpg


_AK2a.jpg


_AK3a.jpg


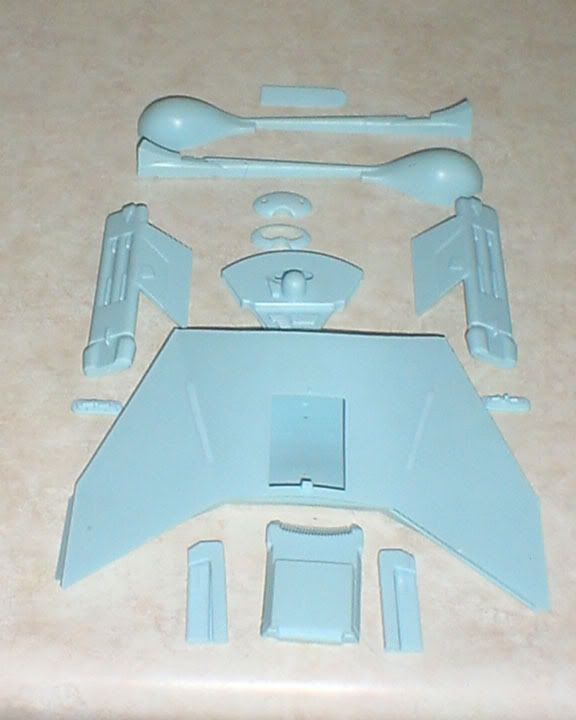
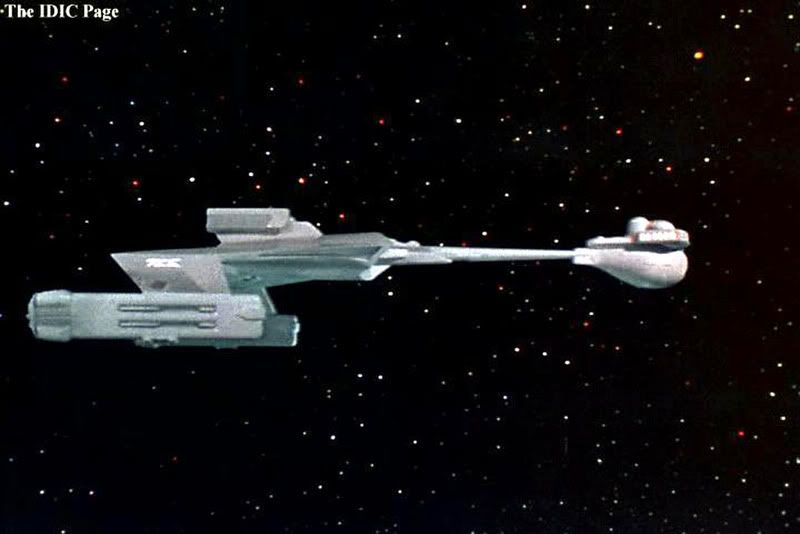
Here's the model I started with.
_AK4a.jpg


Here's one of Mike Trices IDIC shots complete with his copyright.
_AK5a.jpg


More to come.
 
I wanted to take more time for this thread, but I've been in the garage working on my Klingon D7 all day. I've used the same methods I'm describing here, so instead of spending time loading pictures, cutting, croping, etc... for now I'm going to refer back to the enterprise.

I used printed paper templates to cut balsa wood,(you can get this at virtually any hobby shop) and aligned the balsa templates on a flat plane that consisted of a printed blueprint of the Enterprise saucer section.

http://www.compositecreationsltd.com/CCimages/awmq3.jpg

http://www.compositecreationsltd.com/CCimages/aw1os1.jpg

Here's the upper saucer section, this is the same way I made the skeleton for the mainbody of the Klingon D-7 body and forward section.
http://www.compositecreationsltd.com/CCimages/anewkit1bafu2.jpg

Below is a mock up of the Enterprise nacelle pylon, I did something similar for the boom on the D-7.
http://www.compositecreationsltd.com/CCimages/anp3sw6.jpg

When I created a nacelle for the Enterprise I just printed up a tube, filled it with foam, let it dry and covered it with fibergalss.

http://www.compositecreationsltd.com/CCimages/an3yv8.jpg

This is the same way I made the engineering section.

http://www.compositecreationsltd.com/CCimages/aa1aeg9.jpg

http://www.compositecreationsltd.com/CCimages/aw2yy5.jpg

This is the lower saucer section of the Enterprise, covered with fiberglass.
http://www.compositecreationsltd.com/CCimages/anewkit1yy0.jpg

I'll have more on the D7 tomorrow, but I thought that would show some applicable methods and examples. Sorry, I'm beat, I've been working on this almost non-stop for about three days now. I've got a boatload of pictures and hope to organize things more tomorrow and present a better explanation.

Since the bridge has a similar shape as the forward section of the D7, I thought I would add these shots. This shows the bridge which is nothing more than spokes of balsa wood, cut as above, covered with tape and coated with fibergals resin.

http://www.compositecreationsltd.com/CCimages/4lr5.jpg

Look in the lower left.

I've learned a lot building that ship and building a Studio Scale A-Wing, so I think you'll like the pics of the D7.

Trek on!
 
Unfortunately, I wasn't able to get the new pics loaded just yet, but I thought I would show you what's possible with this method. I had started my project back in Oct of 06, long before the MR toy had reached production, yet the night that the MR hit the scene, a friend of mine compared my parts, made from this method, with the MR. Here are some pics.

http://img204.imageshack.us/my.php?image=acomparison1wv6.jpg

http://img207.imageshack.us/my.php?image=acomparison1asb9.jpg

http://img224.imageshack.us/my.php?image=acomparison1buw0.jpg

http://img224.imageshack.us/my.php?image=acomparison1dwp2.jpg

http://img213.imageshack.us/my.php?image=acomparison1fwh7.jpg

http://img213.imageshack.us/my.php?image=acomparison1gqk3.jpg

http://img206.imageshack.us/my.php?image=acomparison1hmi1.jpg

http://img205.imageshack.us/my.php?image=acomparison1igh4.jpg

Of course there are some differences, but hey, this was my first time and I had not worked on it for a year, with and entire staff and didn't have it mass produced in China! LOL

How long will it take for this post to be run down the list?

HAHAHAHA...LOLOL.... :angel:
 
Unfortunately, due to circumstances beyond my control, this build-up thread will be delayed. My website has been hacked and I'm working with another gentleman to restore the data. I'm still working on the Klingon D7 and have it very close to being finished. I'm still taking pictures as I go along,and will get back to this shortly. Unfortunately, I have to get my website repaired first.

Keep on Trekkin! :thumbsup:
 
ancient said:
This is pretty damn creative, well done!

Thanks. I was working with a machinist, on doing a machined aluminum version, which is something I've laways wanted to do and in fact started a thread about it here some time ago, about six to seven years ago.... Anyway, Progress was almost non-existant and I was severely frustrated, so I came up with this method. Little did I know that a very similar method had been used by professionals, for years.

Where's Rick when you need him? :angel:

I'm really getting into making my own models. The skies are the limit. I can make anything I want now and don't have to pay huge prices for something that may, or may not be what I want. I can make my own and make it my way. That's the whole reason for this thread, to kind of share the wealth.
:thumbsup:
 
Well, I finally got my site back up, for now.... So, I've got a little time to dedicate to this. I'm organizing my pictures of the K-D7 work up but I wanted to refer back to the Enterprise again, since it's relevant to the process.

As I stated earlier, one of the ways you can do this is to work directly from a blueprint. I started out with Alan Sinclair's prints and with a paper model that Ron Caudillo made of the Enterprise. I sized the paper model up and made sure that the dimensions matched what I wanted and matched the Sinclair prints. This was hard, since Ron made his paper model from the Sinclair prints.

Anyway, as you see below, I took the sized prints and layed them over the balsa wood that I used for framing. Initially I was going to produce some rudimentary support frame, but found that was unnecessary.

http://www.compositecreationsltd.com/CCimages/picture176dh7.jpg

http://www.compositecreationsltd.com/CCimages/picture177oc5.jpg

Below you see a partially finished nacelle pylon made from paper, tape, glue and fiberglass.

http://www.compositecreationsltd.com/CCimages/5ki4.jpg

Here's an early nacelle blank.

http://www.compositecreationsltd.com/CCimages/7yz2.jpg

Some rough looking parts that end up looking a lot better.

http://www.compositecreationsltd.com/CCimages/anewkit10nh8.jpg

As you see, in the background, there's a working print that I used to keep an eye on all of the separate parts, to check for dimensions. This was used as a quick check, I went over every part with various measuring devices to check the tolerances, this would work in a oinch though.

http://www.compositecreationsltd.com/CCimages/anewkit17dj5.jpg

I wont deny that some of the parts looked a little rough, for awhile, but it's all part of the process.

http://www.compositecreationsltd.com/CCimages/anewkit31.jpg

http://www.compositecreationsltd.com/CCimages/anewkit32.jpg

http://www.compositecreationsltd.com/CCimages/anewkit34.jpg

http://www.compositecreationsltd.com/CCimages/ASinclair1.jpg

Here are some of the parts, in a semi finished condition. Keep in mind this was all done in a couple of weeks and cost me very little in supplies, since I was using paper, tape and glue to start with.

http://www.compositecreationsltd.com/CCimages/usssinc1a.jpg

http://www.compositecreationsltd.com/CCimages/usssinc1e.jpg

http://www.compositecreationsltd.com/CCimages/usssinc1f.jpg

A couple more parts checks.....

http://www.compositecreationsltd.com/1ATK60.jpg

http://www.compositecreationsltd.com/1ATK61.jpg

http://www.compositecreationsltd.com/1ATK68.jpg

http://www.compositecreationsltd.com/1ATK69.jpg

Hopefully the next update will all be K-D7. See what's possible with a little engine-uity, a little paper, a little tape and a little glue? Oh yeah and a little perserverence.
 
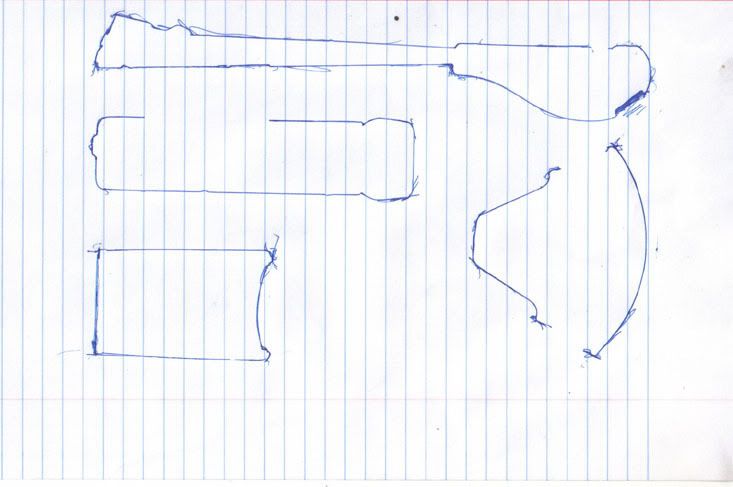
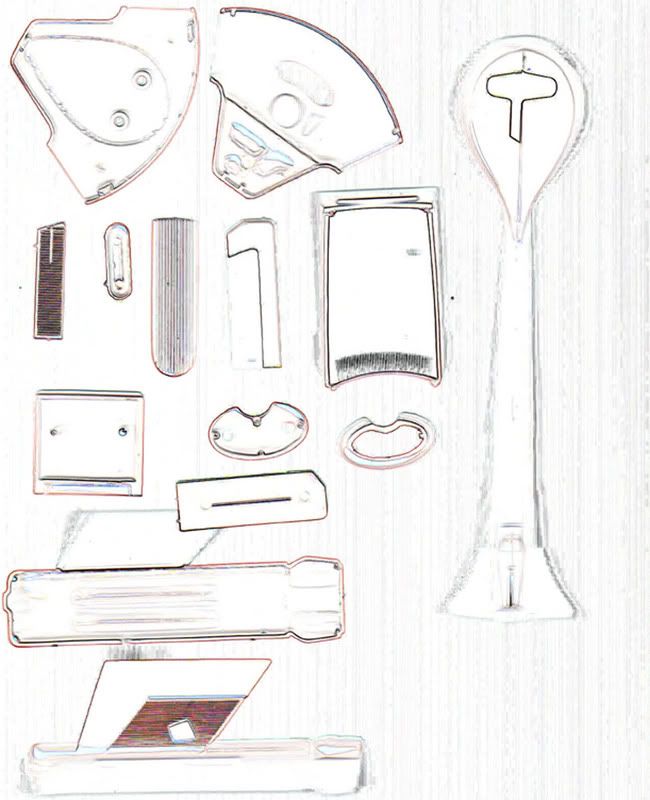
OK, here we go with the actual build on the D7. I did the same thing that I did for the Enterprise, I made up properly sized templates for each separate piece of the model and printed them up on cardstock. Here is what we have to start with.

A scan of various flat surfaces.
AK1F.jpg


http://i45.photobucket.com/albums/f63/6242amu/AK2F.jpg

I split the boom and forward section of the ship into two different templates.

http://i45.photobucket.com/albums/f63/6242amu/AK2Fboom.jpg

http://i45.photobucket.com/albums/f63/6242amu/AK2Fbridge.jpg

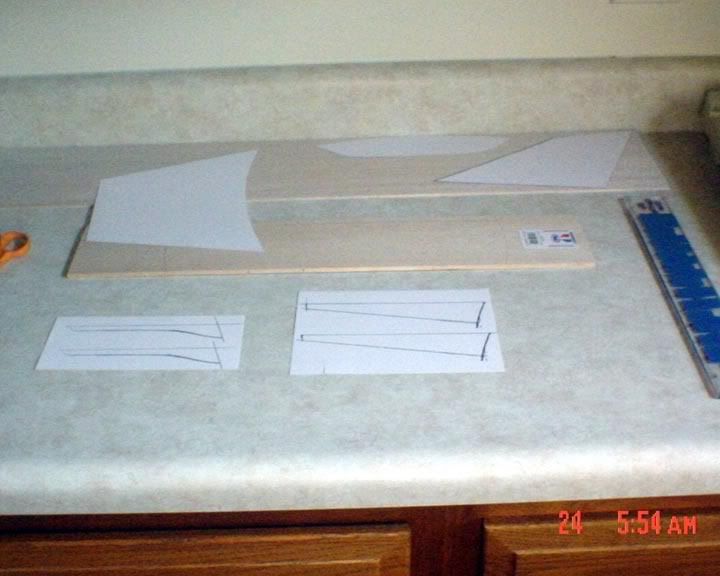
I layed the balsa wood on the template of the top, just like I did the saucer section of the Enterprise.
http://i45.photobucket.com/albums/f63/6242amu/AK2Fbridgetop.jpg

More to come......
 
Here are a few shots of the templates ready to mark off the balsa wood, just like the Enterprise. I would show where I'm at on the ship, but I don't want to get ahead of the purpose of this thread. Remember, you can build it yourself.

AKwork1.jpg


http://i45.photobucket.com/albums/f63/6242amu/AKwork2.jpg

I ended up using two sheets of cardstock, for the primary component of the back, my balsa wasn't thick enough and I didn't want to compromise the integerity of the hull.

http://i45.photobucket.com/albums/f63/6242amu/AKwork3.jpg
 
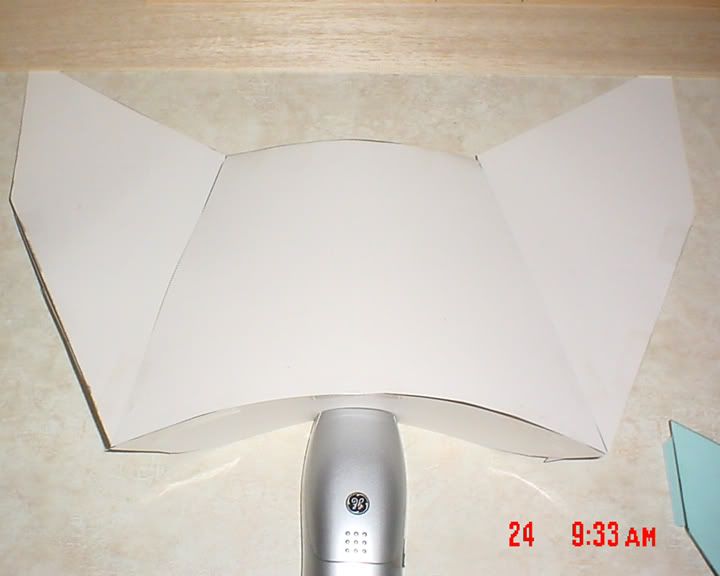
Before I cut into the balsa wood I like to verify each template. The best way to do this is to place all of the parts of one section together and make sure they line up. You can also tape them together and check for over all fit, shape and form.

See below. This is also one way to make a paper model. Please refer back to the previous images and you'll see where this is going.

http://i45.photobucket.com/albums/f63/6242amu/_Aklingonbuild1.jpg

http://i45.photobucket.com/albums/f63/6242amu/_Aklingonbuild2.jpg

_Aklingonbuild3.jpg
 
I'm sitting here going through all the pictures trying to write up the verbiage, so that it makes sense and I was wondering a few things.

Does anyone who's keeping track of this want me to hos the properly sized templates?

Do you think I should include a Bondo primer?

Should I include some basics on fiberglass?

I figure I can cover the bases one at a time, while working through the "How To."

Any thoughts?
 
Its fascinating stuff, but I reckon you must have to be good with your hands to do stuff like this.

I think the ratio of links to hosted pics are good at the moment, too many pictures in the thread can make them very long to load.

Definitely include instructions on bondo and fibreglass, I made models for 20 years, and have never heard of the first, or used the second.

Keep up the good work, you are inspirational.
 
biotech said:
Its fascinating stuff, but I reckon you must have to be good with your hands to do stuff like this.

I think the ratio of links to hosted pics are good at the moment, too many pictures in the thread can make them very long to load.

Definitely include instructions on bondo and fibreglass, I made models for 20 years, and have never heard of the first, or used the second.

Keep up the good work, you are inspirational.

I don't know if you have to be good with your hands, or just persistent. Bondo is a very forgiving medium, you can cut it, file it, sand it, shape it and so on. Bondo is a polyester resin that's used in automotive and other fields for shaping and contouring. Fiberglass is a form of epoxy resin that can be used much the same way, for mant different uses.

Also, think of composite materials. Light weight, durable, strong materials that when properly combined can be stronger than steel, lighter than aluminum and never rust. The Beoing 787 was made from composites and they are used in many high stress and high heat applications, such as model rocketry...etc.

What you have are two different media that are very pliable, easy to work with and very strong when they "set up" or cure.

Both of these tools can be used to make masters and parts for casting very easily and very quickly.

I'll show more and tell more later. I will have a primer on each included in this thread.

Don't buy it, build it. Don't talk about it, do it. :angel: :thumbsup:
 
If you are not already a member then please register an account and join in the discussion!

Sign up / Register


Back
Top