Hi there!
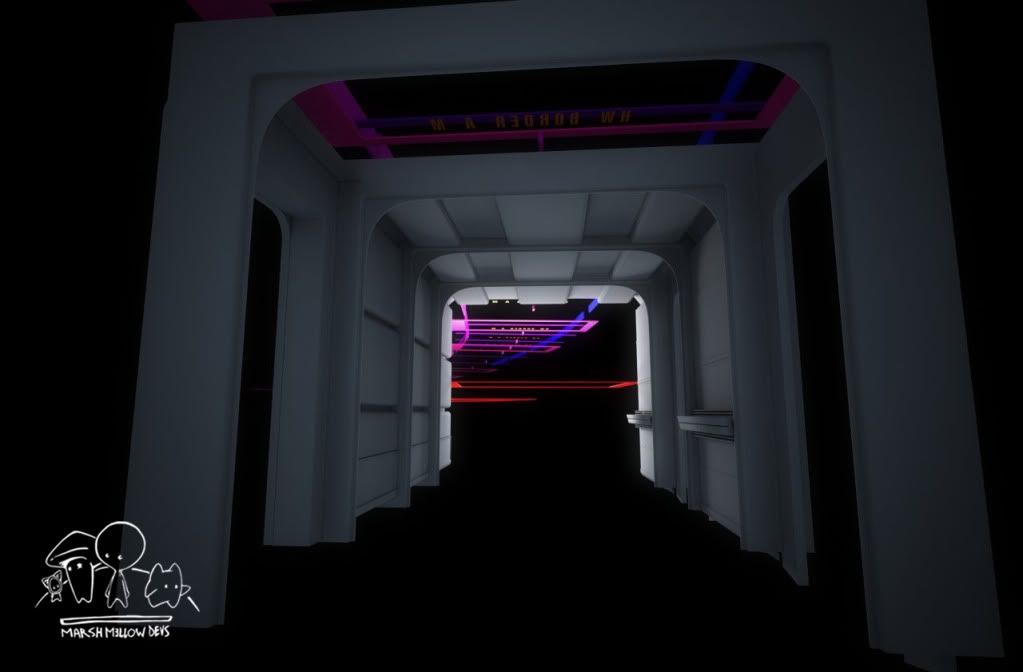
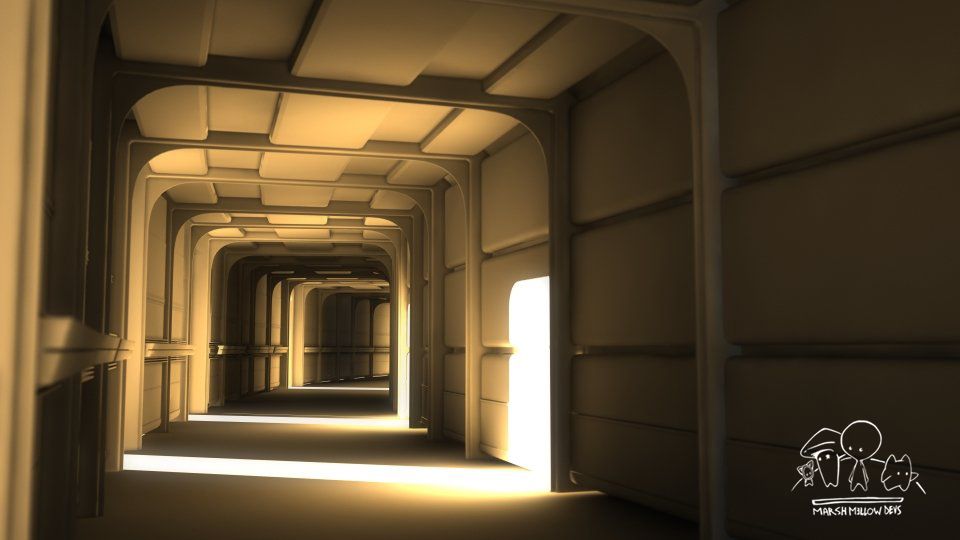
This is a Work In Progress and supposed to be walkable in realtime at the end. The title pretty much says what you should be able to walkthrough - though, if there is enough interest in the project we (one guy for Design, one for Technology) might even extend the project and build the next decks, when we're finished with D1-4. But our primary concern is it to build the first four decks for a continuous representation as it would have been in the latest season of Star Trek: The Next Generation.
I will use the Sternbach AND the Whitefire Blueprints, various screenshots hosted at trekcore, related interviews with the original film crew ( Okuda, Sternbach, Whitefire, Probert et al. ), many episodes and a lot of other stuff... puh ...research, sorting and aligning everything as close to as we see it on screen is one of the most time consuming tasks, even with all the available resources.
The reason for using the 2 blueprints is that they both contain mistakes, but either contain good ideas where the other one fails to present usable layouts for the finale design. Which brings me to the point we all know: the blueprints, the tv screencaps and so forth don't line up. So, I will set priorities when it comes to drifts in the finale designs and I will have to create designs for rooms we haven't seen onscreen.
As a general rule:
What we see onscreen of the ships interiors outweights what we see onscreen of the exterior, which again outweights the schematics ( drawings, non-canon related material and so forth ). The final design decisions outweight everything.
Motivation.
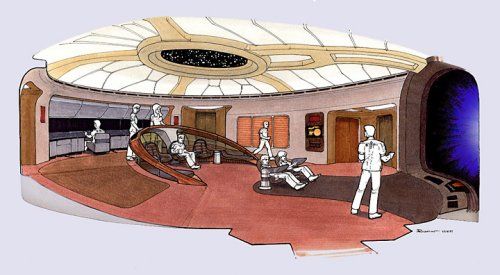
I saw many cg-recreations of Trek related things, wether it may be ships, equipment or whole sets. And I think we saw alot of good stuff in that department on the internet and around here. But even one of the few recreations on the Enterprise D (also featured in this forum) - although beautiful - is non-continuous and done with old technology. Even if we look beyond continuous realtime approaches it's hard to find an accurate representation of... for instance the bridge, let alone Data/Worfs/LaForges Room ( Deck 2 ) anywhere (though there is still plenty of good work on that matter to find) ... and above all that, there seems to be no active attempt at an unintermitted walkthrough ( playable in realtime ).
This is definitively inspired by the Star Trek: The Experience and the 90's technichal manual CD-Rom which featured a "walkthrough" of the Enterprise D. Though there never was a walkthrough... They had panoramic pictures which were done from certain point of views. But I admit : I think it was cool for that time. Not really being able to walk around the ship certainly was a disappointment, but I definitively remember that, when I was a child, I spend some hours on the CD-Rom instead of the book.
Unfortunately, though supported by people from the series and good cg artists, they seem to have done another publication that does the panoramic thing again. So,... those weren't even from the real sets and not done for a practical realtime application ( design and technology have to be different ). And to recreate all the 42 Decks would have been too intense anyway. Which is ... sad.
I don't need to mention that walking around in realtime and use (some of) the devices always was a dream of some of us. And even if I will just be able to work on a fraction of the ship we still want to try and deliver a convincing experience from a "tour-perspective", but without the limitation we have seen before and then, of course, giving it away as a free download. We'll see how far we get.
The idea isn't new. Still, from time to time I will need to talk about one or the other matter - for your understanding - to clarifiy where we want to head and how decision come about.
So, here we go.

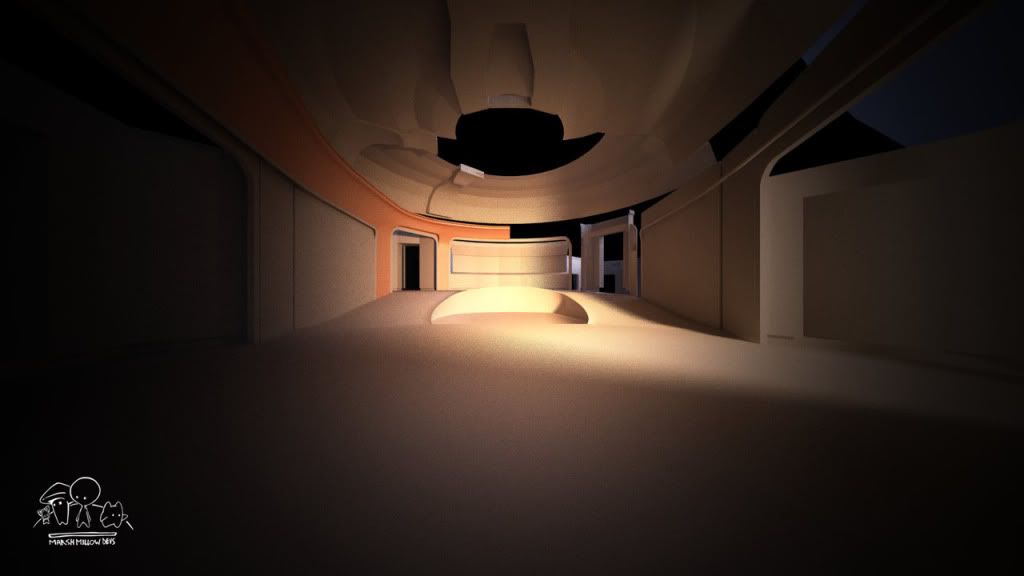
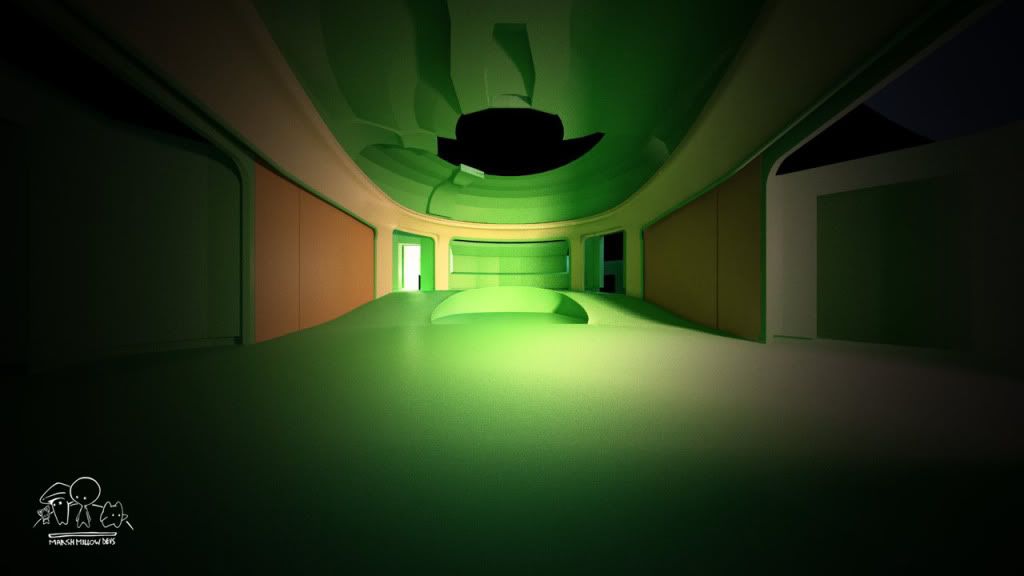
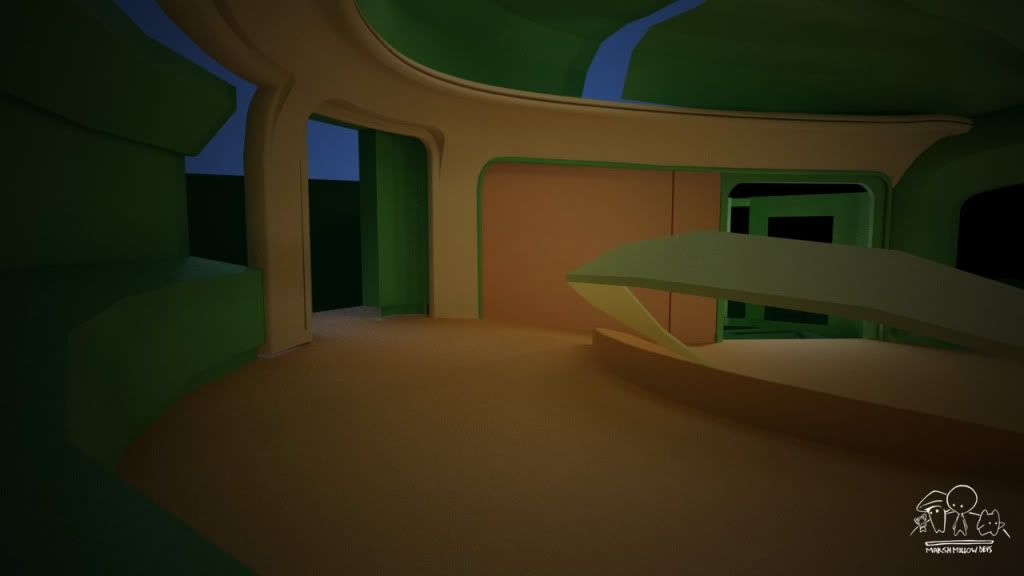
This first post will fiddle with discrepancies in the rescources and some of the changes I have to do to the design. I possess alot of references and blueprints, but i will primarily show just a few for comparisons or to give you a certain understanding of the process.
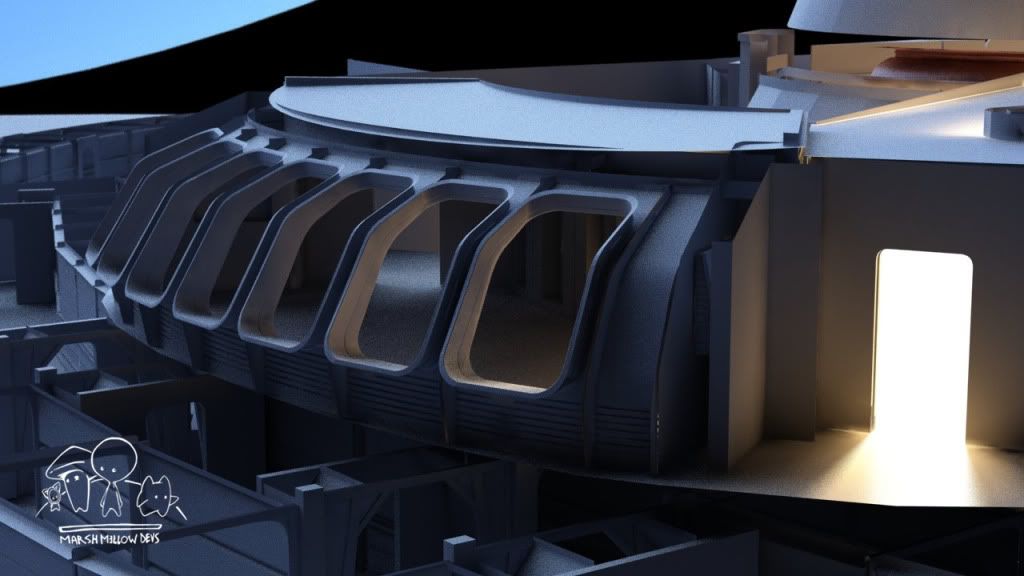
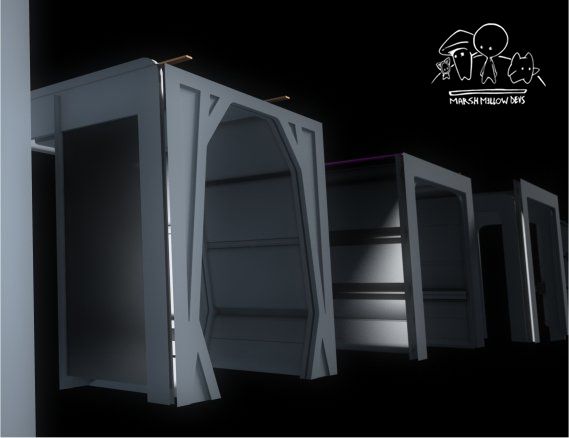
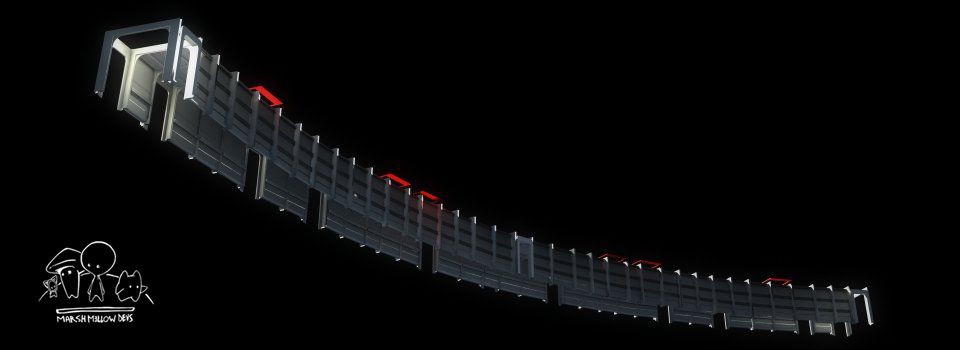
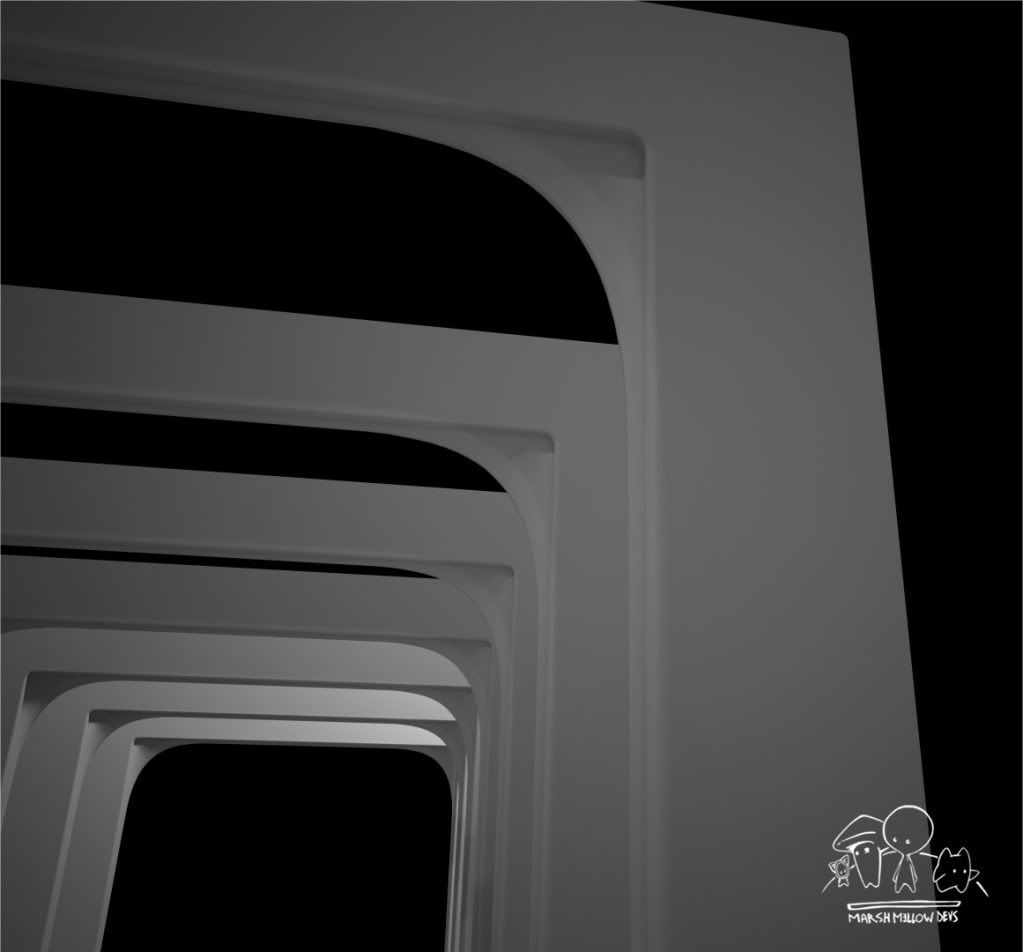
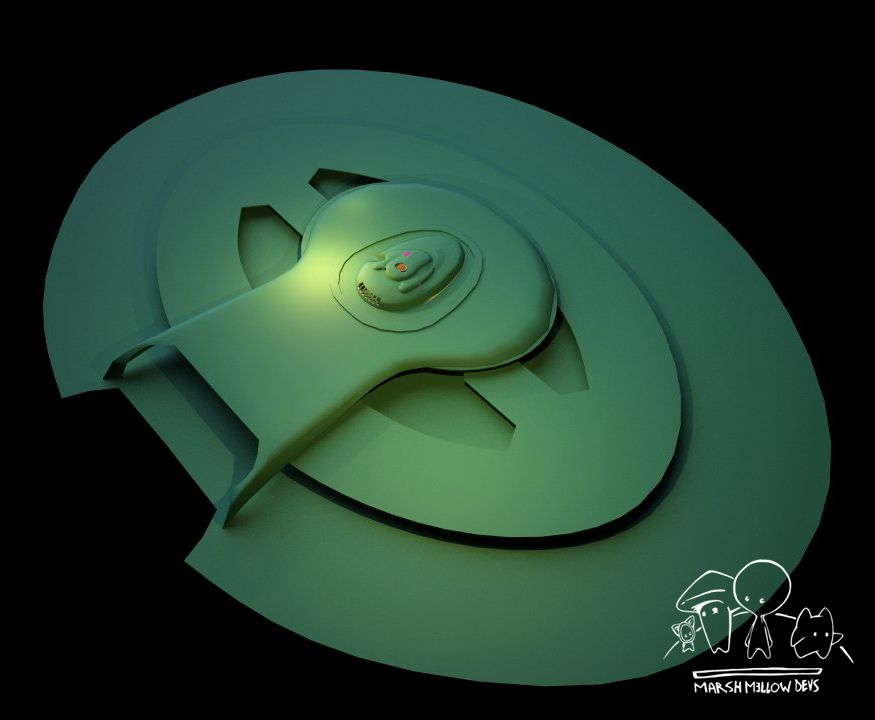
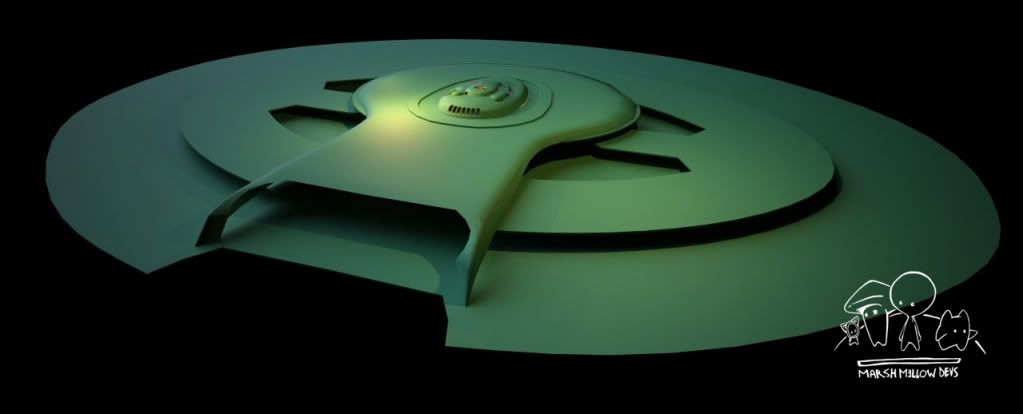
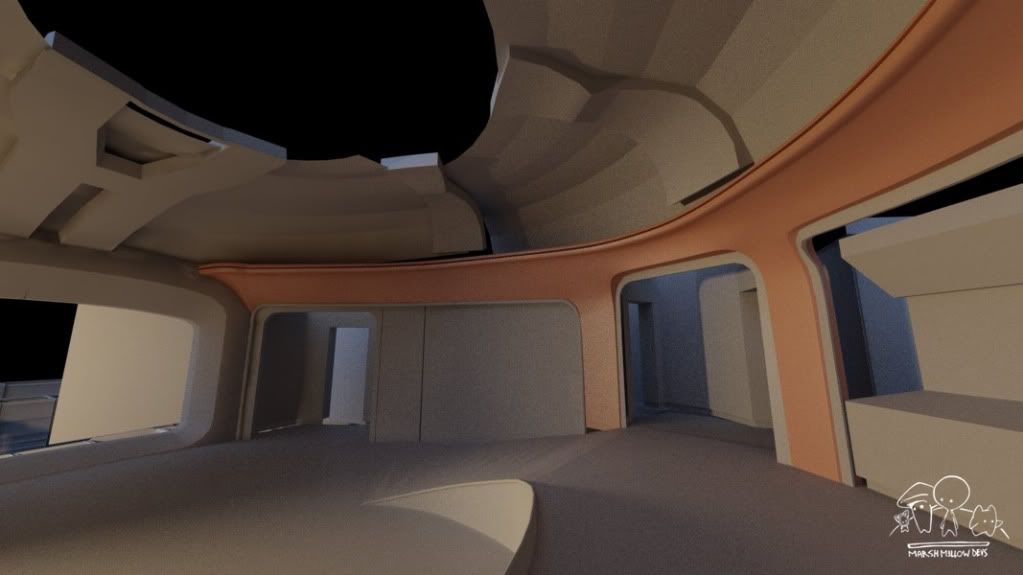
Let's take a look at the surface and the volume of the structure to build. This is a rough rendering layout of Deck 1-4. It was build based on the Sternbach Blueprints ( abbr.: SternBbt ).


This layout helped a lot with setting up some of the design specifics required for building the interior. Though you should note that this is a layout and, although helpful for visualizing the mass, it does not represent the final models.
Use this layout to understand the design challenge presented by the structure. The main shuttle bay has to be designed, organised and connected all the way to Deck 2 by staircases, apartment, lounges, the sensor phalanx, turbolift shafts ...
Many things. Still, it's much like a little bunker. Some parts have to be consideres connected, others can be treated separately. - This has a great influence on the design tactics.
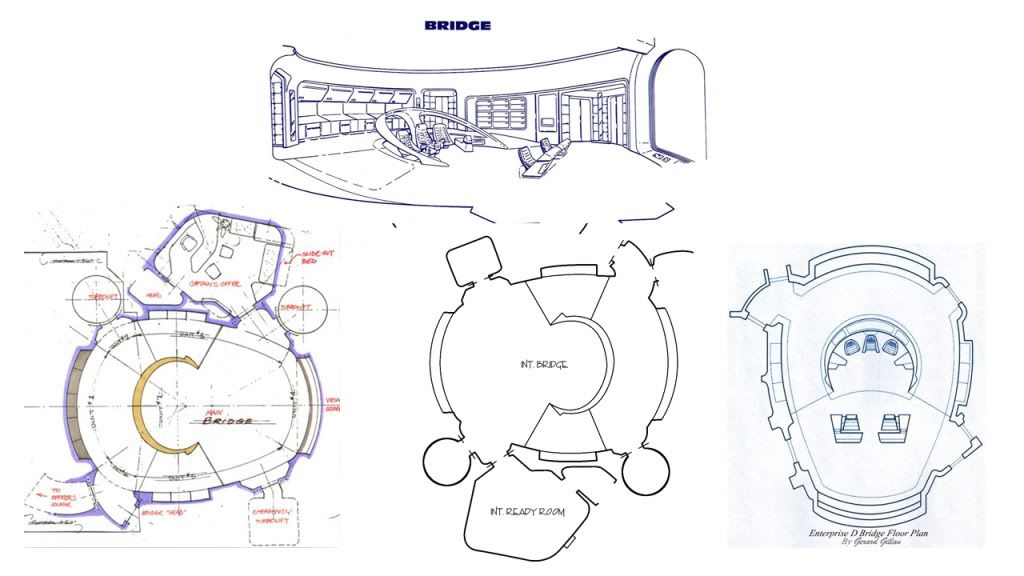
Bridge Reference Part 1 - Alignable Shematics
Since we start at the bridge we will look at some of the research material first. I looked a lot around to find good references, but I am ultimately limited by what is floating around on the internet and books I already have or that are made available for me. Needless to say I have to separate the wheat from the chaff ( canon from fanon ).

(STAR TREK and all related marks, logos and characters are owned by CBS Studios Inc. or the respective artist.)
Plans like these helped a lot with realizing where evrything is for instance on the bridge. On the other hand, the plans don't line up perfectly to each other, and they lack a lot of information anyway. - But because some of them are done by the original designers, or others because they showed a good amount of thoughtful detailing, they are very usable as a start - while the episodes screenshot will still be a prioritized reference.
Bridge Reference Part 2 - Schematical Chaos
I had prepared a couple of paragraphes that would go more into detail with all the mistakes a lot of the references possess ( like the Star Trek The Experience Bridge somewhat kitbashes the TNG bridge designs changes over time and other stuff... ) but that way I would extend the scope unnecessarily.
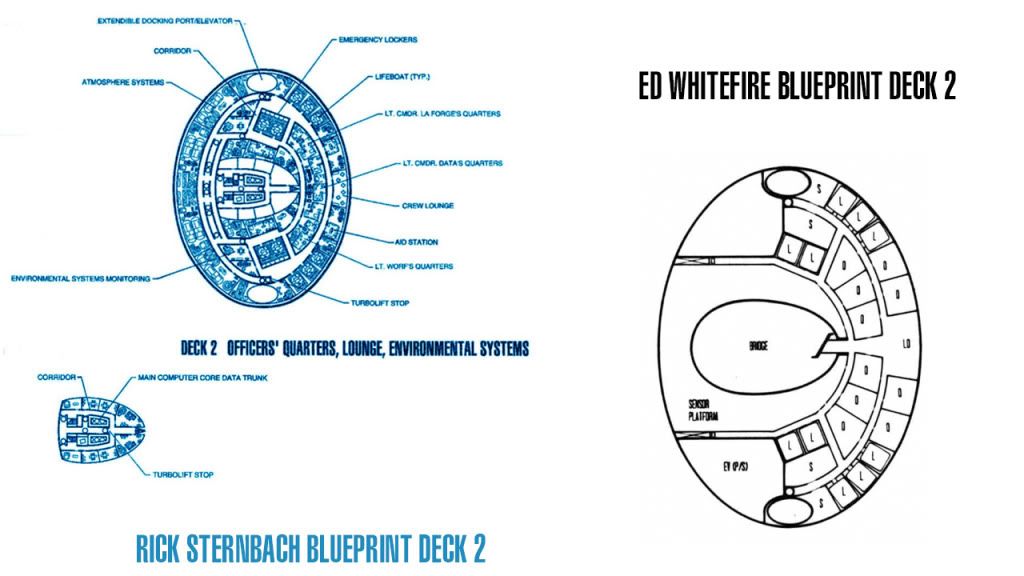
The Sternbach and Whitefire Blueprints are a special case. I will use them throughout the project. But they don't essentielly make sense considering all we know from the interior of the ship. Nevertheless. There was put some thought into either of them aligning them with their respective model( Sternbach : 4ft, Whitefire : 6ft ) and following a certain philosophy that was informed by the original film crew ( or were part of it ).
But this does not mean I could just take one of them and build the structure from there. It would'nt work. I will have to make the most sense out of the two blueprints. I will talk about the problems of their schematics when they arise/ are interesting to talk about, but have to say that it helps to have plans that make more or less sense in itself.
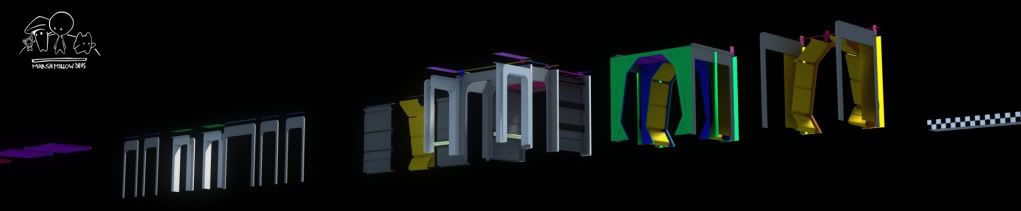
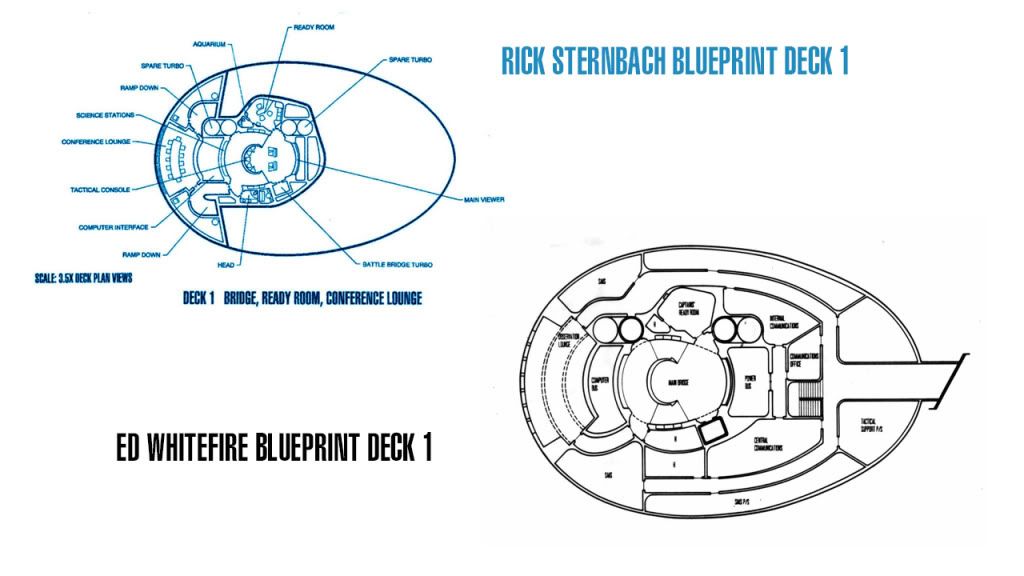
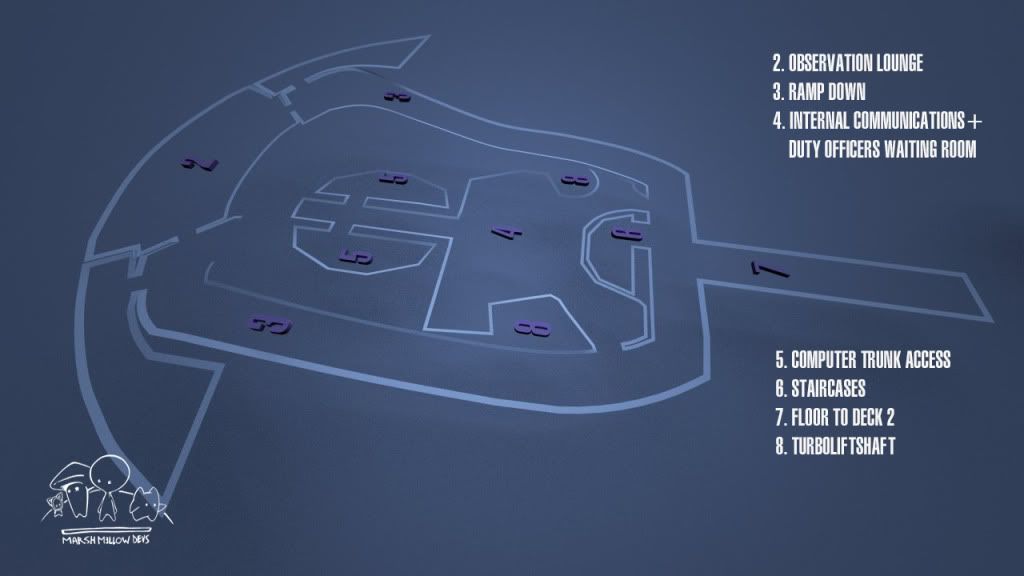
Just a sample: the interconnection between Deck 1 and 2

(STAR TREK and all related marks, logos and characters are owned by CBS Studios Inc. or the respective artist.)

(STAR TREK and all related marks, logos and characters are owned by CBS Studios Inc. or the respective artist.)
Look closer and see the problems with their depiction. Sternbach draws ramp downs that lead to Lower Deck 1 ( just present in SternBpt ) right behind the bridge, where Whitfire has a ramp down directly to deck 2. The general idea of the Whitfire plans ( abbr.: WhiteBpt ) is it to have the module Sternbach describes as Lower Deck 1 on Deck 1 itself...
I actually already stop here, since there are too many things to compare. But it is important for me to understand what can be included in the final design ( or its respective draft ) and what not.
So, here are just some of the conclusions I made concerning Deck 1 and 2:
- Deck 1 : going with the WhitBpt isn't possible: Picard couldn't watch out of his window
- the ramp downs have to be where Sternbach draws them
-( layout observations ) the actual slope that is needed for the ramps prohibit for what Sternbach draws for Lower Deck 1
- there will be a Lower Deck 1, but it will lean more towards the WhiteBpt.
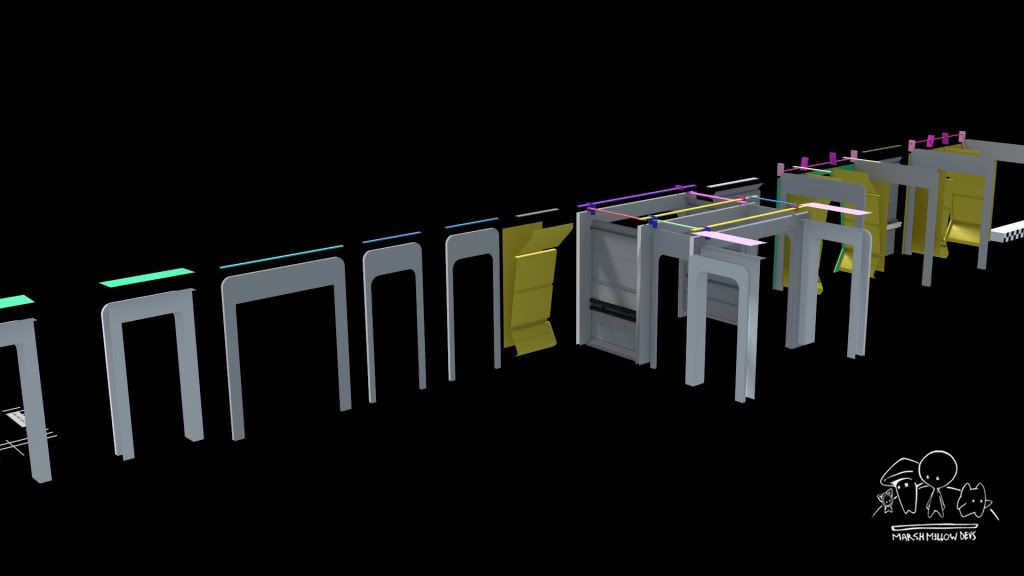
Bridge Reference - Part 3 - New Designs
Now, those are hybrid-plans I've made out of my conclusions. Please note, that the Lower Deck 1 configuration isn't set in stone yet. You will notice that the ramp downs are asymmetrical. That is due to asymmetrical properties of the nearby rooms. I tried to keep the Computer Core Data Trunk and made it accessible for personnel. Internal Communications has shrunk and has been put together with the Duty Officers Waiting Room - yes, it's an invention by me, but it's plausible - or where do you think the little officers come from (those who release the main staff at there station, when our heros head for a space adventure?). I have put the staircases in the center. SternBpt + WhiteBpt have an intirely differnt approaches on the staircases, which ultimately causes some promblems with the necessary changes I have to make.
One of my priorities would be to actually being able to walk from Lower Deck 1 to Deck 2. But there are other reasons, like redundant details in the SternBpt which has to be substituted by plausible rooms and inventory. I must conclude the WhitBpt do not have detailed graphics, but more thought was put into finding a plausible use for the space availabe.


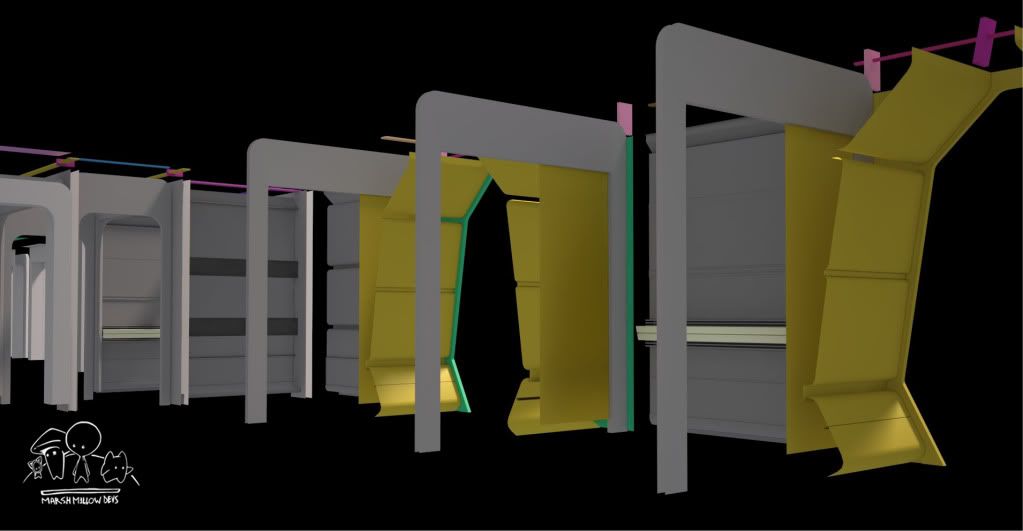
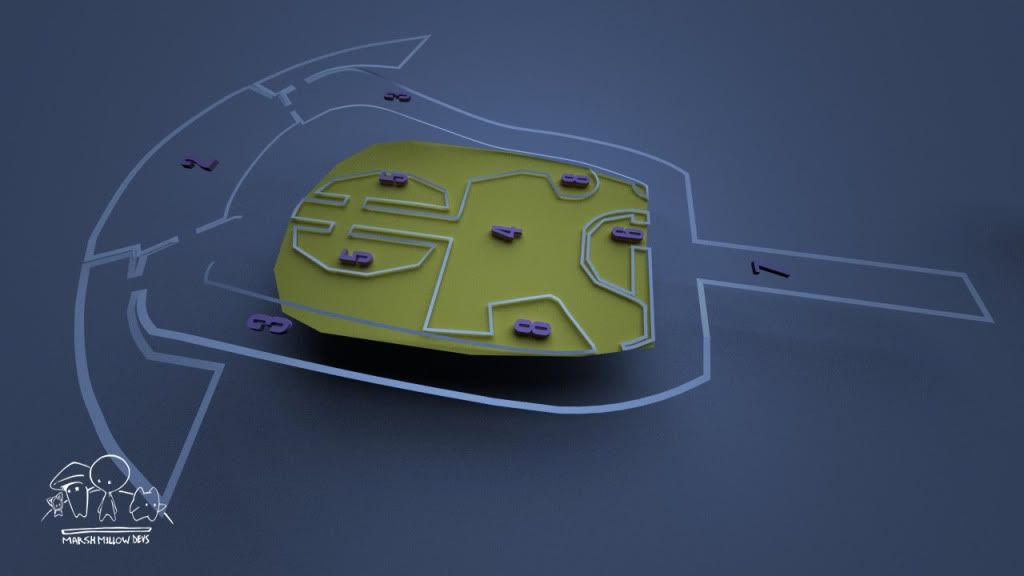
In the following image you see the yellow marked area. It contains whatI concluded should be in there - though the arrangement may change. If you have thoughts on this, just tell me in this thread. But consider, that there are two turboliftshafts, staircases and other stuff that already occupies a certain space!

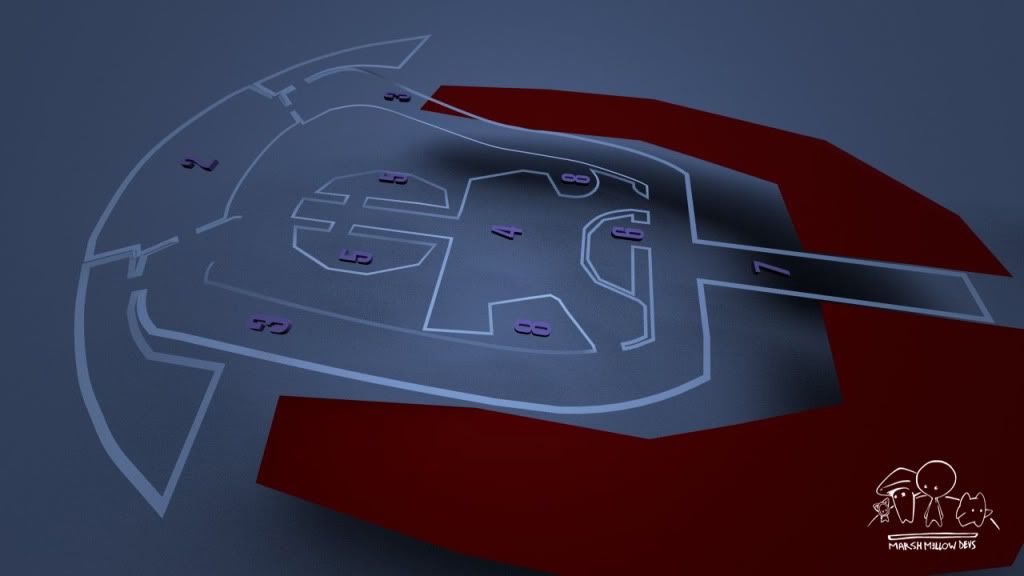
This red marked area will most likely contain the Whitefire-variant. The SternBpt content, although graphically detailed, is redundant with no helpful information. This btw is not the sensor grid. That's above the ceiling of Deck 2 and the rooms beneath it give you access to the grid.

So, actually ... that's it, for now...
...I'd have a ton more to talk about, but I don't want to waste to much of your time and preparing this actually occupies time that would go to the actual builing process otherwise . The next post will talk briefly about secondary structures like the corridors, targeted polygon counts and it will contain more test and traget renderings of actual models. Stay tuned!
This is a Work In Progress and supposed to be walkable in realtime at the end. The title pretty much says what you should be able to walkthrough - though, if there is enough interest in the project we (one guy for Design, one for Technology) might even extend the project and build the next decks, when we're finished with D1-4. But our primary concern is it to build the first four decks for a continuous representation as it would have been in the latest season of Star Trek: The Next Generation.
I will use the Sternbach AND the Whitefire Blueprints, various screenshots hosted at trekcore, related interviews with the original film crew ( Okuda, Sternbach, Whitefire, Probert et al. ), many episodes and a lot of other stuff... puh ...research, sorting and aligning everything as close to as we see it on screen is one of the most time consuming tasks, even with all the available resources.
The reason for using the 2 blueprints is that they both contain mistakes, but either contain good ideas where the other one fails to present usable layouts for the finale design. Which brings me to the point we all know: the blueprints, the tv screencaps and so forth don't line up. So, I will set priorities when it comes to drifts in the finale designs and I will have to create designs for rooms we haven't seen onscreen.
As a general rule:
What we see onscreen of the ships interiors outweights what we see onscreen of the exterior, which again outweights the schematics ( drawings, non-canon related material and so forth ). The final design decisions outweight everything.
Motivation.
I saw many cg-recreations of Trek related things, wether it may be ships, equipment or whole sets. And I think we saw alot of good stuff in that department on the internet and around here. But even one of the few recreations on the Enterprise D (also featured in this forum) - although beautiful - is non-continuous and done with old technology. Even if we look beyond continuous realtime approaches it's hard to find an accurate representation of... for instance the bridge, let alone Data/Worfs/LaForges Room ( Deck 2 ) anywhere (though there is still plenty of good work on that matter to find) ... and above all that, there seems to be no active attempt at an unintermitted walkthrough ( playable in realtime ).
This is definitively inspired by the Star Trek: The Experience and the 90's technichal manual CD-Rom which featured a "walkthrough" of the Enterprise D. Though there never was a walkthrough... They had panoramic pictures which were done from certain point of views. But I admit : I think it was cool for that time. Not really being able to walk around the ship certainly was a disappointment, but I definitively remember that, when I was a child, I spend some hours on the CD-Rom instead of the book.
Unfortunately, though supported by people from the series and good cg artists, they seem to have done another publication that does the panoramic thing again. So,... those weren't even from the real sets and not done for a practical realtime application ( design and technology have to be different ). And to recreate all the 42 Decks would have been too intense anyway. Which is ... sad.
I don't need to mention that walking around in realtime and use (some of) the devices always was a dream of some of us. And even if I will just be able to work on a fraction of the ship we still want to try and deliver a convincing experience from a "tour-perspective", but without the limitation we have seen before and then, of course, giving it away as a free download. We'll see how far we get.
The idea isn't new. Still, from time to time I will need to talk about one or the other matter - for your understanding - to clarifiy where we want to head and how decision come about.
So, here we go.
(STAR TREK and all related marks, logos and characters are owned by CBS Studios Inc. or the respective artist.)
This first post will fiddle with discrepancies in the rescources and some of the changes I have to do to the design. I possess alot of references and blueprints, but i will primarily show just a few for comparisons or to give you a certain understanding of the process.
Let's take a look at the surface and the volume of the structure to build. This is a rough rendering layout of Deck 1-4. It was build based on the Sternbach Blueprints ( abbr.: SternBbt ).
This layout helped a lot with setting up some of the design specifics required for building the interior. Though you should note that this is a layout and, although helpful for visualizing the mass, it does not represent the final models.
Use this layout to understand the design challenge presented by the structure. The main shuttle bay has to be designed, organised and connected all the way to Deck 2 by staircases, apartment, lounges, the sensor phalanx, turbolift shafts ...
Many things. Still, it's much like a little bunker. Some parts have to be consideres connected, others can be treated separately. - This has a great influence on the design tactics.
Bridge Reference Part 1 - Alignable Shematics
Since we start at the bridge we will look at some of the research material first. I looked a lot around to find good references, but I am ultimately limited by what is floating around on the internet and books I already have or that are made available for me. Needless to say I have to separate the wheat from the chaff ( canon from fanon ).
(STAR TREK and all related marks, logos and characters are owned by CBS Studios Inc. or the respective artist.)
Plans like these helped a lot with realizing where evrything is for instance on the bridge. On the other hand, the plans don't line up perfectly to each other, and they lack a lot of information anyway. - But because some of them are done by the original designers, or others because they showed a good amount of thoughtful detailing, they are very usable as a start - while the episodes screenshot will still be a prioritized reference.
Bridge Reference Part 2 - Schematical Chaos
I had prepared a couple of paragraphes that would go more into detail with all the mistakes a lot of the references possess ( like the Star Trek The Experience Bridge somewhat kitbashes the TNG bridge designs changes over time and other stuff... ) but that way I would extend the scope unnecessarily.
The Sternbach and Whitefire Blueprints are a special case. I will use them throughout the project. But they don't essentielly make sense considering all we know from the interior of the ship. Nevertheless. There was put some thought into either of them aligning them with their respective model( Sternbach : 4ft, Whitefire : 6ft ) and following a certain philosophy that was informed by the original film crew ( or were part of it ).
But this does not mean I could just take one of them and build the structure from there. It would'nt work. I will have to make the most sense out of the two blueprints. I will talk about the problems of their schematics when they arise/ are interesting to talk about, but have to say that it helps to have plans that make more or less sense in itself.
Just a sample: the interconnection between Deck 1 and 2
(STAR TREK and all related marks, logos and characters are owned by CBS Studios Inc. or the respective artist.)
(STAR TREK and all related marks, logos and characters are owned by CBS Studios Inc. or the respective artist.)
Look closer and see the problems with their depiction. Sternbach draws ramp downs that lead to Lower Deck 1 ( just present in SternBpt ) right behind the bridge, where Whitfire has a ramp down directly to deck 2. The general idea of the Whitfire plans ( abbr.: WhiteBpt ) is it to have the module Sternbach describes as Lower Deck 1 on Deck 1 itself...
I actually already stop here, since there are too many things to compare. But it is important for me to understand what can be included in the final design ( or its respective draft ) and what not.
So, here are just some of the conclusions I made concerning Deck 1 and 2:
- Deck 1 : going with the WhitBpt isn't possible: Picard couldn't watch out of his window
- the ramp downs have to be where Sternbach draws them
-( layout observations ) the actual slope that is needed for the ramps prohibit for what Sternbach draws for Lower Deck 1
- there will be a Lower Deck 1, but it will lean more towards the WhiteBpt.
Bridge Reference - Part 3 - New Designs
Now, those are hybrid-plans I've made out of my conclusions. Please note, that the Lower Deck 1 configuration isn't set in stone yet. You will notice that the ramp downs are asymmetrical. That is due to asymmetrical properties of the nearby rooms. I tried to keep the Computer Core Data Trunk and made it accessible for personnel. Internal Communications has shrunk and has been put together with the Duty Officers Waiting Room - yes, it's an invention by me, but it's plausible - or where do you think the little officers come from (those who release the main staff at there station, when our heros head for a space adventure?). I have put the staircases in the center. SternBpt + WhiteBpt have an intirely differnt approaches on the staircases, which ultimately causes some promblems with the necessary changes I have to make.
One of my priorities would be to actually being able to walk from Lower Deck 1 to Deck 2. But there are other reasons, like redundant details in the SternBpt which has to be substituted by plausible rooms and inventory. I must conclude the WhitBpt do not have detailed graphics, but more thought was put into finding a plausible use for the space availabe.
In the following image you see the yellow marked area. It contains whatI concluded should be in there - though the arrangement may change. If you have thoughts on this, just tell me in this thread. But consider, that there are two turboliftshafts, staircases and other stuff that already occupies a certain space!
This red marked area will most likely contain the Whitefire-variant. The SternBpt content, although graphically detailed, is redundant with no helpful information. This btw is not the sensor grid. That's above the ceiling of Deck 2 and the rooms beneath it give you access to the grid.
So, actually ... that's it, for now...
...I'd have a ton more to talk about, but I don't want to waste to much of your time and preparing this actually occupies time that would go to the actual builing process otherwise . The next post will talk briefly about secondary structures like the corridors, targeted polygon counts and it will contain more test and traget renderings of actual models. Stay tuned!
Last edited: