-
Welcome! The TrekBBS is the number one place to chat about Star Trek with like-minded fans.
If you are not already a member then please register an account and join in the discussion!
You are using an out of date browser. It may not display this or other websites correctly.
You should upgrade or use an alternative browser.
You should upgrade or use an alternative browser.
Life-Size Shuttlecraft Help
- Thread starter Bradester
- Start date
")

Bradster,Just a picture/progress update.
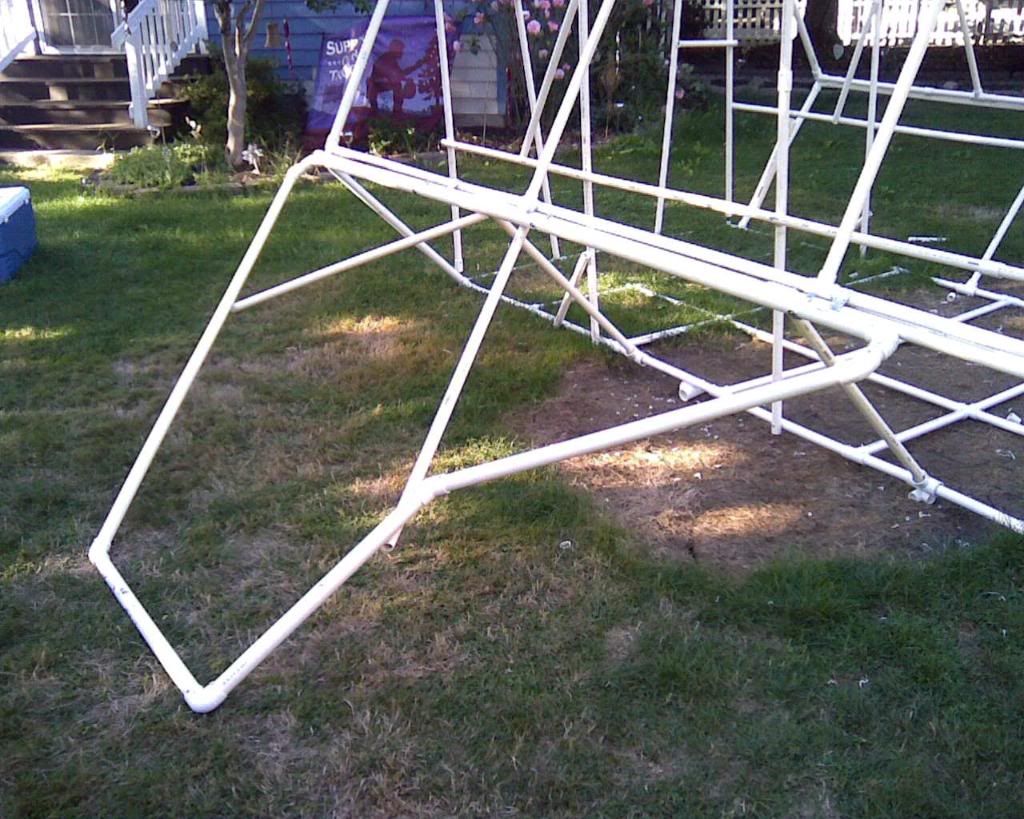
Right wing pattern pieced out onto the ground:

Right wing zip-tied into place to test the looks:

A few of the newly installed ceiling and what it looks like standing inside at the back looking forward:

You're the most creative person on this board in a long time you'll chose the right combination of design features that makes your shuttle scream "Star Trek" to any fan.
BTW I was thinking of using PVC myself for a Hover bike project or Bicycle frame parts.and I did design a shuttle based on a small shuttle pod,whose class escapes me.
Anyway good work so far love to see the completed shuttle.
Signed
Buck Rogers
Great update to post! The frame is done!!!
This is the connection I decided to use on the "wings". The wings are heavy enough that they stay in place by themselves, and they also pivot to be almost perfectly horizontal which will allow for nacelles if that happens. And it turns out the nacelles might happen because we discovered that grease buckets are metal, are almost free in cost, are sturdy and can be bolted together. Due to this connection the wings will also just lift off for movement and storage:

And the completed right wing in place:
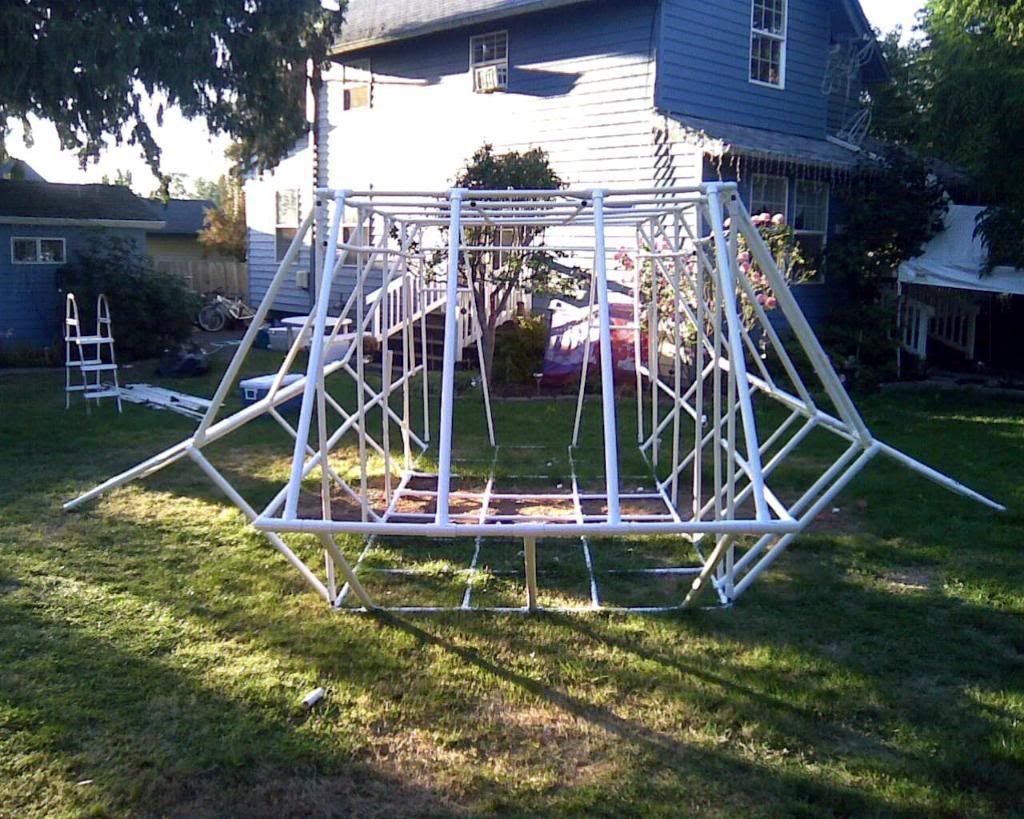
A beauty shot of the frame!:
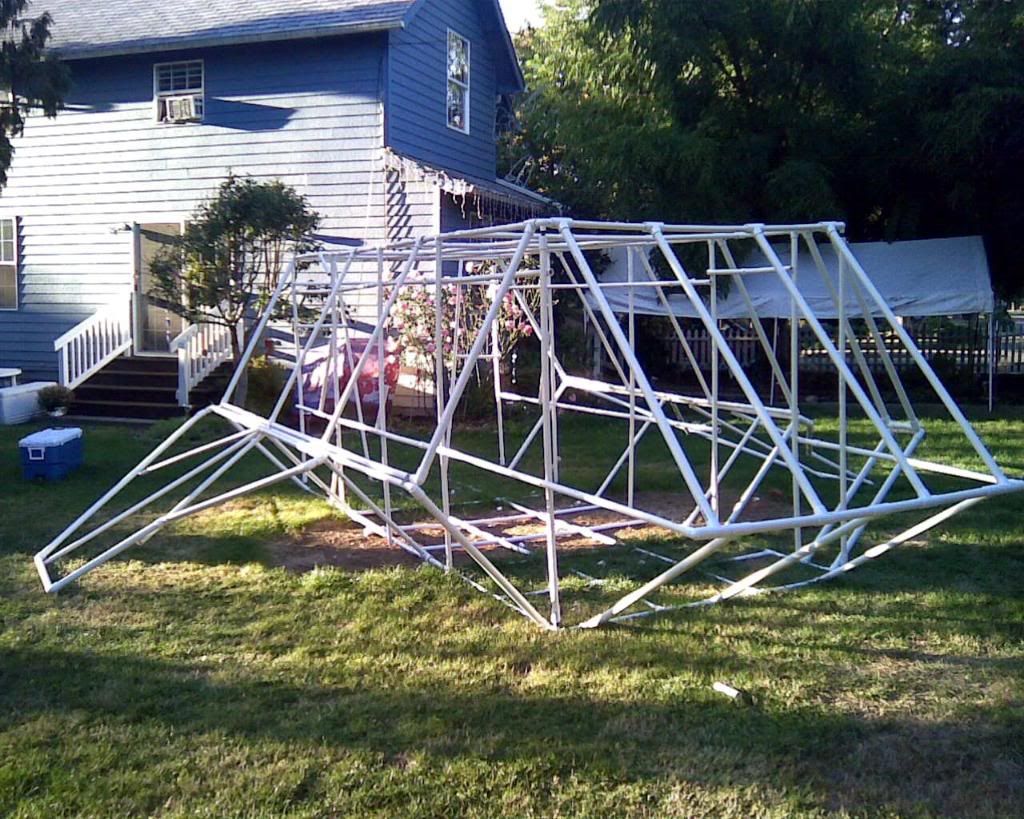
Front view:
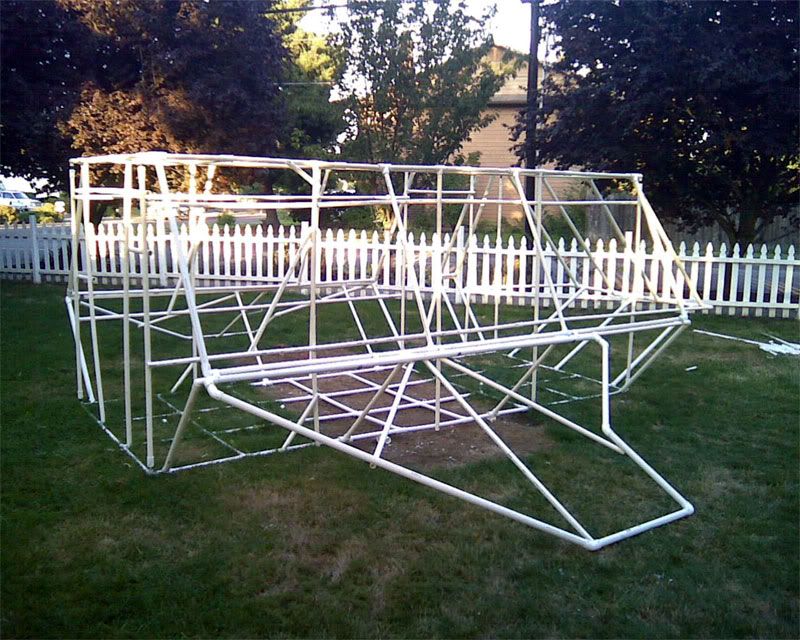
And left side view:

This weekend and weather permitting, the skin starts installation! What I thought was cool is that the shuttle as pictured is standing under its own weight without any kind of tether to keep it straight.
This is the connection I decided to use on the "wings". The wings are heavy enough that they stay in place by themselves, and they also pivot to be almost perfectly horizontal which will allow for nacelles if that happens. And it turns out the nacelles might happen because we discovered that grease buckets are metal, are almost free in cost, are sturdy and can be bolted together. Due to this connection the wings will also just lift off for movement and storage:
And the completed right wing in place:
A beauty shot of the frame!:
Front view:
And left side view:
This weekend and weather permitting, the skin starts installation! What I thought was cool is that the shuttle as pictured is standing under its own weight without any kind of tether to keep it straight.
Last edited:
I love what you are doing here. This is great stuff! The photos remind me of photos that I've seen of the TOS Galileo under construction.
I hope that, once your shuttle is finished, you'll be so generous as to share tips on how the "rest of us" can build something like this. I hope to build something like this for a future no-budget movie someday.
I hope that, once your shuttle is finished, you'll be so generous as to share tips on how the "rest of us" can build something like this. I hope to build something like this for a future no-budget movie someday.
Great Scott! That's actually starting to look like a Star Trek shuttlecraft! Forgive me for harboring any doubts about this project when it started, but I can see where you're going and I'm impressed!
Alright, that's enough exclamation marks until you're finished!
D'oh!
Alright, that's enough exclamation marks until you're finished!
D'oh!
Great Scott! That's actually starting to look like a Star Trek shuttlecraft! Forgive me for harboring any doubts about this project when it started, but I can see where you're going and I'm impressed!
Alright, that's enough exclamation marks until you're finished!
D'oh!
Thanks! When doing projects like this, I try not to skimp on anything. Why bother putting the time and money into it if it's something you're just going to slap together not caring?
Also, I just got an email from my internet provider saying I have already reached 75% of my monthly traffic quota. Probably between this and Ghostbuster stuff is what did it I would say, so Im starting to try and figure out Photobucket for future image posting.
I love what you are doing here. This is great stuff! The photos remind me of photos that I've seen of the TOS Galileo under construction.
I hope that, once your shuttle is finished, you'll be so generous as to share tips on how the "rest of us" can build something like this. I hope to build something like this for a future no-budget movie someday.
I will share any info and answer any questions that are asked on the building process. So far it has been just a lot of cutting, tapping with a rubber mallet and screwing with self-tapping screws. My mind just thinks the way it does and sometimes doesnt take into account what another person might be wondering on how to build something, so ask anything to might have.
I just got an email from my internet provider saying I have already reached 75% of my monthly traffic quota. Probably between this and Ghostbuster stuff is what did it I would say, so Im starting to try and figure out Photobucket for future image posting.
Looks like we have our very own TrekBBS equivalent of the Basement Lambo.
Getting back briefly to the matter of the Galileo, it does appear that the ol' girl managed to survive the initial lot clearing (a satellite pic showing some of the strutures cleared while the Galileo still say unmolested under that blue tarp). So the chances that someone, possibly inspired by one of these discussions, swung by and rescued the ship, shot up greatly.
Now, is there anyone in Ohio who can find out what the frack happened here?
Now, is there anyone in Ohio who can find out what the frack happened here?
Great work! It's going to be interesting seeing this finished. So, what do the neighbors think?
2 walkers-by have figured it out. Otherwise people are starting to drive by really, really slow while gawking. A few neighbor kids will lean on the fence and watch construction for a short amounts of time. The Mystery Machine is still quite popular as just yesterday I helped a mom get her daughter's picture taken with the van, and just today a lady came running across the road from the softball field and took at least 6 pics.
Okay after looking at the whole thread this has a cool factor seven! I will make a really good suggestion for nacelles use those carboard forms for cement pilings! A good coat a latex primer and paint inside and out it will last for years, and when you cut into it or drill holes cover the cut or drilled edges with carpenters glue or gorilla glue.
Okay after looking at the whole thread this has a cool factor seven! I will make a really good suggestion for nacelles use those carboard forms for cement pilings! A good coat a latex primer and paint inside and out it will last for years, and when you cut into it or drill holes cover the cut or drilled edges with carpenters glue or gorilla glue.
7 out of what :-P
Given Oregon rain and mud, I'm not going to trust the cardboard nacelles idea. I'm going to give the grease barrel idea for nacelles a shot since they are metal, sturdy and best of all free in price.
Can't beat free. The question is, can you get enough of them to make two good sized nacelles?
...can you get enough of them to make two good sized nacelles?
Well, considering how he has arranged the "wings", in theory, he could "fake it" with just four. Place one under the front edge, just protruding and cover the end in some fashion (hopefully with a hemisphere). Place a second at the rear section, again, protruding a bit. If a "cowl" can be affixed to the barrel, so much the better. Repeat for the other side. The down swept "wing" hides the reality that it is not a single long nacelle, but rather two separate, shorter cylinders.
That's how I'd do it if the barrels are too short.
Sincerely,
Bill
Brady do you have enough barrels to do the job,like Redfern said in his post?
Any thoughts on how much PVC I should think of buying to build my hover bike project. from front thruster to rear its going to be 6'.0" X 2'.0" wide rear 3'.0" wide overall height equals top of hover bike 3'.0" remember is the prototype,and framing needs to be sturdy,and cost effective. the design also has a landing skid that retracts,and it might be skinned in model aircraft ABS film,and balsa to save on weight.
Please give a cost estimate I'll be using "Y"'s,elbows,and "T"'s,as well as straight tubes. Motors will be electric,and the controls sans throttles will be Radio controled servos.The throttles are boat,and motorcyle based.
In a future thread I might start showing designs,even construction pics like you did,but I've got to find a job so I pay for the stuff needed to build this project.
Signed
Buck Rogers
Similar threads
- Replies
- 13
- Views
- 2K
- Replies
- 1
- Views
- 198
- Replies
- 7
- Views
- 622
- Replies
- 3
- Views
- 610
If you are not already a member then please register an account and join in the discussion!