• Welcome! The TrekBBS is the number one place to chat about Star Trek with like-minded fans.
    If you are not already a member then please register an account and join in the discussion!

Enterprise in Spacedock via iClone 6 PRO

martok2112

Commodore
Commodore
My build of the USS Enterprise in Spacedock (ala Star Trek The Motion Picture)
About the only thing missing from my latest rebuild of the Enterprise is the nomenclature on the saucer, and on the secondary hull (USS ENTERPRISE NCC-1701 UNITED FEDERATION OF PLANETS, etc.)

The spacedock I built in about 2 days. Like all my models, it isn't movie perfect, but I think it serves the purpose well. And iClone 6 PRO seems to really bring out the best in all my models, thanks to the new rendering system, and the advanced light sourcing and shadows system.

Me hope you likey :)

(All models, starfields, planets built and textured by Martok2112 in Blender, Converted in 3Exchange 6 PRO, assembled and rendered in iClone 6 PRO)


Today, I rebuilt the spacedock itself. It was a lot simpler than I anticipated.... building and texturing it in just a few hours. I think it looks a little more accurate to the movie version, with the rounded skeletal segments. The new build allows for more visibility of the ship from outside the spacedock.
All assets in the following pics were built and textured by me in Blender, converted in 3DExchange 6 PRO, and assembled/rendered in iClone 6 PRO.


I hope you like. :)

Comments are welcome and appreciated. :)
 
Over-all, I think most of the modeling looks pretty good here...while my experience with Blender is fairly limited, I know from my own experience that some of those shapes on the ship can be rather challenging (LOL). My single biggest comment is to watch your lights...with a couple of your shots there, I suspect if you look at them in Photoshop, you'd see that some of the whites are SERIOUSLY blown out...looking at the side of the ship in the first couple of shots for example, there's virtually no detail visible with the sides of the ship. Same goes for the shot that's second from last...look at the lower port side of the saucer section, again it's just pure white...in photographic terms, it makes the shots look seriously over-exposed.

I will say that a lot of this does look to be like it could have something to do with camera angle...I run into this with Maya was well. Looking at the two shots of the front of the ship...those don't look too bad at all, however anything with the sides of the ship, particularly from an aft perspective and you start getting some serious hot spots there.

I would also watch the textures on the planet in the background as well. The planet's atmosphere just doesn't look natural and in that first shot, I can see flat spots from the polys....again my experience in Blender is limited, however if this were Maya, I'd suggest either smoothing your mesh or simply using a Nurbs sphere instead. I also might trying using some higher rez images for your textures...in the 6th shot looking at the saucer section, the textures almost seem a bit blurry. Again in Maya terms, instead of using the stock 512 x 512, I'd try going with 2048 x 2048 and maybe do some specific texture mapping. Just my own opinion, but to me, it's the lights and textures that really make or break a 3D model...that's what sells it and makes it believable. Also...and this is just a bit of a nit-pick, but in that last shot, it looks like your decal on the side of the lower hull bends/warps a bit under the docking ring...me thinks that should probably be straight (i.e. the docking port is too low)?

Again looks like a nice job on the modeling, I'd just pay much closer attention to the lights...watch out for those hot spots.
 
Thank you for the kind words and the con-con, lomitus. It is much appreciated.

I'm still getting used to the light sourcing in iClone 6 PRO. I completely agree with you that some of the details on the Connie seem to be white washed out by overexposure. I kept trying to find the offending light source, but none were really copping up at this point. Grrr.

The planet atmosphere itself is something I do need to rebuild. Yeah, I saw the flat edges too, and they will be corrected. The planet and atmosphere were from my builds in iClone 5 PRO, and somehow I think they just didn't seem to translate well to iClone 6 PRO.

With the exception of the old planet, yes, all textures that I do are in 2048x2048. The planet itself may have been done in 512x512, but everything I've done since I got iC6 has been 2048x2048.

I will try making the adjustments you keenly pointed out. Constructive crits are the only way one gets better, and I thank you for them. :) Thanks for taking time to stop by my little gallery. It is most appreciated. :)
 
I think I also found the solution to the bent red lines problem on the secondary hull.

Whenever I build my models, I always build them from schematics, which are of course often done orthographically. When put in perspective, the travel pod dock should actually sit higher on the hull sides. The travel pod portals I've put into the hull are booleans, and it would seem that the red lines kinda get caught right in where the boolean effect radiates.

It'll take a wee rebuilding, but I've done the secondary hull enough times that I can almost do it in my sleep. So, once I raise where the travel pod hatch booleans go, that should clear up the problem. Then all I have to do is unwrap the new build, retexture it, and voilla. I could do it more surgically on my current build, but I'd rather do a new mesh of it anyway. :)

Trust me dude...I hear ya on the whole orthographic thing! Placing and cutting the windows on my TOS Enterprise was certainly challenging for that reason...took some rather creative thinking to work it out.

Likewise, I feel your pain on the "wee rebuilding"...the lower hull on my model - I musta cut that sucker over 40 times at this point (although I'm very pleased to say that I finally got away from using Booleans)! LOL! That lower curve under the shuttlebay hanger just gave me fits to say the least. I'm actually putting together a separate file called "the land of screwed up parts"...something I can do a screen shot of and sent it to my former 3D professor at the college so he can show his current students whenever they get frustrated! LOL!!!!!!! Dozens and dozens of hulls (primary and secondary), hundreds of cubes for cutting/aligning windows, a dozen or so bridge sections, lots of scrapped nacelles....it's actually rather frightening.

On the one hand, yea...I guess in some ways it's about tenacity and just doing it over and over again until you get it right. On the other hand, in the words of the great Norman Rockwell, "great art is never finished, only abandoned" :cool:.
 
Yeah, orthographic is great for positioning extremities (warp pylons, nacelles, neck, saucer, etc.). But when it comes to positioning embedded objects (travel pod ports, windows, etc) then you need the perspective view. That's where having physical models comes in handy.

I use orthographic schematics, and my miniatures, as well as DVD and blu-ray screen caps where possible. (I really need to focus more on the miniatures and screen caps for details like the travel pod and window placements.)

Also, I use (whenever possible) blu-ray and dvd screencaps for texturing parts of my ships or other assets. The spacedock uses a few screencaps from Star Trek TMP (blu-ray) for its textures.

For retexturing the secondary hull, I did go the surgical route instead. I highlighted the docking port faces, and separated them from the hull. I then made face patches over the area where I moved the docking port section from. Then I deleted the faces in the new area where the docking port hatches would go, and (after a lot... a LOT... of fine XYZ adjustment, and a minor resizing of the docking port areas). So basically, I raised the docking ports. The result (after doing another unwrap and texture session) was nice, straight red lines down the sides of the hull. :)

Booleans in Blender are actually a matter of trial and error.
The dovetail section under the hangar bay is actually a boolean, as is the interior of the hangar bay itself. It is a matter of making sure the normals are faced in the right direction.

Now, when it comes to the window and docking port booleans, you have to preselect the area of faces where you wish to apply the booleans, and subdivide that area. I usually go with 30 faces by 30 faces when possible. That is usually enough subdivision to accommodate the boolean placement. This eliminates offending, overlapping faces that cover up (even partially) the boolean holes when exporting for conversion in 3DExchange.

As my roommate is fond of saying (we're both musicians on Bourbon St.): "Half of writing is rewriting."

I generally apply that to my builds: "Half of building is rebuilding."

And yeah, the "only abandoned" saying by Rockwell is very appropriate.

I am enjoying this discussion and trading of notes. :)
 
marktok2112 - if you ever find yourself in the Cleveland area, I'd like to buy ya a cup of coffee :-) Yep...I'm a musician too! Don't want to highjack your thread here as click bait, but feel free to look for my Youtube channel, "WalczakPhoto"...there's a couple of videos of my previous band, a couple of original pieces, A LOT of my da Vinci animation work (I've done around 40 models based on Leonardo da Vinci's sketches) and of course, my original Enterprise animation from 2011/2012. And yea...I'm a "re-writer" too. Both with music and writing (I've done a couple of manuscripts), I just "throw down ideas" then go back and hammer them into something that's (hopefully) coherent.

On the Booleans thing, using them in Maya is a REAL mixed bag. In some cases,they CAN let you do some cuts pretty quickly (assuming the geometry doesn't just "disappear") and for still images and such, it's ok as long as you don't try and smooth the mesh. On the other hand, yea...Booleans will leave the mesh a serious mess which will give the program fits over the tessellation with renders...I think the correct term is "non-manifold geometry" and Maya get's really fussy about it. I've had instances where even still renders have taken up to half an hour because of the danged Booleans. You can of course clean things up afterwards, but what I'm quickly learning is that it's actually just faster (and less tedious) to do it right from the git-go.

With the ortho's, I don't know if this will help you, but what I finally did was make some "measuring blocks" for my windows...just some basic cubes, long enough to poke thru the out side of the mesh from the center of the ship. I used a window on the side of the ship (level with the side of the mesh) to use as a size reference, then keeping the pivot centered in the middle of the whole mesh (world, whatever), I rotated the measuring block(s) into place to show me where to make my cuts on the mesh. Don't know if this works the same way in Blender, but with Maya I can group and re-group the measuring blocks so I can have multiple pivot points for doing this....made my life a lot easier. Once I had the blocks in place, I just cut the specific faces and extruded the windows....this way, all the windows were in the correct position and at the correct angle, etc..

BTW...for what it's worth, kudos on the work you've done there with Blender! I was trained in Maya (college 3D modeling & animation class back in 2011) and I've done some work in Max, Poser, Daz, etc. After 5 years, I -still- can't make heads or tails of Blender...I actually managed to make a stinkin' cube once! LOL!!!!! Mainly I just use it for converting downloaded Blender meshes to OBJ's for use in Maya (or other programs). I guess it's a lot like growing up with Photoshop/Adobe and being thrown into Coral...same thing, but everything works COMPLETELY different.

Anyways, yes, I too am very much enjoying this convo! It's nice to trade notes with a fellow trekkie, fellow artist and of course, a fellow musician. Again, if you make it up here to Cleveland, the first round is on me :cool:.
 
That sounds very cool, lomitus. Never really been a coffee drinker, but I love hot chocolate. (I have a funny story about that too, from the road, in my days as a touring band guy. :D ) If I ever get up around Cleveland, I'll take you up on that.

I'll be sure to check out your YouTube channel. Mine is "martok2112", and it has lots of videos that show the progress of my forays into starship pr0n and effects work, from actual practical miniatures and machinima, and Photoshop/Image Ready, to my delving into Blender and iClone.

I was extremely daunted when I first looked at Blender. I sat down after I downloaded it the first time, and it stared right back at me, saying: "Yeah, I just dares ya' to try and learn me.....BOY!" Well, that was that, and I didn't look at it again for a good long while.

Until I found a really cool introductory video to its interface by one Karan Shah. Thanks to that 20 minute basics video, I was on my way... and after that, Blender was demystified for me.... and five days after watching that video, and then getting a couple of tut books ("For Dummies" LOL) I built my first ever model.... the classic battlestar, Galactica. I am going to do a serious rebuild on it very soon, as I know I can do a better one that is far less memory intensive.

My ships now are really low-poly. It's the textures that I think bring out some of the best in them.

About the only downside I find to Booleans in Blender is that, if you are working on a series of booleans (like the window clusters that surround the rim), then can flatten out what are supposed to be rounded areas on the rim....but it's really only noticeable if you get up close to the saucer's rim section.

What I did was basically make a mesh of a single window cluster, shaped properly (elipses and circles). I make sure they are of planar origin, and not solid primitives. (Planes and primitives do not work well together, so everything I do is planar based.... shoot, when I built the cargo hull for the Miranda class, I did it vertice by vertice. :) )

Also, you have to make sure the normals for the windows are faced inwards.

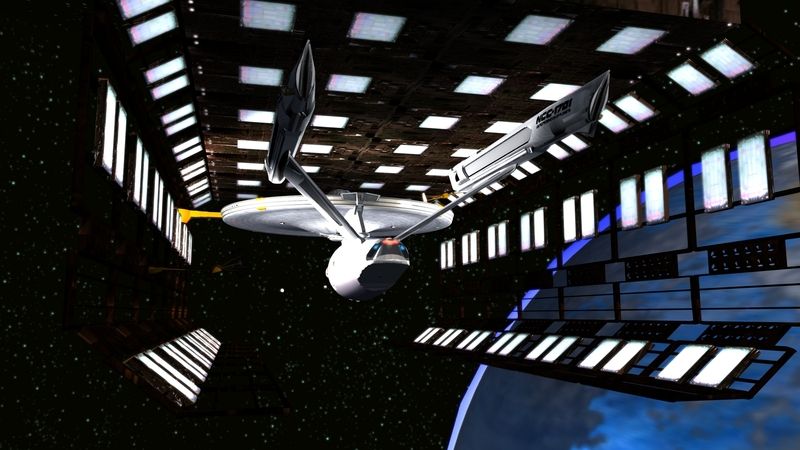
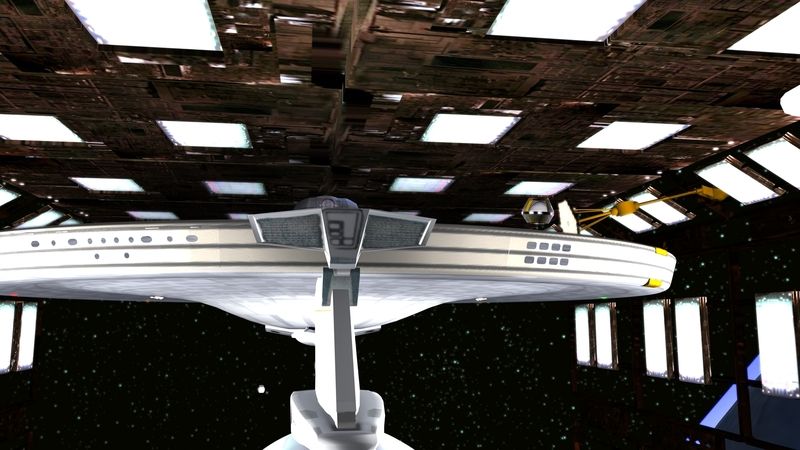
Once I completed a window cluster, I made multiples of them, and placed them at their proper points along the rim. I also, as you can see, made the 8 window Rec Room cluster at the starboard aft of the saucer. Anyhoo, after placing them (and again, compensating between orthographic and perpsective references), I applied the booleans from each cluster, one at a time.

Now the first time I executed this is when I discovered the big problem... those annoying, hidden faces that cover up part of the windows when I converted them in 3DExchange. I'd see half a window opening, while the rest of a window would be covered by a thin face. In the words of Mutant Enemy: "Grrr....argggh!"

So, I went back to Blender, and sure enough, when I went into "edit" mode, I could see the centerpoints for each of the offending face remnants. Simply eliminating them was not enough.

So, what to do? What to do?

Then I experimented with subdividing the section of saucer where the window cluster would go. Again, I went with 30x30 faces. I figured that would be good enough without taxing the computer. (I remember I subdivided a sphere one time into like 1000x1000.... my computer wanted to kill me. :D ) Well, when I executed the boolean on that area, the booleans took, and the windows looked great. There were no overlapping face residuals. Again, the only downside is that the rounded edge of that segment of saucer was now a series of subtly flattened edges. But, it's a small trade off...considering that from even a short distance, the rim looks fine. You have to really get up close to it to see the side effects.

Booleans don't work every time. There'll be times where the program will say: "Unable to execute Boolean function". So, back to the drawing board. :D

Overall, I think Blender is fairly forgiving about Booleans.

I went to Comic Con (for the first time in five years) yesterday, and talked with a pro CG designer, who also works and teaches with Maya, Zbrush, and a bunch of other programs. (Nowhere in the toolset was Blender mentioned....LOL!) I asked him if he'd heard of iClone. He said he hadn't. I'd shown him many of the same pics I displayed here, and he was pretty impressed. "Not bad at all for a hobbyist." He said... and there was no condescension in his voice at the word "hobbyist". It looks like you've got camera angles and textures fairly well down. (He could have just been being very kind at that point, if he spotted the same problems that you did with my "racing stripes" as I like to call them. :D )

I'll be about ready to post some pics of my new Connie fairly soon. :)
 
Oh, btw, Blender has options on there that allow you to adjust your interfaces into other configurations: Maya and I believe 3DSMax. I haven't tried them out, since I am so used to the Blender default config, but if you should ever wanna give Blender another try, that might be the ticket. :)
 
Been a while since I actually posted any WIP pics, so here's one of my newest build, the space office from TMP. As with all my other models, it won't be movie perfect, but it'll be close enough to serve my purposes.
So enjoy (if you will) this WIP pic. :) (screencapped from Blender)

 
Interesting thing about the space office; it was under construction at the time of TMP. You can see several workbees flying around with parts with which to assemble it. I've always wondered if the reason Spacedock was put in orbit in SFS in pretty much the same place was to give a time progression: the office complex is (almost) done in TMP, and by the time of SFS, the entire Spacedock is complete and up and running.
 
Interesting thing about the space office; it was under construction at the time of TMP. You can see several workbees flying around with parts with which to assemble it. I've always wondered if the reason Spacedock was put in orbit in SFS in pretty much the same place was to give a time progression: the office complex is (almost) done in TMP, and by the time of SFS, the entire Spacedock is complete and up and running.


I had wondered that too. A lot had apparently happened in the 2.5 years that Kirk was made CoSOps. :)

As for the mushroom spacedock in TSFS, yeah, I had wondered about that too. That is a massive structure compared to the TMP spacedock that berthed Enterprise. The way I view it, the mushroom spacedock was always there (even since TMP) , but perhaps on another side of the planet at the time. The skeletal spacedock in TMP probably serves as more of a launching platform for new ships, although seeing the yet unlaunched Excelsior in the SFS spacedock would contradict that notion.

Oy.... I'm gonna lay down before I overcontemplate this. LOL!

Thanks for stopping by. I hope you liked what you saw. :) More refined screencaps on the way soon.
 
I've modified the light sourcing in this latest re-batch of screens from my rebuild of the refit Constitution class in spacedock. I wanted to try to get rid of as much of the whitewashing brightness effect as possible.
Still need to work on the atmo for that planet. It looks so low poly and angular. I know I can do better.


If you are not already a member then please register an account and join in the discussion!

Sign up / Register


Back
Top