Oh YES!
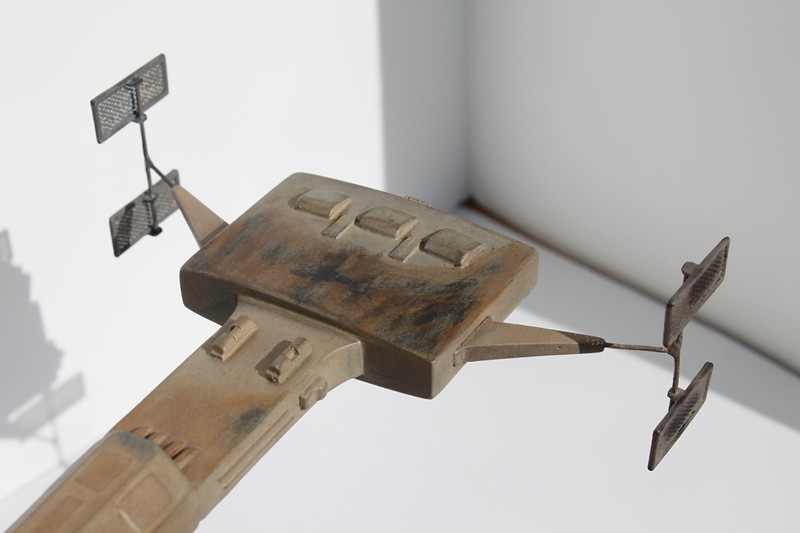
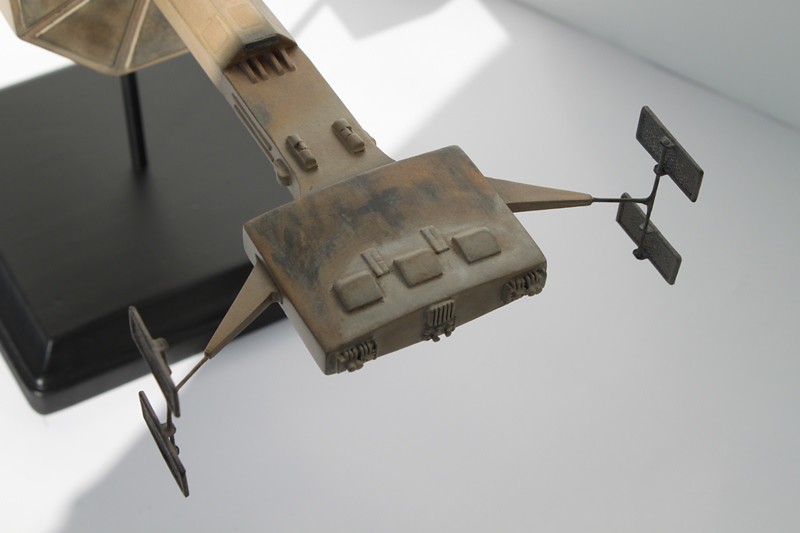
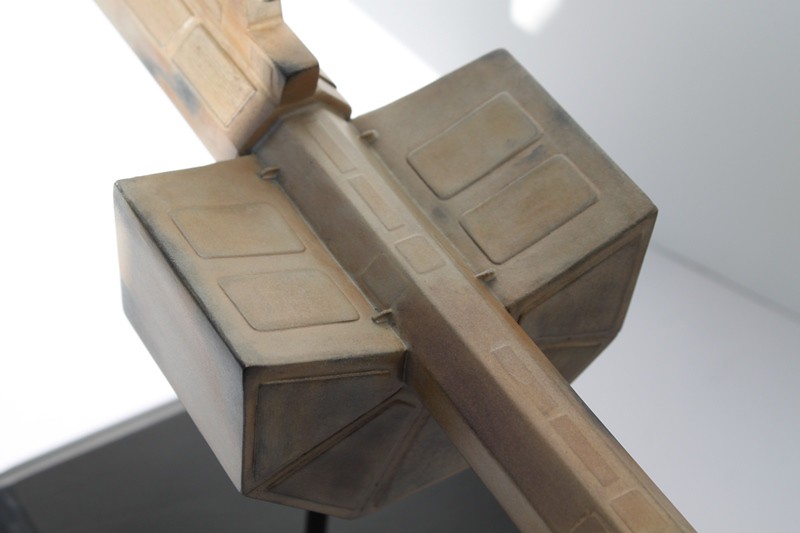
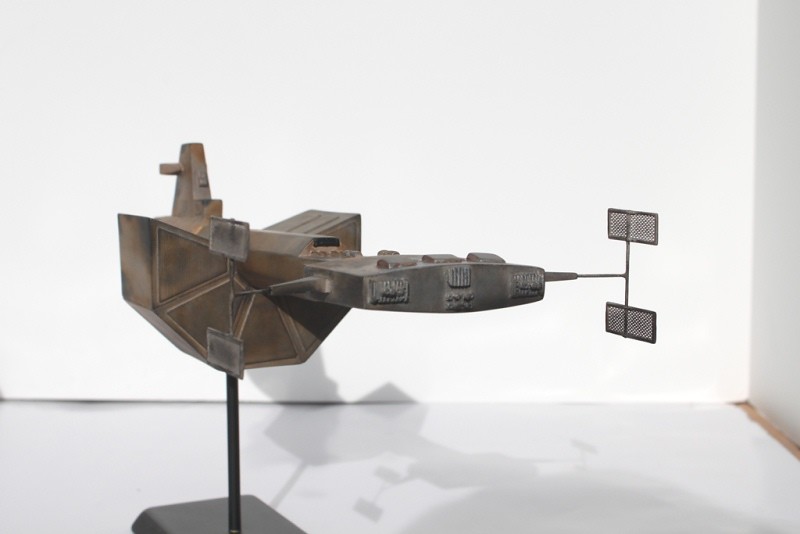
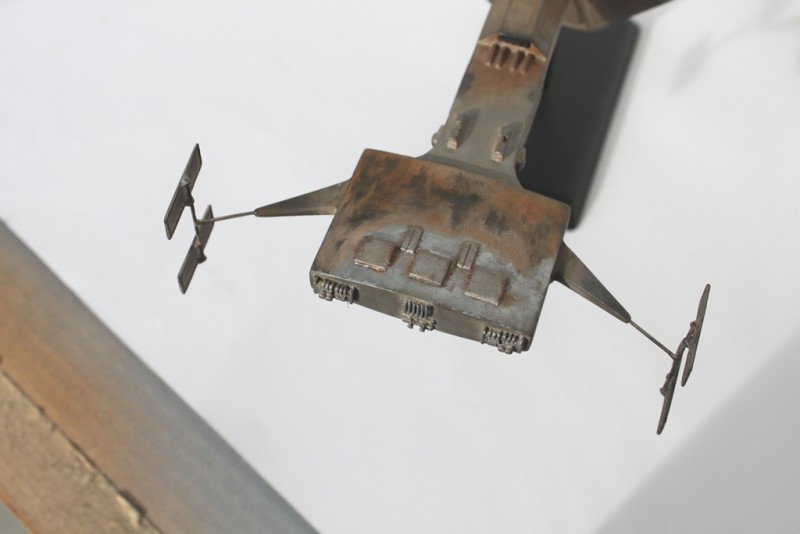
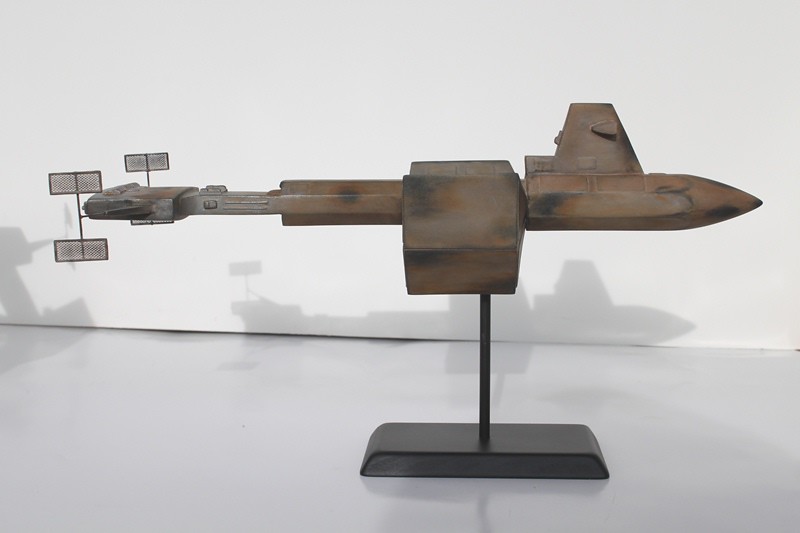
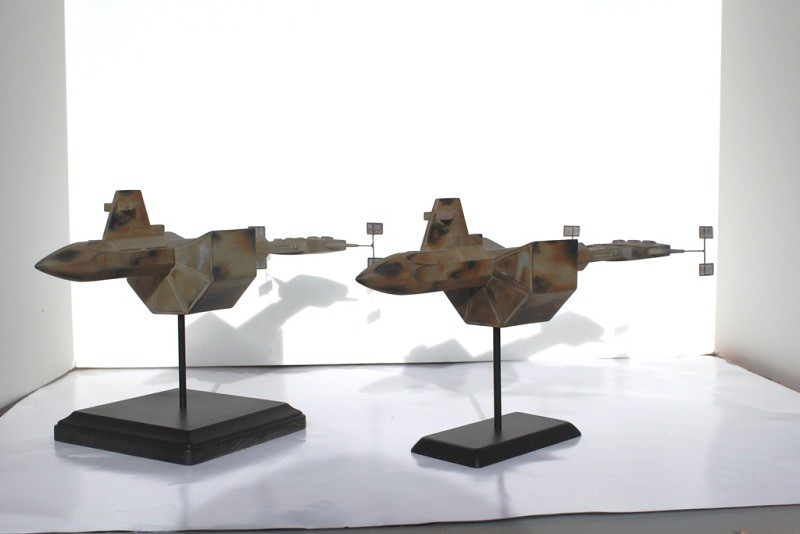
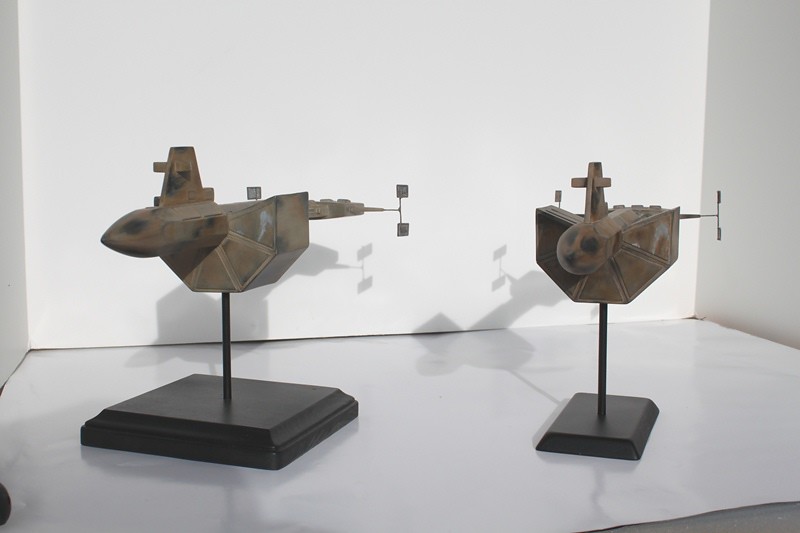
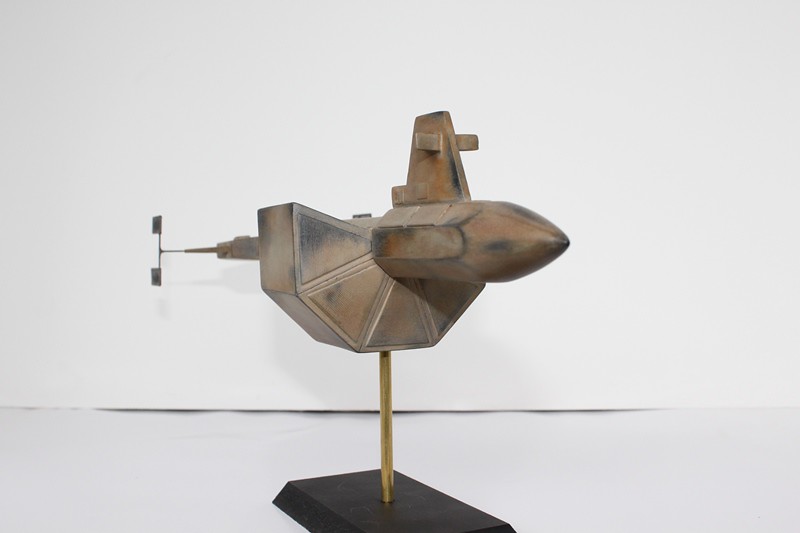
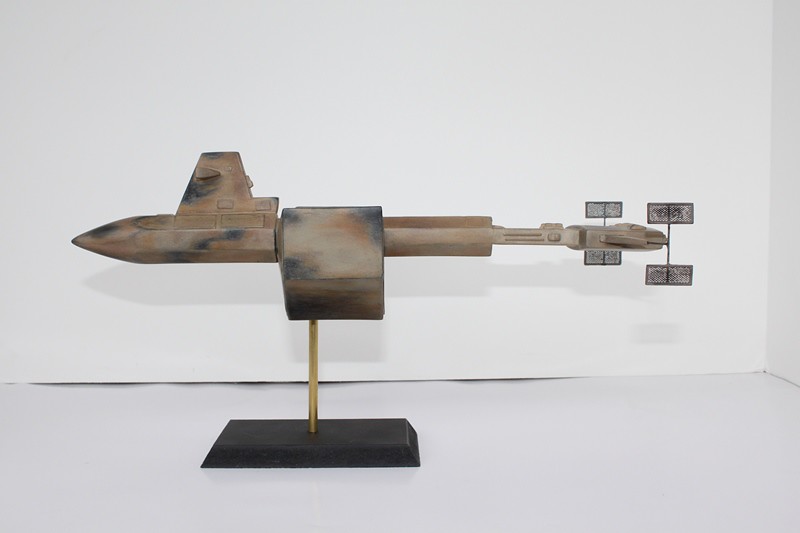
Here are some images taken in natural sunlight of the first of two builds of the Fantastic Plastic Botany Bay resin kit mastered by Richard Long. The ship in these photos will remain in my collection; the second model, still in progress, will be shipped to my client upon completion. The model was painted with Tamiya grey lacquer primer followed by coats of Testors black and rust enamel. Then it was sprayed with coats of grey and light tan enamels. Then the grey/tan was sanded away in spots to reveal the rust and black coats underneath. The model was then oversprayed with more of the basecoat (thinned and mixed with Floquil Flat Base) to tone down the starkness of the black and rust patches. Then Tamiya pastel chalks were applied. Finally the entire model was sealed with Dullcote for a dead flat finish. The photo-etch panels on the stern were made from plastic strip, brass rod, and sections cut from the nacelle pylon screens in the Round 2 TOS Enterprise supplemental PE set:
IMG_5648 by trekriffic, on Flickr

IMG_5650 by trekriffic, on Flickr
IMG_5651 by trekriffic, on Flickr

IMG_5652 by trekriffic, on Flickr
The client is a big TOS fan and wanted the weathering to look as close to the studio model as possible using photos he pulled off the internet and sent to me. This build was a guinea pig of sorts to try out various weathering techniques prior to finishing the client's model. He plans to display his ship inside an acrylic display case next to his MR Enterprise.
I hope you guys enjoy the pics!
Here are some images taken in natural sunlight of the first of two builds of the Fantastic Plastic Botany Bay resin kit mastered by Richard Long. The ship in these photos will remain in my collection; the second model, still in progress, will be shipped to my client upon completion. The model was painted with Tamiya grey lacquer primer followed by coats of Testors black and rust enamel. Then it was sprayed with coats of grey and light tan enamels. Then the grey/tan was sanded away in spots to reveal the rust and black coats underneath. The model was then oversprayed with more of the basecoat (thinned and mixed with Floquil Flat Base) to tone down the starkness of the black and rust patches. Then Tamiya pastel chalks were applied. Finally the entire model was sealed with Dullcote for a dead flat finish. The photo-etch panels on the stern were made from plastic strip, brass rod, and sections cut from the nacelle pylon screens in the Round 2 TOS Enterprise supplemental PE set:
IMG_5648 by trekriffic, on Flickr
IMG_5650 by trekriffic, on Flickr
IMG_5651 by trekriffic, on Flickr
IMG_5652 by trekriffic, on Flickr
The client is a big TOS fan and wanted the weathering to look as close to the studio model as possible using photos he pulled off the internet and sent to me. This build was a guinea pig of sorts to try out various weathering techniques prior to finishing the client's model. He plans to display his ship inside an acrylic display case next to his MR Enterprise.
I hope you guys enjoy the pics!