-
Welcome! The TrekBBS is the number one place to chat about Star Trek with like-minded fans.
If you are not already a member then please register an account and join in the discussion!
You are using an out of date browser. It may not display this or other websites correctly.
You should upgrade or use an alternative browser.
You should upgrade or use an alternative browser.
Abram's Enterprise, Version 4
- Thread starter MadMan1701A
- Start date

Yeah, really. ")
Isn't that the "street artist paint job?"I did. They claim to preserve UV coordinates and everything... but I'm sure it can't be as easy as it should be.
Yeah, they're wrong.

On the upside, the mesh opens fine in LightWave. Other than needing to set the smoothing angles for the surfaces and an unaccountable sluggishness when trying to edit the mesh, it looks like it came through fine.

A
Amaris
Guest
Loving the great work, Madman. Your Enterprise renders look beautiful!
J.
J.
I've heard you talk about having trouble with it in the past... is there anything in particular? Maybe I can help. I'm still using version 2.45, since in 2.48, they changed a couple of things that drove me nuts.
I'm still using version 2.45, since in 2.48, they changed a couple of things that drove me nuts. Well, most of my problem is engrained methodology. As my signature says, I have never been able to draw freehand. This resulted in adopting graph paper at a young age and led me to rely heavily on grid snapping. Sketchup Is made for this. Things naturely snap to other things and grid points. Blender, so far as I can tell, does have a snap function. It just take 4 or 5 steps to use it. The other annoying thing about snapping to grid in Blender is that yes, it snaps, but not to the visible grid! This is just so counter-intuitive to me. I am going to take another stab at Blender this month. I just need to adapt to the work flow it uses.
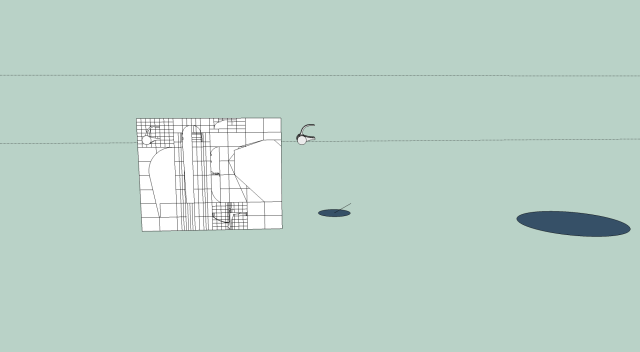
Sketchup is addictively simple. But then again, that's also the problem. it's simple. I'll show you an example of my workflow in Sketchup. Almost everything I draw starts as a 2-d outline. Once I find the profile I am looking for on an object I will either spin it, in the case of a primary hull, sensor dish, etc. Or extrude it like for secondary hulls. I then modify the shape from there and add details. You can se in this attached image the "worksheet" I used to create the Capella I have been building.
Sketchup is addictively simple. But then again, that's also the problem. it's simple. I'll show you an example of my workflow in Sketchup. Almost everything I draw starts as a 2-d outline. Once I find the profile I am looking for on an object I will either spin it, in the case of a primary hull, sensor dish, etc. Or extrude it like for secondary hulls. I then modify the shape from there and add details. You can se in this attached image the "worksheet" I used to create the Capella I have been building.
Well, most of my problem is engrained methodology. As my signature says, I have never been able to draw freehand. This resulted in adopting graph paper at a young age and led me to rely heavily on grid snapping. Sketchup Is made for this. Things naturely snap to other things and grid points. Blender, so far as I can tell, does have a snap function. It just take 4 or 5 steps to use it. The other annoying thing about snapping to grid in Blender is that yes, it snaps, but not to the visible grid! This is just so counter-intuitive to me. I am going to take another stab at Blender this month. I just need to adapt to the work flow it uses.
At its simplest, holding the control key down while you drag or otherwise manipulate a vertex will allow you to move a that vertex (or collection of vertices) one "blender unit" -- an arbitrarily defined distance that can represent an inch, a mm, or even a kilometer if that's your preference. Now grid lines are drawn by default so that you see one every blender unit and one every ten blender units. The space between each grid line will vary depending on scale, and as you scale out, the grid lines may also scale to become tens, hundreds, thousands, etc. of blender units, changing by ten as you zoom in and out.
So, given your default view, you can select the vertices of the default block and move them by one blender unit interval exactly just by holding down the control key as you drag.
Simple enough, but if you drag and release a vertex without using the control key, or add a mesh that's somewhat complex and doesn't put vertices down precisely on integer blender units (gridline intersections), you have a problem! When you select such a "misplaced" vertex and try to drag it, it continues to move precisely by single blender units from its initial location. This is what shift-S is used to fix. When you use shift-S, a drop-down menu appears that lets you snap the currently selected vertices to the grid, their common center, or the current location of the 3D cursor.
So, drag your vertices with the control key held down to move in blender unit intervals, and use shift-S to put misbehaving vertices in their proper place.
Hmm, that almost the same technique I use in Blender.Well, most of my problem is engrained methodology. As my signature says, I have never been able to draw freehand. This resulted in adopting graph paper at a young age and led me to rely heavily on grid snapping. Sketchup Is made for this. Things naturely snap to other things and grid points. Blender, so far as I can tell, does have a snap function. It just take 4 or 5 steps to use it. The other annoying thing about snapping to grid in Blender is that yes, it snaps, but not to the visible grid! This is just so counter-intuitive to me. I am going to take another stab at Blender this month. I just need to adapt to the work flow it uses.
Sketchup is addictively simple. But then again, that's also the problem. it's simple. I'll show you an example of my workflow in Sketchup. Almost everything I draw starts as a 2-d outline. Once I find the profile I am looking for on an object I will either spin it, in the case of a primary hull, sensor dish, etc. Or extrude it like for secondary hulls. I then modify the shape from there and add details. You can se in this attached image the "worksheet" I used to create the Capella I have been building.
I always try for the profile first, then move on from there. That was tough, building the new Enterprise, though. It's got some very organic parts.
Interesting... I might play around with this in the future. I've gotten used to Eye-balling it....Well, most of my problem is engrained methodology. As my signature says, I have never been able to draw freehand. This resulted in adopting graph paper at a young age and led me to rely heavily on grid snapping. Sketchup Is made for this. Things naturely snap to other things and grid points. Blender, so far as I can tell, does have a snap function. It just take 4 or 5 steps to use it. The other annoying thing about snapping to grid in Blender is that yes, it snaps, but not to the visible grid! This is just so counter-intuitive to me. I am going to take another stab at Blender this month. I just need to adapt to the work flow it uses.
At its simplest, holding the control key down while you drag or otherwise manipulate a vertex will allow you to move a that vertex (or collection of vertices) one "blender unit" -- an arbitrarily defined distance that can represent an inch, a mm, or even a kilometer if that's your preference. Now grid lines are drawn by default so that you see one every blender unit and one every ten blender units. The space between each grid line will vary depending on scale, and as you scale out, the grid lines may also scale to become tens, hundreds, thousands, etc. of blender units, changing by ten as you zoom in and out.
So, given your default view, you can select the vertices of the default block and move them by one blender unit interval exactly just by holding down the control key as you drag.
Simple enough, but if you drag and release a vertex without using the control key, or add a mesh that's somewhat complex and doesn't put vertices down precisely on integer blender units (gridline intersections), you have a problem! When you select such a "misplaced" vertex and try to drag it, it continues to move precisely by single blender units from its initial location. This is what shift-S is used to fix. When you use shift-S, a drop-down menu appears that lets you snap the currently selected vertices to the grid, their common center, or the current location of the 3D cursor.
So, drag your vertices with the control key held down to move in blender unit intervals, and use shift-S to put misbehaving vertices in their proper place.
it continues to move precisely by single blender units from its initial location.
ahhhhh! This sounds like my issue! And thankyou for explaining the Snap feature in very easy to understand terms! I have looked in countless books/forums/videos but somehow never could find much mention of the snapping functions. Which always seemed strange to me considering the nature of alot of the work. The lack of a realworld scale I can live with. I will just have to leave behind my English measuring system and have to start thinking in Metric. Thanks! Now I am definitly going to dive in again. hmmm, maybe the art challenge would be a good first project. I have had an idea that has been knocking around for it.

Hey MadMan, thanks for making your mesh available, it's very impressive. Hope you don't mind if I put up a quick render I threw together using it, I just thought it came out fairly good.

Can't wait to see more models and renders from you.

Can't wait to see more models and renders from you.
Last edited:
Looks good.Hey MadMan, thanks for making your mesh available, it's very impressive. Hope you don't mind if I put up a quick render I threw together using it, I just thought it came out fairly good.
Can't wait to see more models and renders from you.

There's some weird things going on with the lettering details, but that's a nice angle.
In the future, though, make sure to put credits on the image.
Yeah, I noticed the problem with the lettering, but was mostly just throwing this together to play with lighting a bit. I'm not sure what caused the problem, I didn't change any texture settings or anything.
And I edited the image link in my previous post to a version with credits on it. Sorry about that. I don't usually deal with other people's work, so I didn't even think of it.
Edit: Fixed the lettering problem. Apparently you have the global ambient set to .5 on all the materials on the ship, and in the case of the lettering especially this causes them to show up far too brightly in dark environments.

Last edited:
Similar threads
- Replies
- 19
- Views
- 944
- Replies
- 32
- Views
- 2K
If you are not already a member then please register an account and join in the discussion!