• Welcome! The TrekBBS is the number one place to chat about Star Trek with like-minded fans.
    If you are not already a member then please register an account and join in the discussion!

USS EURISKO - Intrepid Mark II Class - PC case build

Ok, I`ve got a question for YOU !

Normally the colour of a federation phaser is orange/red. But to recreate that visually a strong laser is needed. Another solution without risking eye damage is a Blue/Violet laser.

Poll: Do YOU think a Blue/Violet phaser is ok for the EURISKO?
-
[*]Yes, that`s cool
-
[*]No, original is better
Tussenstand:
results.cgi

Ook een poll maken? Klik hier

Poll stops in 5 days !
Thanks people !!!
 
First of all my humble apologies for failing to post anything recently. I have been very busy and have started updating all my buildlogs and even started my own blog for my SCIFI CCD or Compulsive Creation Disorder.

I will post a BIG update now !

The USS EURISKO - Dedication Plaque consists of all the nicknames of all the people who supported or helped the development of the Case. The EURISKO is blessed with a crew of over 170 members!

The high res (4592 x 2576 - 4. MB) can be downloaded from my blog
02.jpg

01.jpg

03.jpg

04.jpg
 
To make a giant leap forward I took some days of work (and life) to work exclusively on the EURISKO! I called this the MOD Marathon ...

So, Here is the update on day one of the MOD marathon
Current state :
dsc05583.jpg

Put a powertool next to it to give a better idea of the size!
dsc05584.jpg

The Wing section needs some serious work!
dsc05585.jpg

The bottom saucer section needs some love too !
dsc05587.jpg

Need to finish some last details.
dsc05592.jpg

See the little wooden blocks, those will be made into a slide-in frame that can be mounted when there's need for warp speed.
dsc05593.jpg

I also want to install all the bottom fans for the push/pull setup
dsc05594-e1316274094971.jpg

A mountain of depron ...
dsc05595.jpg

The nose and aft section of the necalle can be removed if i ever need to get to the BITSPOWER fittings.
dsc05597.jpg

Jump ahead, second nacelle encapsulated!
dsc05598.jpg


dsc05599.jpg

dsc05601-e1316274185315.jpg

dsc05608.jpg

That was it for day one , stay tuned for the upcoming 5 days of the marathon !
Laters
 
Ok, Here is the update of the 2nd day of the MOD Marathon!
0900 >>>
dsc05611.jpg

1700
dsc05612.jpg

So that's it for today, laterz !
Just joking ..
dsc05613.jpg

dsc05615.jpg

Installed the SSD/HDD Tailfan to see the effect before fixating the mesh with apoxy clay.
dsc05619.jpg

dsc05621.jpg

Untill tomorrow !
 
Ok, Here is the update of day 3 of the MOD Marathon ...
Ever had one of those days that you work your ass off and it just doesnt look like your going forward?
Well It was one of those days …
Did tons of work getting the sides symmetrical (not a small task)
dsc05625.jpg

Finally the design of the tail is finished, had 3 versions and could not decide which one. Chose the one most like the original design.
dsc05624.jpg

Short update, hopefully better tomorrow !
Laterz
 
Ok, Here is the update of day 4 of the MOD Marathon.
Instead of working on the exterior hull and deflector tunnel sections, I was working on something I felt was missing untill now.
The Impulse drives were just simple pieces of foam. This cannot be !
So started to work on some simple models to see what I wanted. This is the one I finally went for.
1.jpg

This is just to get a sense of size and general feel .. But its already looking better I think !
2.jpg

This is the final model. It looks a bit rough but I need to sand it down and fill in the cracks with the cellulose based filler.
3.jpg

Again looking better I think !
4.jpg

Here you can see the reason why I needed to build the models first. I needed to cut deeply into the wingsection to get the lighting installed. This is aluminium foil and 3 seperate layers of 5 mm frosted plexi to get a good glow.
5.jpg

Here you can see the layered approach to the impulse drive.
6.jpg

lighting test, the glow is ok considering this is lit by a led strip and not 2 single 8KMCD RGB leds (yes they will be constrolleable!)
8.jpg

Final result! Still has some light leaks but those are easily fixed .
9.jpg

Until tomorrow!
Laterz
 
Day 5 into the MOD Marathon and I am starting to feel the strain.
Must have been working on the EURISKO for at least 39 hours the past days.
All good fun but I am getting Depron-itis and would love do something else then sticking foam to epoxy. So I did
Yesterday I worked on the right Impulse drive. Today I duplicated it to the left and created all the wiring and updated the circuit board to allow for the additional RGB leds. Will try to get a better picture tomorrow!
31.jpg

I finished the design of the lower saucer but cannot finalise it as the baseplate needs be fixated to the deflector tunnel to allow for certain curves to be finished with depron.
This is by the way the first attempt ( a very miserable one I agree) to paint the EURISKO for a contest a couple of months ago. It was abandoned for more reseasch as after 5 minutes I knew this was not going to fly …
21.jpg

Just a small thing. Finished the front of the EURISKO. The lower “missing” parts will be airbrushed to allow for some additional depth.
11.jpg

Also did tons of other small but necessary stuff !
So with just a day left to finish all the depron work its going to be close.
Got around 8 hours left before I go on holiday for 2 weeks.
Untill tomorrow !
Laterz
 
Teaser ...
dsc05655-e1316709575805.jpg

The High Res Pics and the Video will be posted on my blog [/URL]hopefully tonight or tomorrow!
 
Man, that is absolutely incredible. Being a PC guy myself, I always wanted to do something like this, but haven't gotten around to it.

So, what will the system specs of the actual computer be, when you're finished?

Can't wait to see it painted. :)
 
Thansk man ! I have clocked around 360 hours now and still there's so much to do ...
For the big contest a couple of months ago she was running like a charm!
Here is some GFX work on the pc parts !

21eb3p1.jpg


2v1q892.jpg


sb5ylv.jpg


rw73if.jpg


No specs on the temps of the watercooling setup yet, was struggling to get as fas as i could for that contest. I am aiming for another MOD Marathon beginning of december (now practising my new airbrush)
 
No specs on the temps of the watercooling setup yet, was struggling to get as fas as i could for that contest. I am aiming for another MOD Marathon beginning of december (now practising my new airbrush)

Watercooling? Hell, if your CPU and GPU don't boil water, you haven't overclocked it enough ... :devil:

Dakota Smith
 
Hahaha, I could use the laser to heaten it up a bit !
Did do a modest overclock on the fly when she was fully operational a while back.
From 3.4 to 4.2 Ghz without breaking a sweat !

I am working on the monitor and delta flyer mouse right now. Looking into a LCARS screen for the monitor. (maybe fit a 22 inch monitor into a 26 inch monitor frame and using the extra room for the lcars)
I have got the delta flyer model from the 3D printer but the material is not exactly how I expected it. To build the mouse hardware into into it I need to cut into the bottom and I am afraid it will break the model. Now researching resin casting for this job. A day not learned is a day lost (or how that verb goes)
2zrid1e.jpg


I am working on my next build also. You can find the specs here. Its a Network Attached Storage or NAS based on the resurrection ship from Battlestar Galactica.
 
I am working on my next build also. You can find the specs here. Its a Network Attached Storage or NAS based on the resurrection ship from Battlestar Galactica.

Great. Just great. Those frakking skin-jobs -- you know they have a plan, right? And you're helping them! Who do you think you are, Gaius Baltar?! :devil:

Dakota Smith
 
Great. Just great. Those frakking skin-jobs -- you know they have a plan, right? And you're helping them! Who do you think you are, Gaius Baltar?! :devil:

Dakota Smith

Respecting the Trek community here, I dont want to go into it to deeply but taking a quick look at this exerpt from the BSG Frak-Map one must conclude that being Gaius Baltar (at least at certain moments) must not have been completely without :censored:

5d9nuo.png
 
Last edited:
Ok, so here's the bad news !!!!
As some of you might know i am relatively new to modding. I have been modding for exactly 13 months now and the EURISKO is my first mod. I have never done any airbrushing before. So i bought myself an airbrush and started practising , reading and so on. I used a special filling primer to get rid of the last little scratches and marks. It all started out so nice !!!
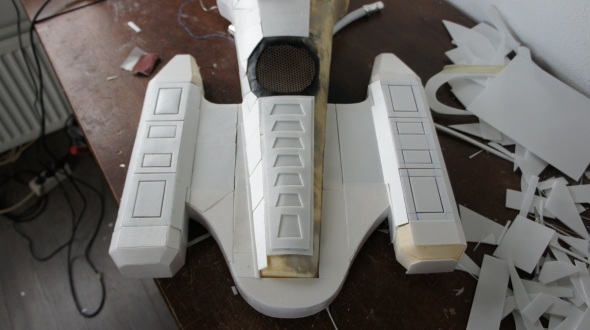
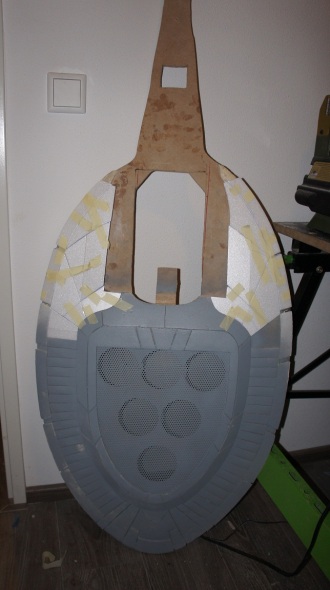
Getting the whole model taped up was a big job, took over 5,5 hours to get it perfect !
29msrj7.jpg

seolmo.jpg

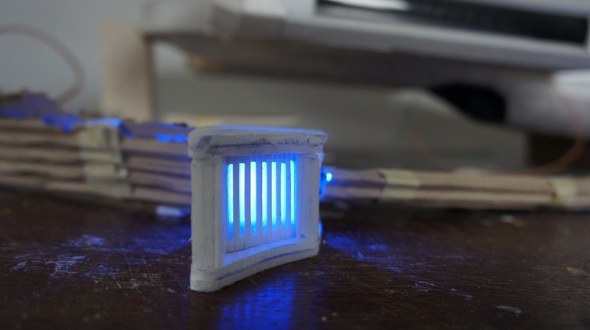
The first layer went on perfectly !
ddtlu.jpg

So then it was time to pull off the tape and continue to the deflector tunnel and warp nacelles! So I thought !
EPIC FAIL !!!!
23urlo0.jpg

The new role of tape was to strong , my test piece waxs done with a role a couple of months old and it worked perfectly and now this !!! It tears the baselayer right off!
I think I died a little there ....
So with 8 hours left to complete the build (I wanted to have it completed before midnight newyears eve) I had to sand all the troubled pieces down (no small task with depron), put them into the primer again and repaint them. I was so hoping that I will not encounter any other hurdles.
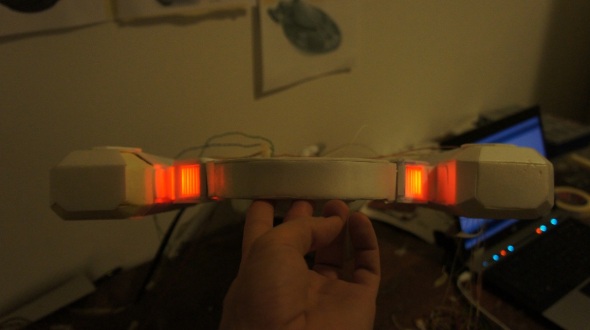
SO on my brithday at 3 in the morning it looked like this
From starship to loveboat!
300y0dd.jpg

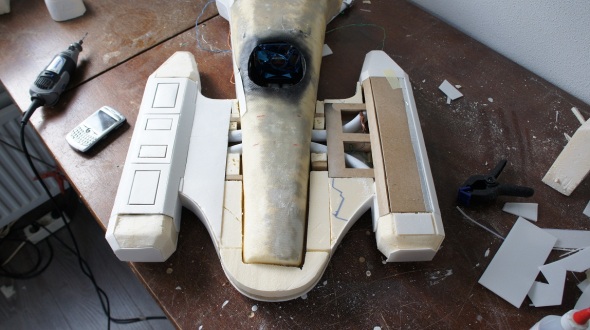
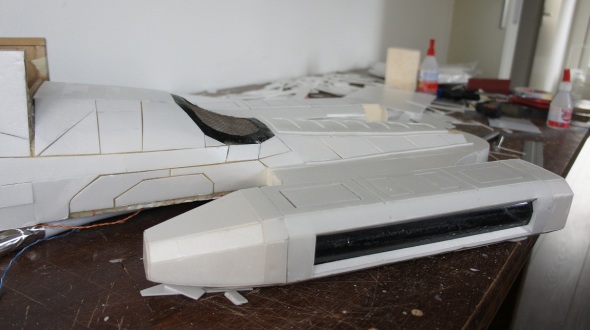
The resturation is going ahead relatively ok!
2nrmq1w.jpg

rwhxt1.jpg

311w1gn.jpg

You can see the damage from the sanding but maybe I can turn that into weathering like a whole bunch of Borg Torpedoes have hit.
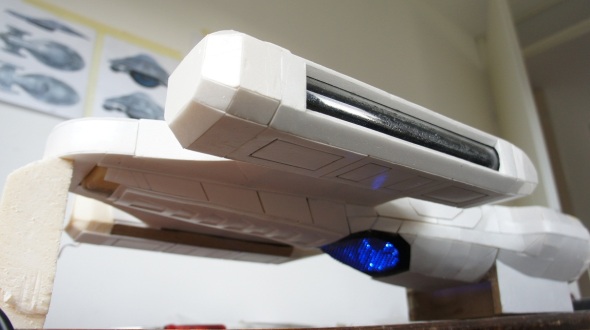
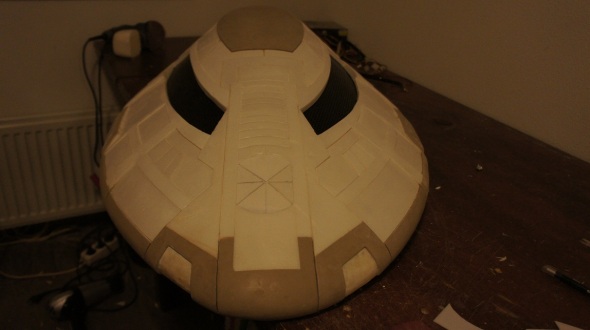
But in the end I made it !!! With the setback of the 29th I worked almost through my birthday and all night but I made it ! She's finished!!!!
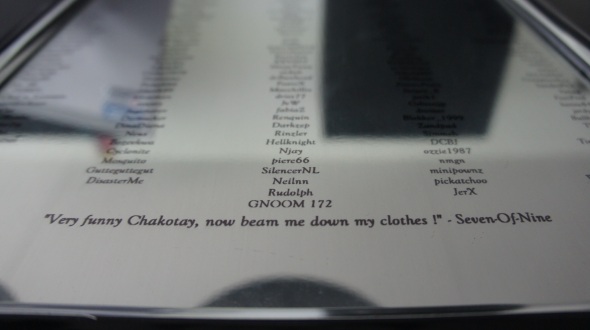
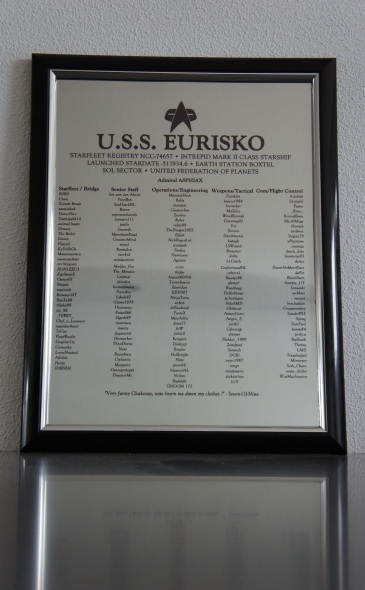
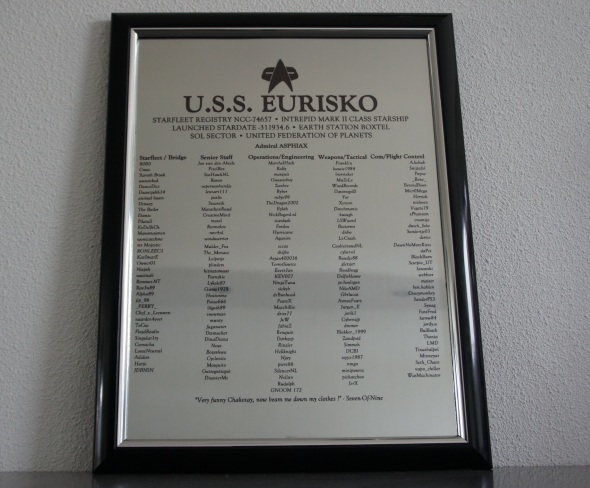
Here are my 2 mascottes , Captain Janeway (sorry kate) and the voyager sign!
More to come but first a Very BIG BEER !!!!
24wh4zs.jpg

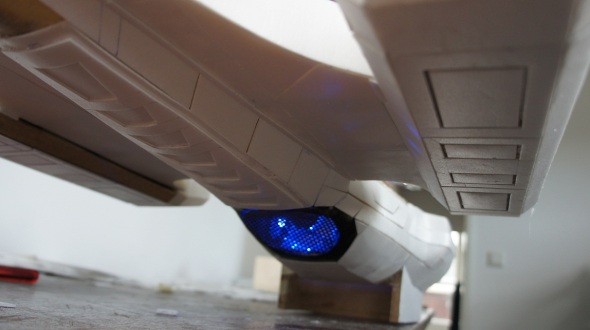
Here is the first picture set !!!
USS EURISKO - Intrepid Mark II Class - Finished !!![/url]
Some highlights !
2a7j3tf.jpg

6t1v8x.jpg

20hu53m.jpg

2z5t5yf.jpg

11jcfo4.jpg

Thanks for watching and to all a Happy new year !!!!!
There will be a proper photoshoot and more posts with additions, its finished but not done !
 
I think it turned out great. :)

I had a similar problem masking with tape back when I built my polar lights 1:350 Enterprise model... Turns out that the Blue painters tape works a lot better than regular or cheap masking tape!
 
I think it turned out great. :)

I had a similar problem masking with tape back when I built my polar lights 1:350 Enterprise model... Turns out that the Blue painters tape works a lot better than regular or cheap masking tape!

Thanks man ! I was so busy trying to finish here before the end of the year that I didnt take a step back and looker at her critically. I think the contrast between the dark and light patches is to high so will put another layer of nuance paint over it to bring them a bit closer. Also every couple of months there will be something done, like the standard, the reworked LCARS fancontroller and the Delta Flyer mouse to name a few. I think I will be working on her for years to come!

Yeah i really kicked myself in the head for not doing my reseach properly, the pink tape is even more sensitive then blue!

Here's one pic that i forgot to post !
aoqt8g.jpg
 
If you are not already a member then please register an account and join in the discussion!

Sign up / Register


Back
Top