Hi All Just thought I’d post a custom Diamond Select Toys 1701 (Refit) Enterprise that I have recently been working on. 
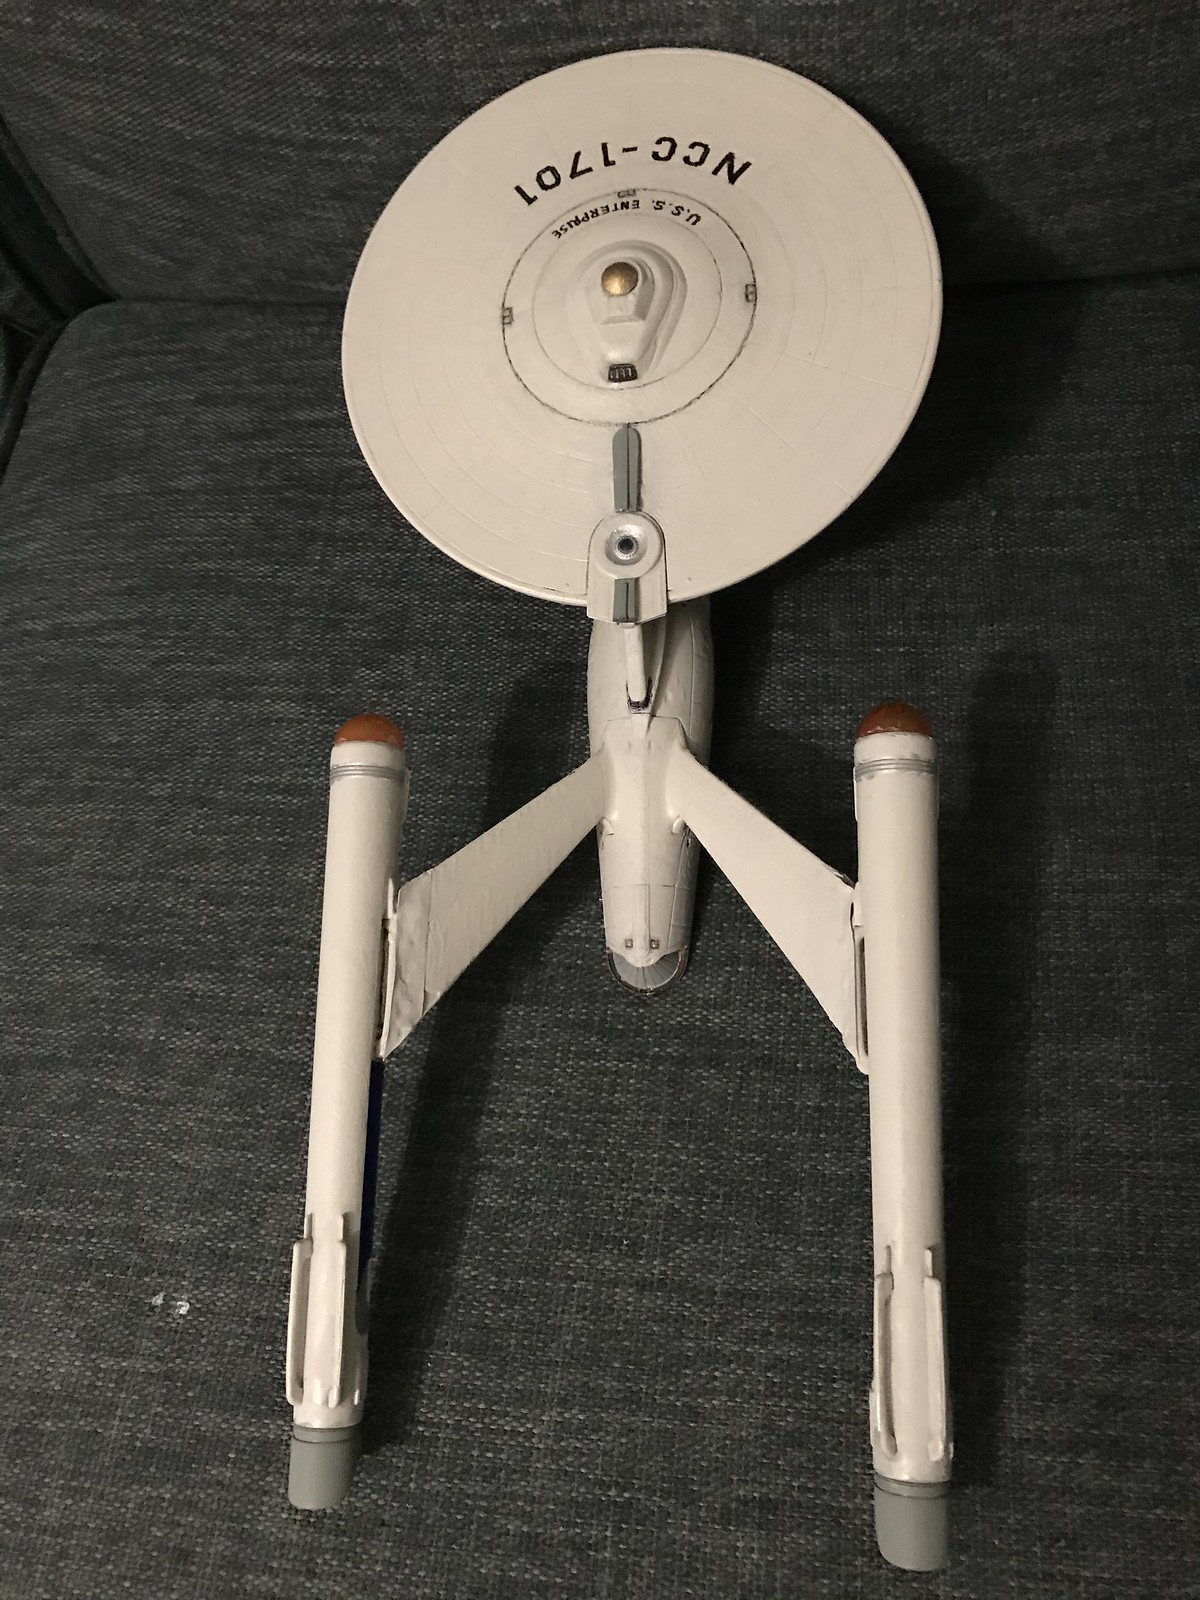
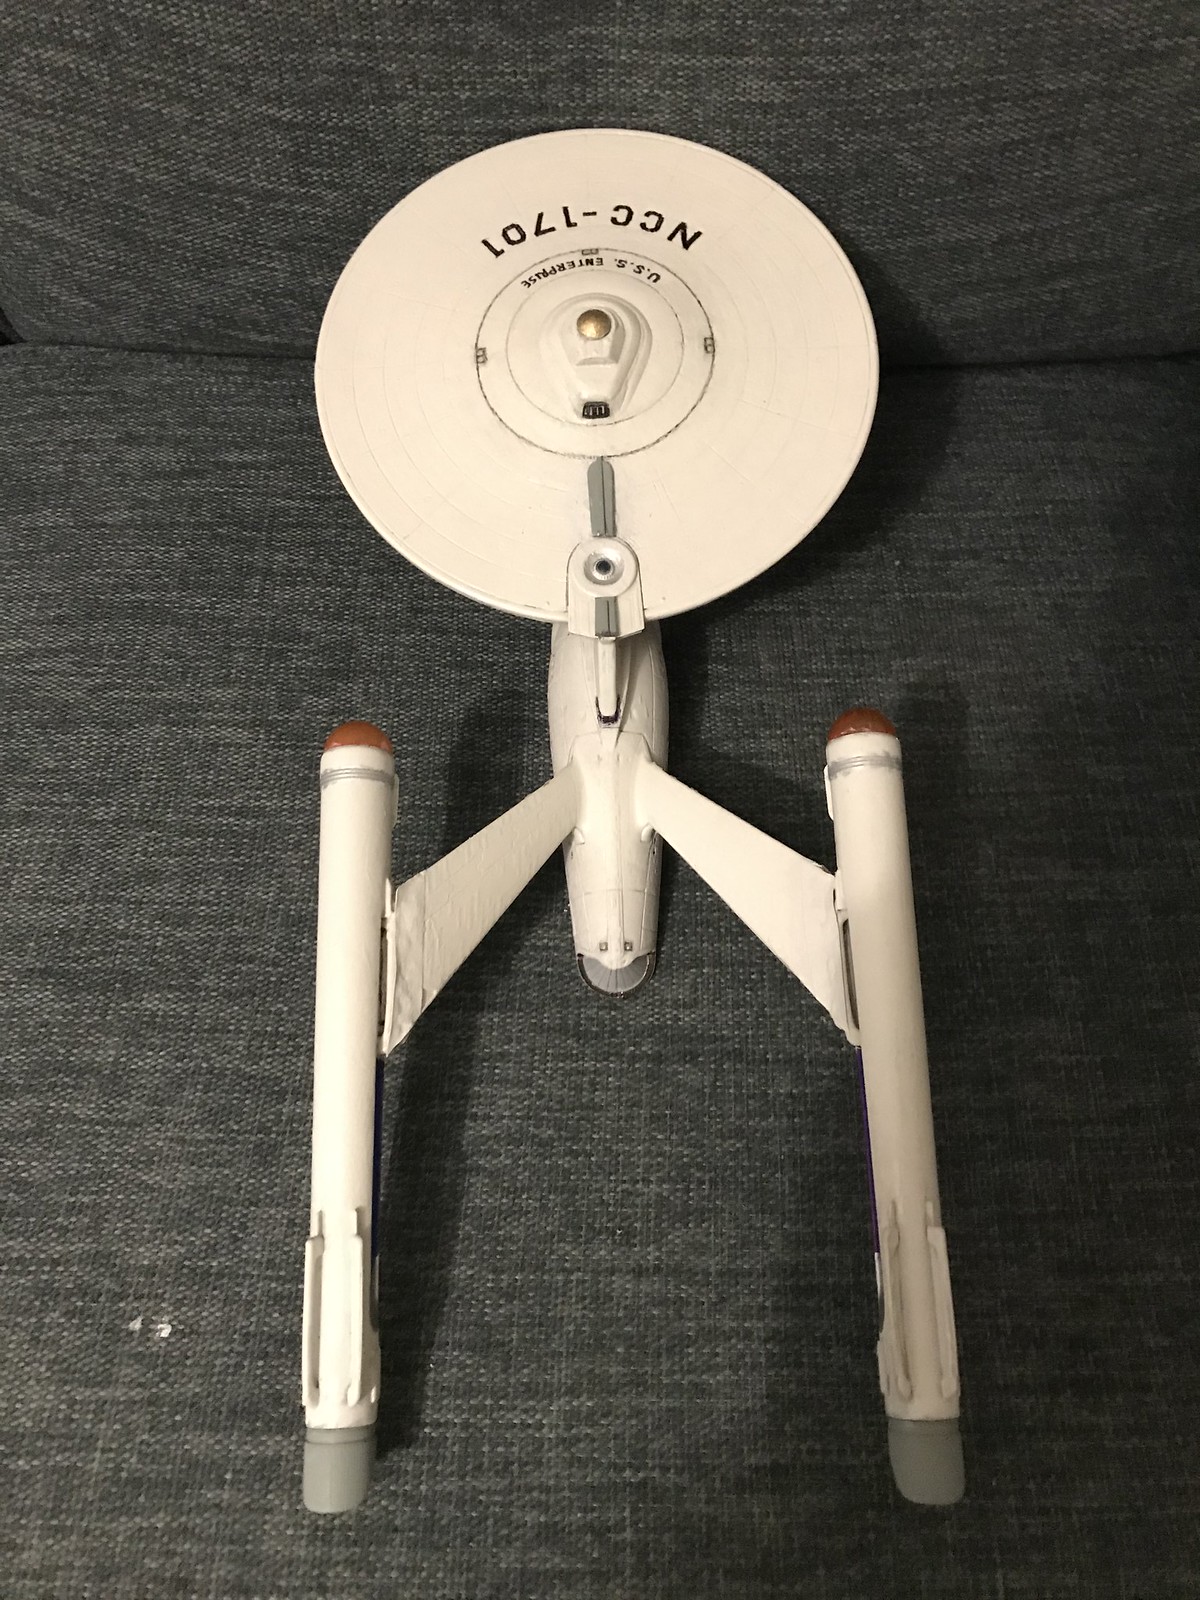
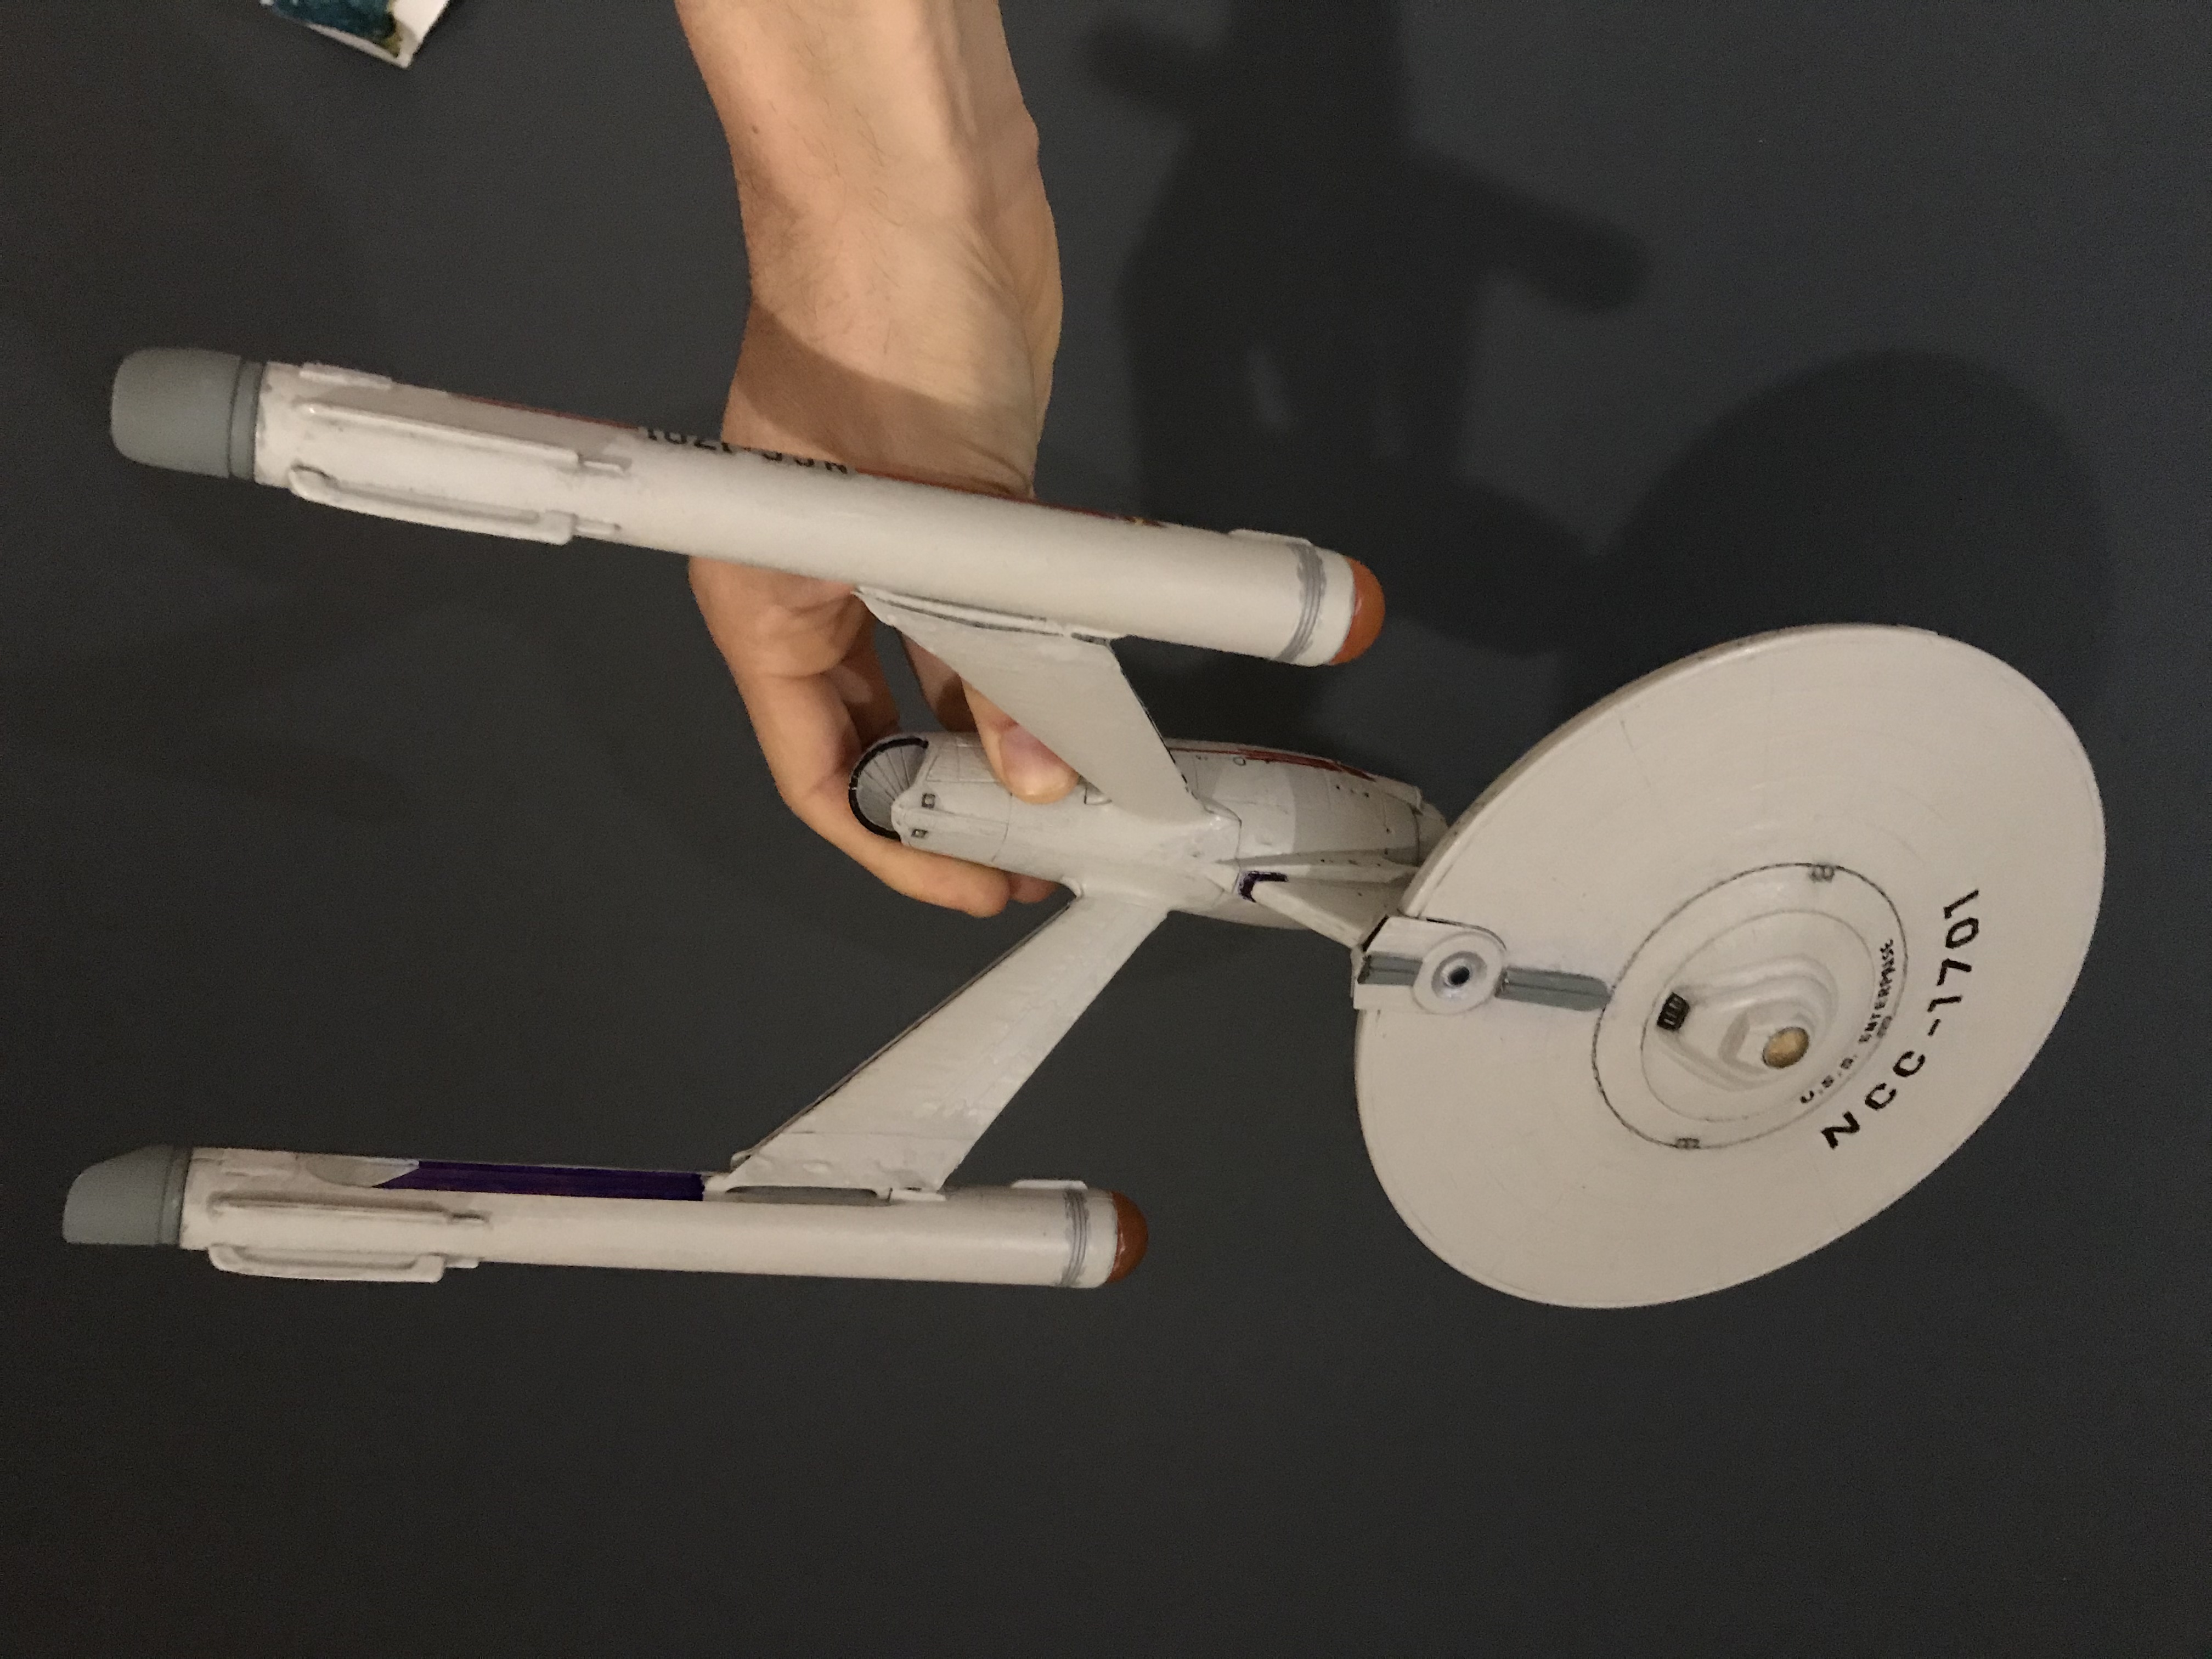
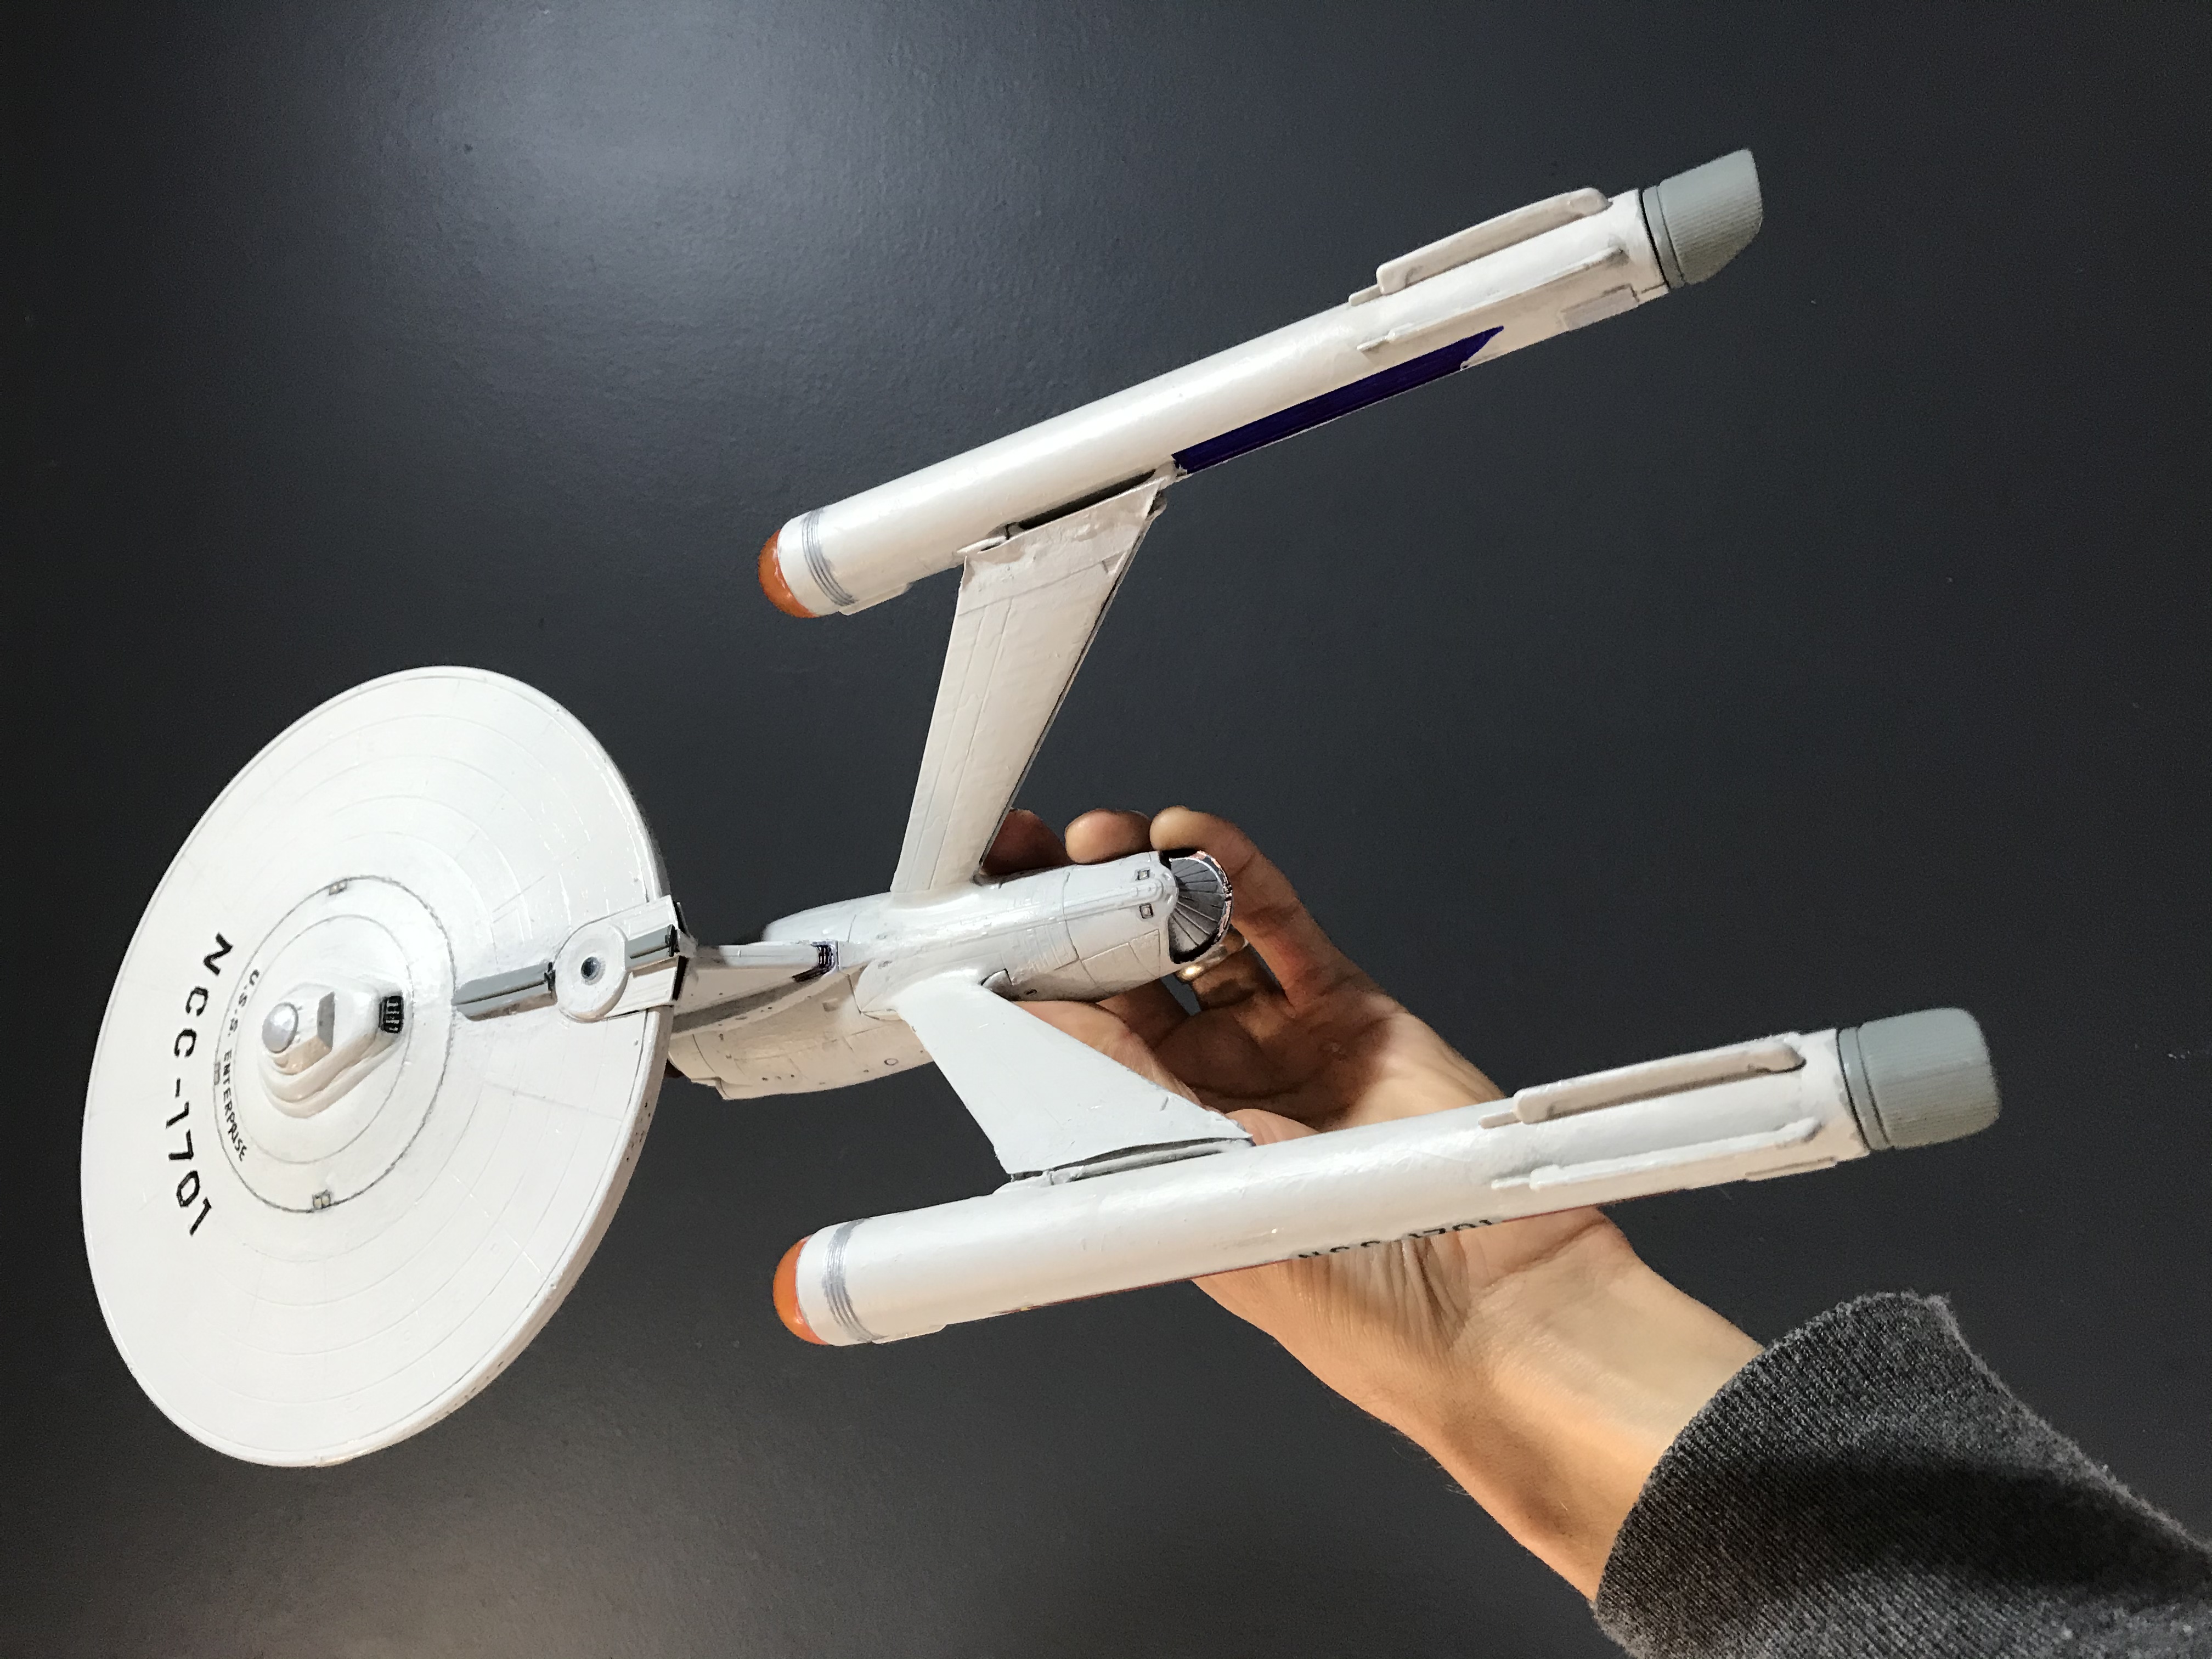
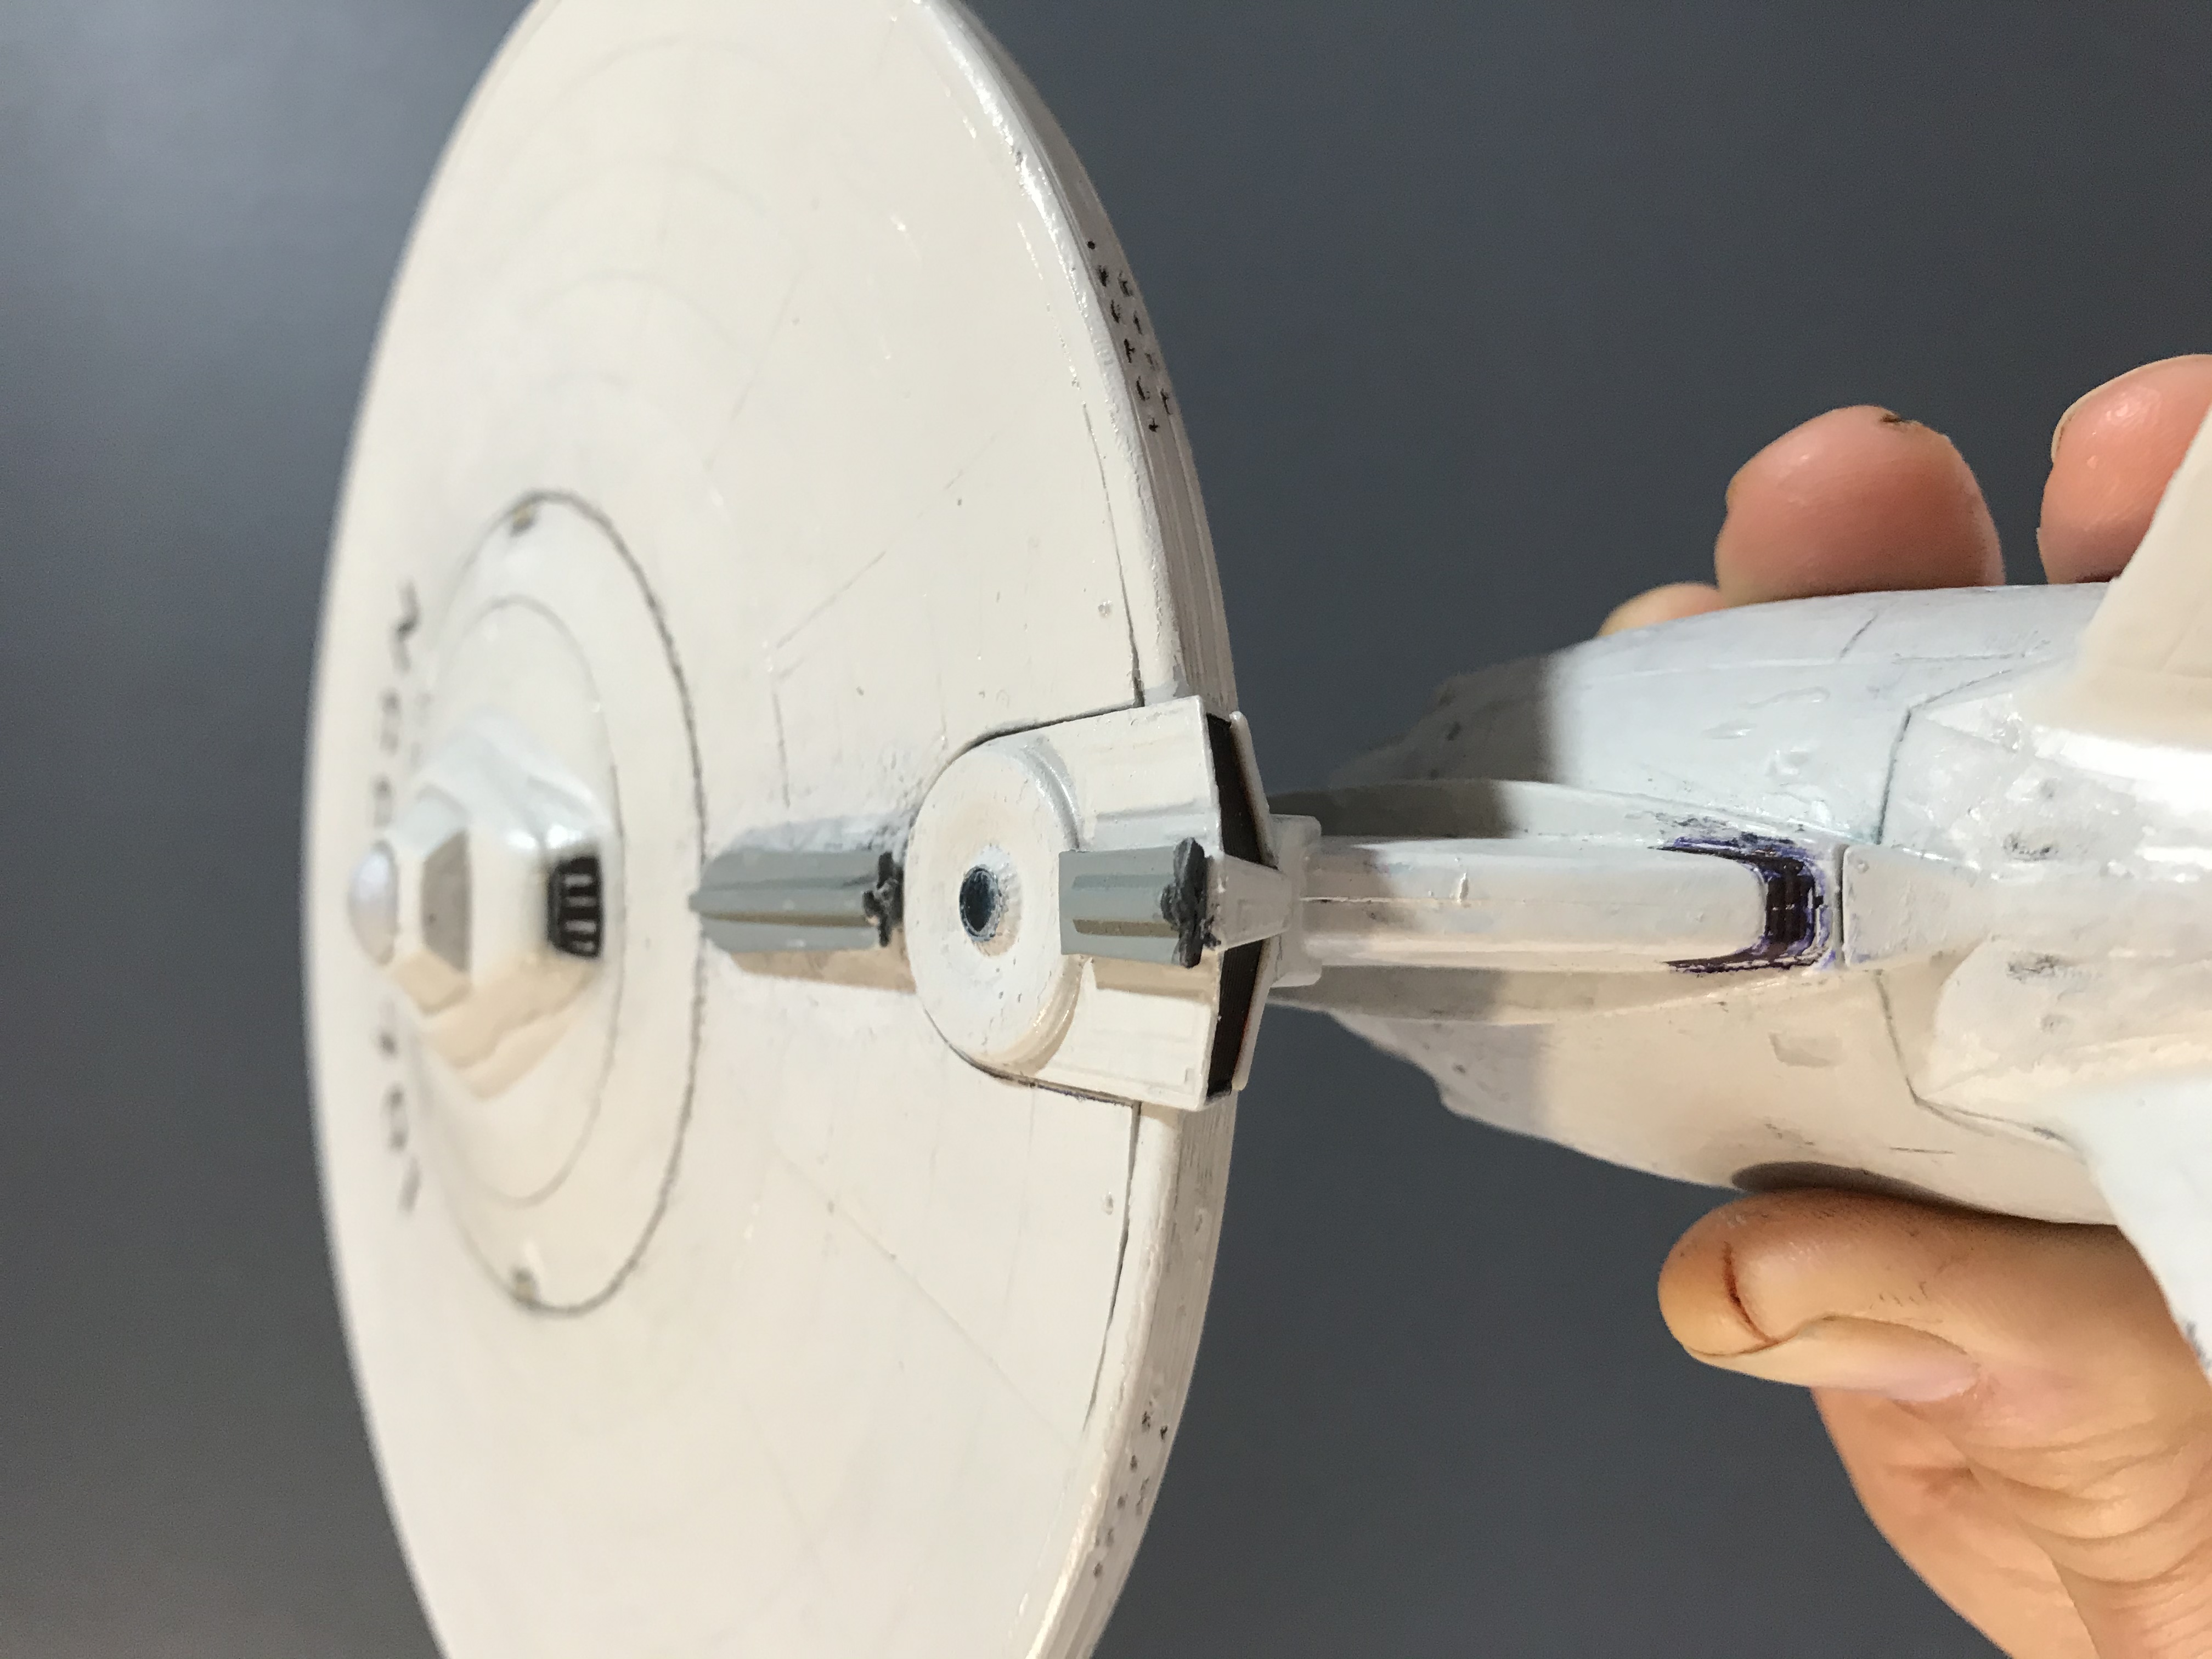
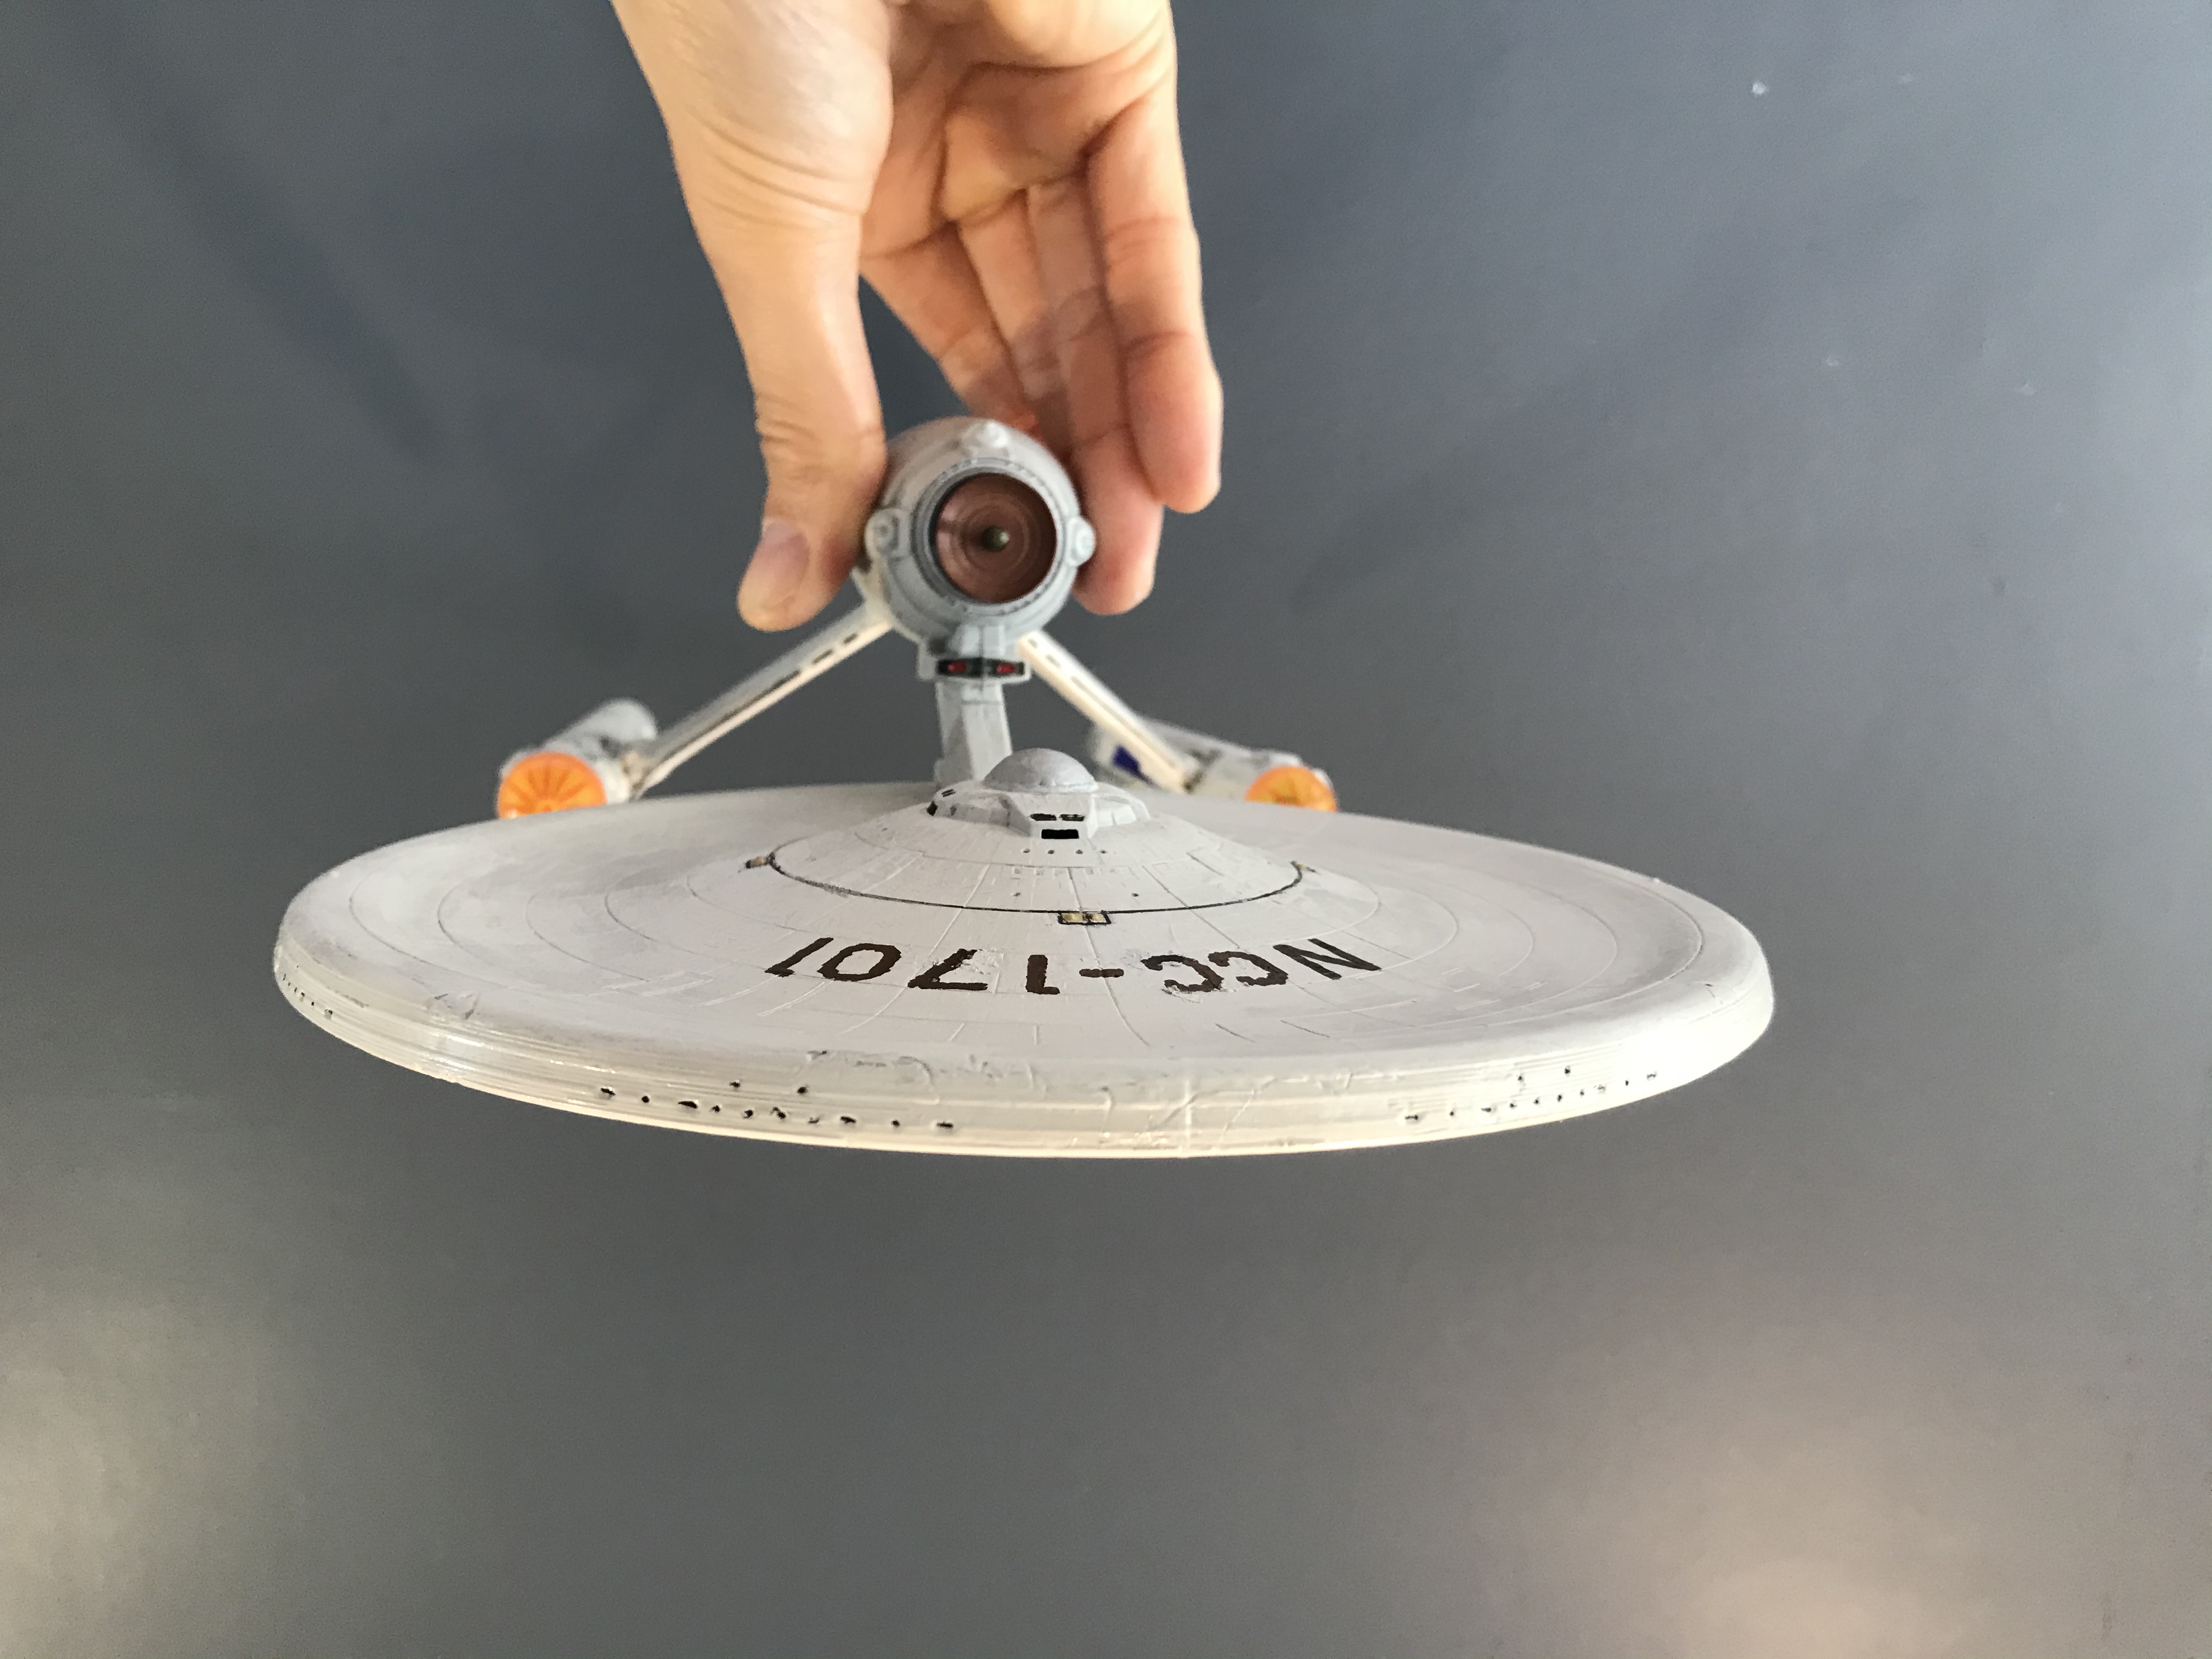
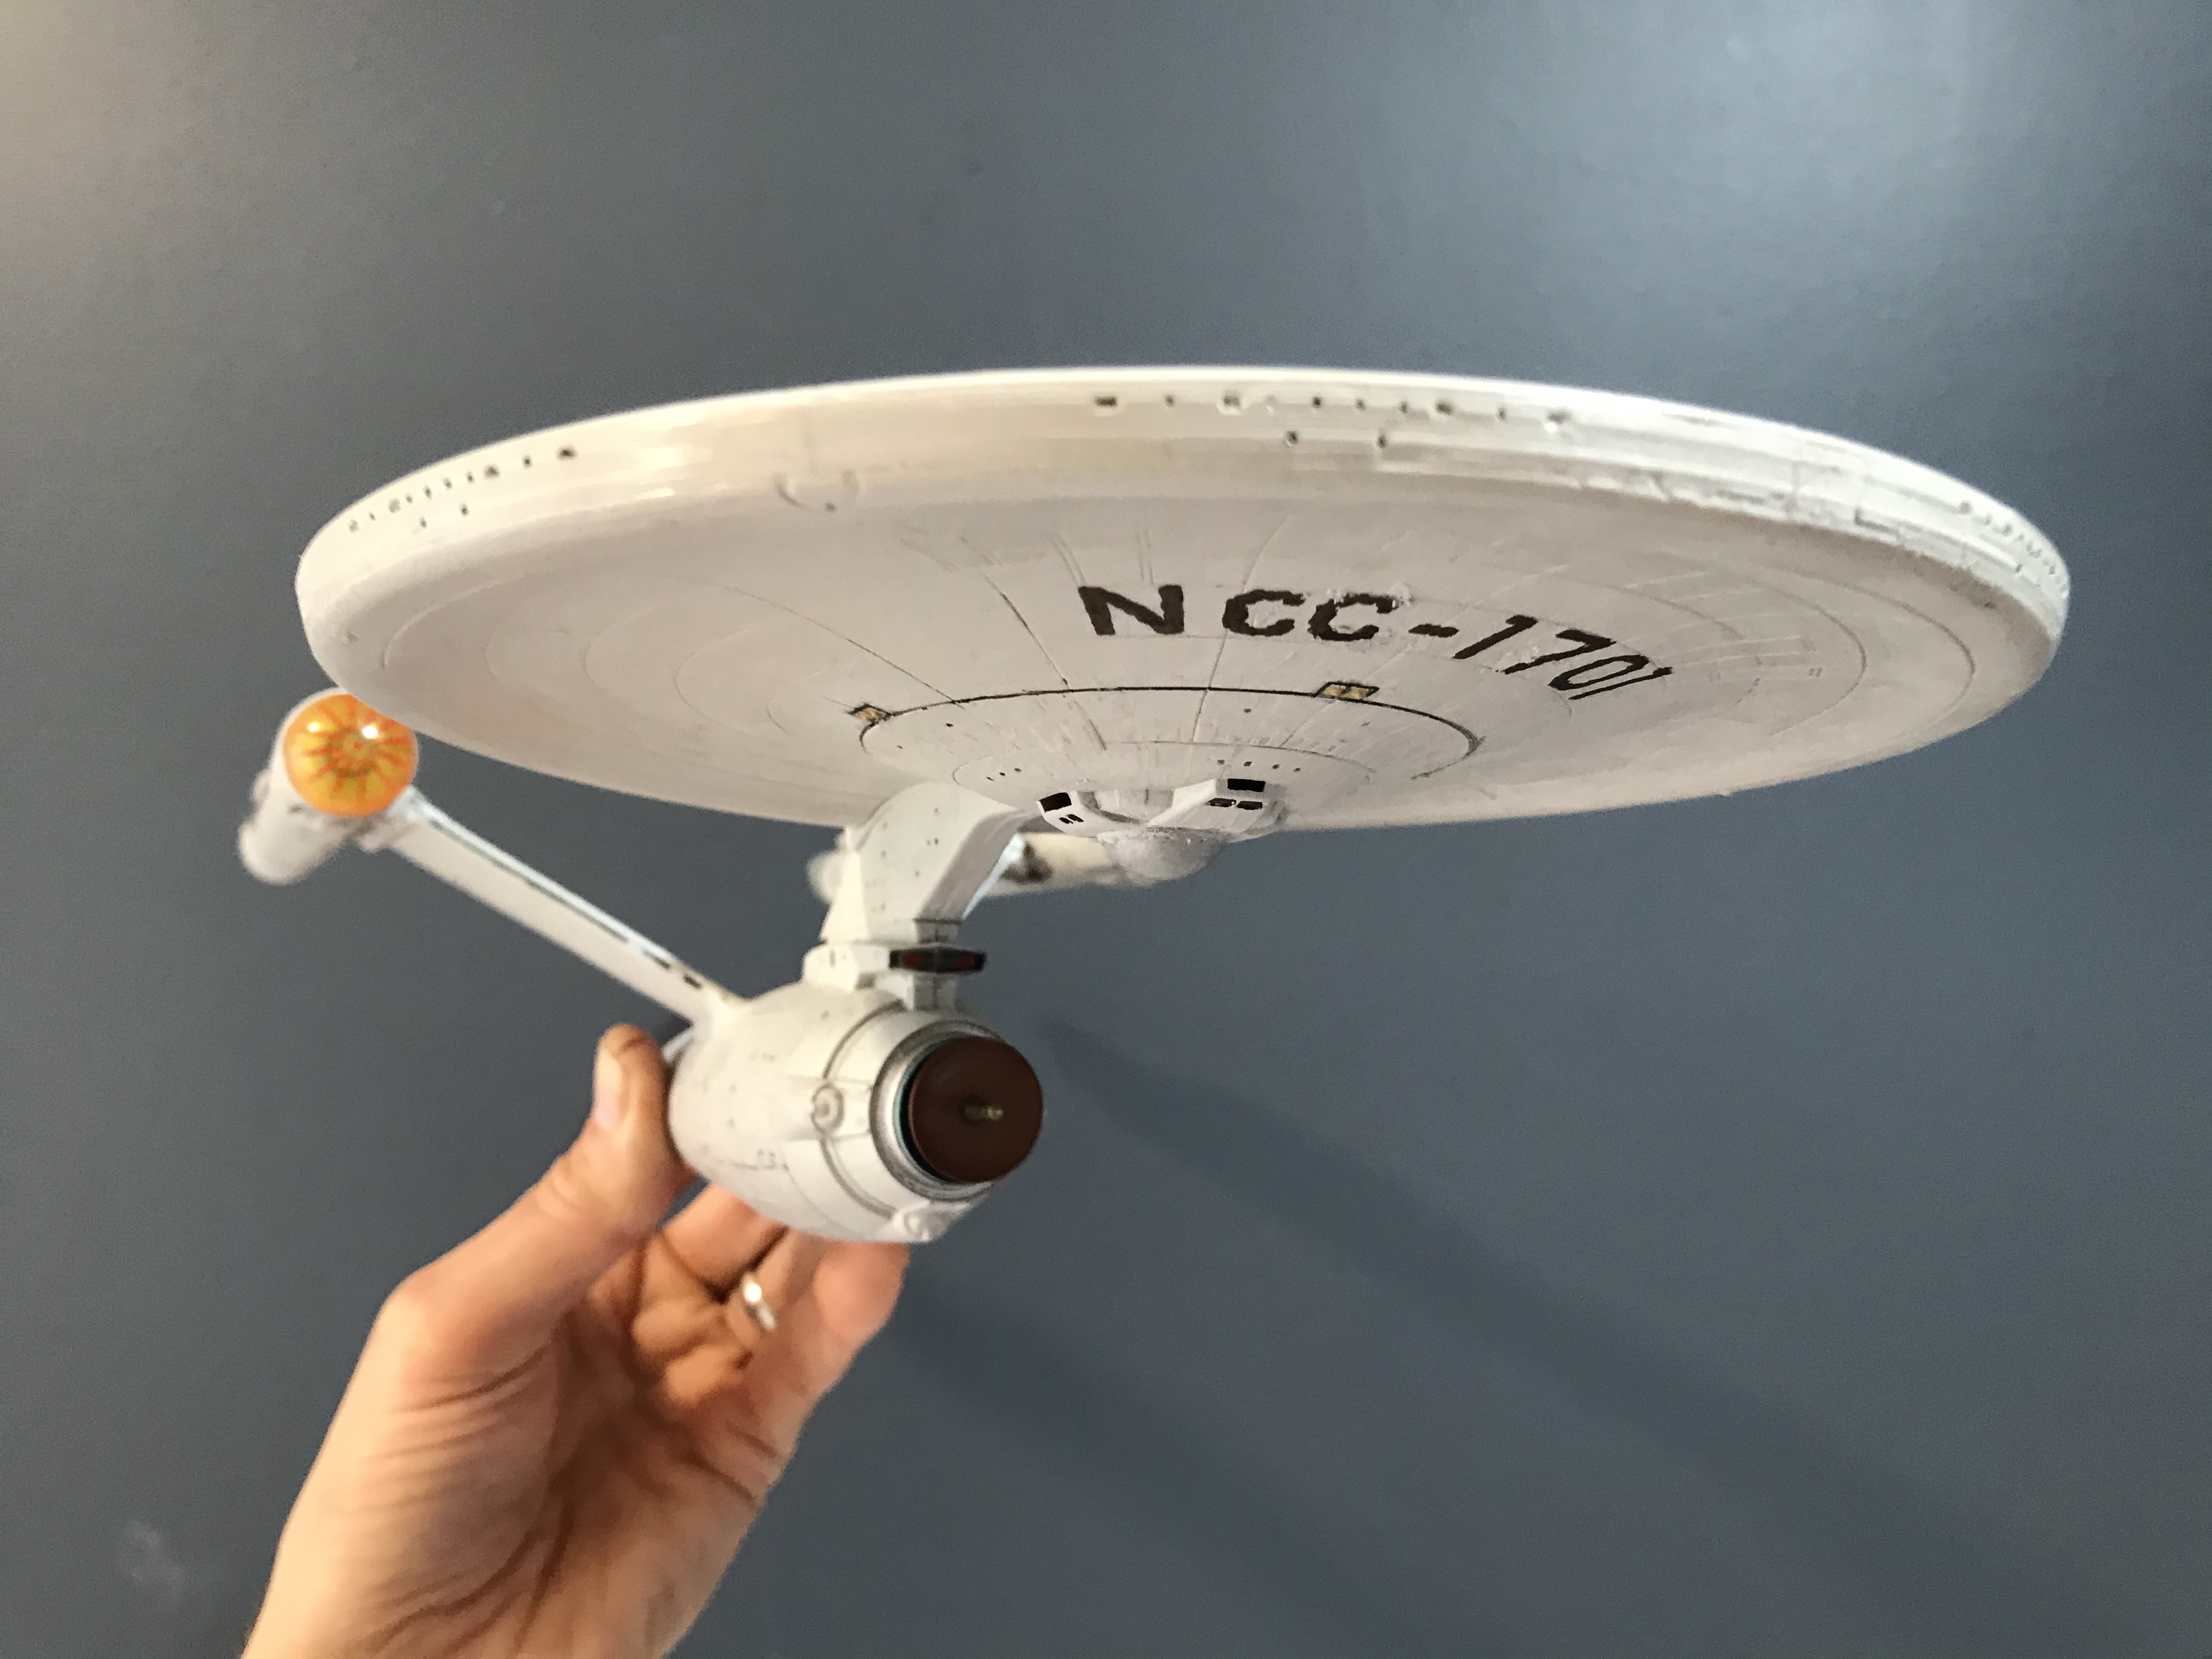
My idea was to create a Phase-II esque version, using nacelles from a DST TOS Enterprise and reattaching then to the Pylons of a DST Refit Enterprise, adding the TOS deflector / sensor, and the neck strip which runs along the top of the TOS 1701 saucer. Basically a kit-bash. Lots of superglue and enamel paint later (and absolutely not the best of finishes in places), here it is (Note: once I get a red permanent marker, and yellow paint, I will add the secondary hull pennant - which is currently MIA): https://www.flickr.com/photos/187262608@N06/albums/72157714517808318
Thanks for the comments! One of the drivers for me doing this, was the fact that I purchased x3 versions of the Refit 1701 back in the days of yore: I have the first Release Ent-A (AA/DST), the first DST Refit Enterprise, and the battle-damaged TWOK version (which is the one I’ve used for my kitbash, whose light n sounds no longer worked) - and more recently I felt having x3 near identical versions of the same ship was somewhat surplus to my requirements - so changing one up has been on the cards for a while now. I also had the DST TOS 1701 whose electronics also didn’t work - so I decided to risk butchering two Starships in favour of creating Mash-up that was neither entirely TOS or Refit. Things I’ve learnt: - The most difficult aspect of this, was the attaching of the nacelles to the pylons, getting them flush, and attempting to get them from sagging, or being misaligned. - Spray-painting would prolly work much better than hand-painting! - Superglue can be a real pain when it doesn’t work out as you intended... - Decals are probably preferable to a hand-drawn registry. - Customising between the hours of 10:00pm and 2:30am is not an ideal a window (despite it being a good time, while family is sleeping) for obvious reasons...
Unsure why that might be, as none of my images are broken? Have you tried clicking on the Flickr album link (where the pics are hosted at)? Edit: as well as the linked album, I did post x16 images in the thread, so if these aren’t visible can members please let me know? From my end, I am see them displaying in my first post... thanks in advance.
I would recommend that the pylons attach to the nacelles a bit lower, so the whole assembly continues at the same angle. As it stands now, the nacelles seem off-center from the pylons in front view, and it feels a little awkward. Just my own personal preference
^^^ great suggestion - and yes I agree. I also would have preferred the pylons meeting the nacelles at a lower join to what I’ve chosen. I found I struggled to glue the nacelles, and discovered I could position / attach them far easier by gluing the pylon end into what is the grill / railing that runs along the TOS nacelle - despite this position sitting more or less in the middle - rather than towards the bottom of the nacelle. I was using superglue gel also, which took a while to set, and required me to hold the nacelle in position for what seemed like an age, so prolly not the best adhesive I chose to use.
How about rotating the nacelle itself enough to make the connection be straight-on in the grille? It may look a bit odd to have the nacelles details rotated slightly, but it may prove less awkward than being attached off-center. It might be worth considering.
I can see them now. The paint job alone is outstanding. If I could redo The Voyage Home, I’d have the travel pod fly over Excelsior, and have Spacedock’s door open, with this ship in the TMP dry dock about half a kilometer away.
^^^ Thanks for the kind words publiusr! Minor update: added the red pennant along the sides of the secondary hull (still need to add yellow insignia) and coloured the bridge dome gold, and the saucer impulse crystal housing silver - trying to bring out some details and break the overall grey/whiteness of the hulll: