• Welcome! The TrekBBS is the number one place to chat about Star Trek with like-minded fans.
    If you are not already a member then please register an account and join in the discussion!

Donny's TOS Enterprise Interiors

Wow. Um... just wow.

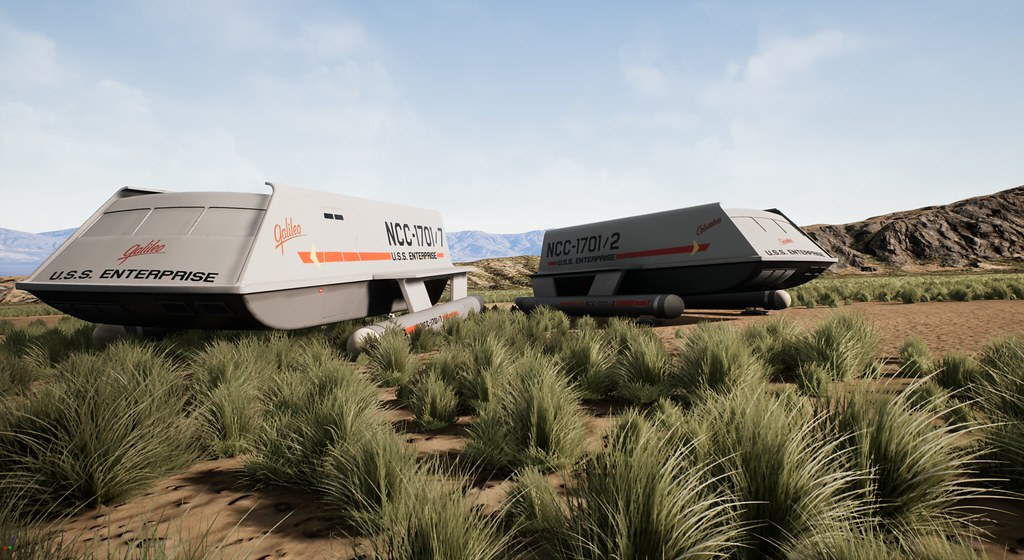
I love how you went from "I CAN'T DO IT!" to a nearly finished model in, what? Three days?
I know, right? It was all about finding the right way to approach it. There's a myriad different ways to model something, I just had to figure out the best way suited to my skills and uses in a game engine.

That's the BEST!

Except when you have family that needs your attention...:weep:
I don't have a family, and my girlfriend is long distance, so I have the luxury of using any and all of my free time towards working on these projects. I did, however, cancel some plans with a friend yesterday just to work on this, and felt realllly guilty about it, but then again I did finish the model yesterday. Trade-off?
 
I know, right? It was all about finding the right way to approach it. There's a myriad different ways to model something, I just had to figure out the best way suited to my skills and uses in a game engine.
Any insights to that approach?
 
Any insights to that approach?

I'm really terrible at explaining how I model something, so bear with me.

I set up my reference planes using Warped9's general plans. I'm only familiar with a polygonal workflow, so I started by modelling the rim, using very basic that runs along the front and length of the craft, where the top lighter grey hull meets the bottom darker grey section of hull. I then extruded polygons up from there, matching the shape of the major hull pieces, adjusting and checking from all views before moving on. From there it was a matter of carefully adding support edges where needed and using a chamfer tool to get the larger curves of the model. Once I nailed down the basic shape of the hull, most of it was pretty standard polygonal modeling. For some shapes (like the back panels and doors) I basically cut into the mesh where needed.

Earlier attempts, I'd started with the larger panels, but getting that rim down first made it much easier. It's from that rim that all other panels are basically anchored.
 
I knew you could do it. Well done!

Any chance of seeing orthographic views? There are some details that look one way in perspective, but another in ortho.

And have you noticed there's only one orientation that works with the rear landing pad? It was usually shown long ways front to back on the miniature, but the set piece could only work the other way. I cut out a bit of the yoke on one side to allow it to work both ways...

M.
 
I'm not quite done texturing, but here's a little teaser...

To paraphrase others (or maybe it's an exact quote):

"I hate you."

At first, I thought I saw some serious segmentation on the front underside of the shuttles, then I realized that was wear and tear of the paint and underlying structure.

Holy crap.
 
To paraphrase others (or maybe it's an exact quote):

"I hate you."

At first, I thought I saw some serious segmentation on the front underside of the shuttles, then I realized that was wear and tear of the paint and underlying structure.

Holy crap.
Well, I actually should add a bit more segmentation there, now that I'm looking at it. But thanks for the compliment either way. Ha.
 
Hey, @Donny, I may have a challenger for you. :lol:

https://www.cgtrader.com/3d-models/interior/other/starship-command-center-high-poly-pbr

Also uses Substance, though the modeler is Blender. Oh, yeah, and this comes from the imagination. No need to try to match anything that way. Yup, yours still rule, as far as I'm concerned.

I've focused on printable models all these years (and ignored developing my texturing skills). *sigh*

Well, I actually should add a bit more segmentation there, now that I'm looking at it. But thanks for the compliment either way. Ha.

Ah. Okay then. Carry on. :lol:
 
I've been painting the shuttlecraft for 3 days now. Gave it a slightly worn look to add some realism. I think I can call the exterior finished for now.


I'll try to produce some orthographic views for those interested as well.

Now, on to the interior...and then hopefully making that fit realistically into the interior...gulp...
 
Hey Donny, if you ever do (or have done) a Cage version of the bridge I discovered a trivia detail you might find interesting:
36402150374_f828f43a73_o.png
 
Hey Donny, if you ever do (or have done) a Cage version of the bridge I discovered a trivia detail you might find interesting:
36402150374_f828f43a73_o.png
Where was this taken from? So these were notes handed down in between The Cage and WNMHGB, or was is between WNMHGB and regular series production? Totally makes sense now that I think about it, the Cage bridge did have a slight metallic paint sheen to it.

Also, I'd love to do a Cage-era version of the bridge for sure. Whenever the fatigue I have from building the season 3 bridge passes, I'll revisit and do some re-dressing. I just really don't have the patience to modify all those damn buttons again....yet.
 
Last edited:
If you are not already a member then please register an account and join in the discussion!

Sign up / Register


Back
Top